


Chalk Pencils for Fabric: A Quilter's Guide
You've spent hours cutting a quilt top from beautiful cotton, and now a seam intersection, appliqué placement line, or quilting guide needs to land exactly where it belongs. The wrong marking tool can vanish before you sew, drag across the weave, or leave a ghostly line after the iron touches it. Chalk pencils for fabric are useful because they offer a fine, controlled mark, but their performance depends on what's inside the lead and how you remove it.
A chalk pencil isn't automatically safe just because its label says “chalk.” Clay, talc, wax, and blended formulations behave differently on quilting cotton, dark batiks, modern solids, and textured fabrics. The dependable habit is simple: test the exact pencil on a scrap from the exact project before marking the quilt top.
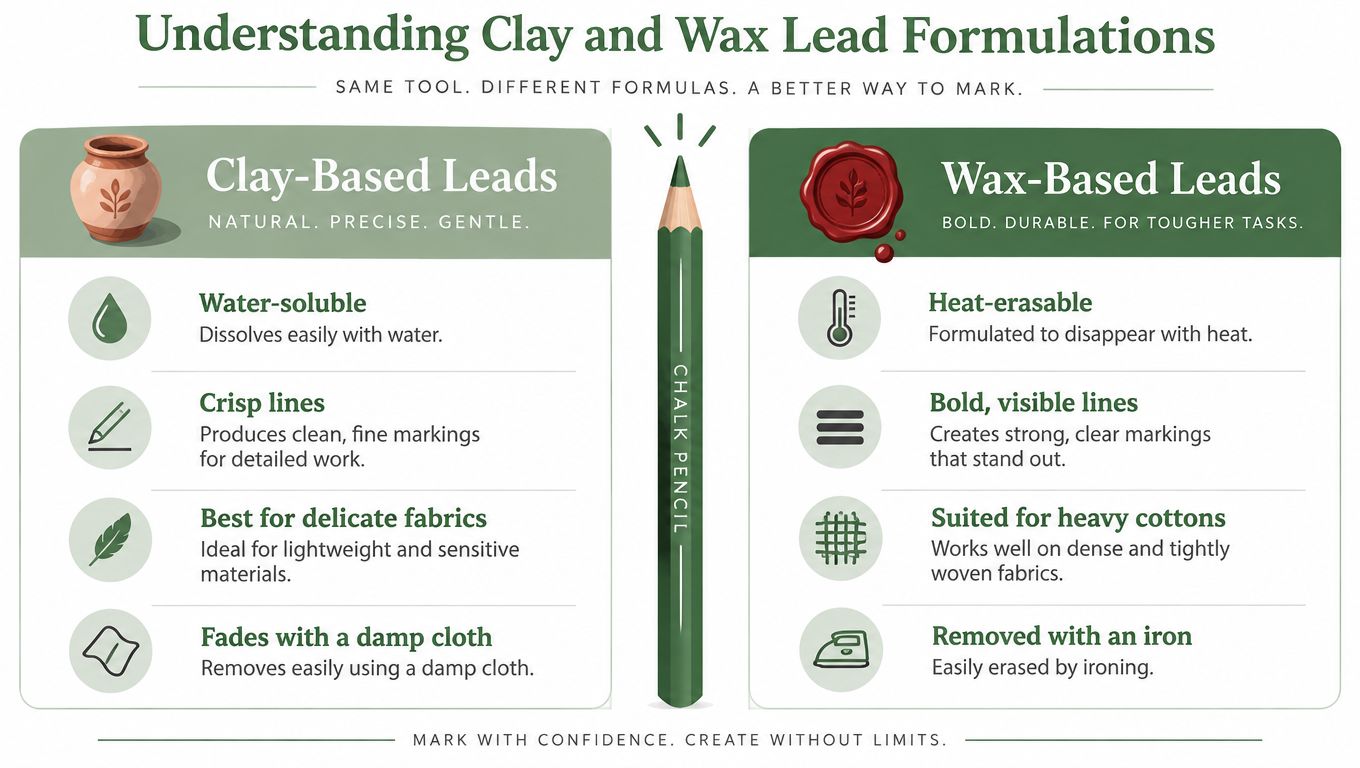
Understanding Clay and Wax Lead Formulations
The word chalk covers several different materials in sewing tools. Geological chalk is primarily calcium carbonate, while commercial tailor's chalk may use clay, talc, wax, or blended compounds. Some textile-marking products also combine calcium carbonate with talc or gypsum, so two pencils can leave noticeably different lines on the same fabric. This materials overview of chalk compositions explains why the name alone doesn't tell you how a pencil will behave.
A clay-based lead usually leaves a softer, powderier line. On tightly woven quilting cotton, that can mean a light guide that brushes away readily and works well for marks you'll sew soon. The trade-off is durability. Handling, folding, or sliding fabric across a cutting table can make a faint clay mark disappear before the seam is under the needle.
A wax-based lead grips the surface more firmly. That stronger adhesion can help on heavier or textured materials where a dry clay line lacks contrast, and a harder core can produce a sharper-looking guide. Heat creates the important risk, though. Pressing over an untested wax mark may make residue harder to remove or reveal a halo that wasn't obvious during marking.
Why pencil format matters
Traditional tailor's chalk has been used for more than a century, making it a foundational sewing notion rather than a novelty. This historical and manufacturing reference on tailor's chalk describes its role in pattern lines, darts, hems, cutting guides, and alterations.
A pencil-style holder surrounds a narrow chalk core, giving you more control than a triangular or rectangular block. That fine point is valuable for quarter-inch seam references, appliqué corners, diagonal lines, and registration marks on a Ruby Star Society print or a saturated solid.
The visual feel tells you something, but not everything. A dry, dragging point may indicate a powdery core, while a smoother, more persistent line may contain wax or another binding material. Treat those impressions as clues, not proof. Removal depends on the formulation, fiber, color, pressure, and heat exposure, so every new pencil deserves its own fabric test.
Material rule: A stronger line isn't automatically a better line. Choose the least persistent mark that stays visible until the sewing is complete.
The Essential Scrap Testing Protocol
Never mark a finished quilt top with an untested chalk pencil. The removal result can change with fabric color, weave, pressure, laundering, and pressing, so the only meaningful test uses the same fabric and the same handling conditions as the project.
Follow this controlled test
- Cut a representative scrap. Use the exact quilting cotton, colorway, and fabric layers involved in the project. If the finished construction includes interfacing or batting, include those layers when they could affect pressure or removal.
- Mark realistic lines. Use the pencil with the pressure, ruler, template, and line length you plan to use. Make a fine line and a heavier line if you're uncertain how much pressure your hand applies.
- Label each test. Keep different pencils or colors separate with masking tape labels. Record whether the core felt smooth, gritty, soft, or draggy, because handling comfort affects how hard you're likely to press.
- Simulate the project. Fold, handle, stitch, and press the scrap according to your planned workflow. Don't test an untouched mark if the quilt top will be moved repeatedly before removal.
- Try dry removal first. Brush the mark gently between your thumbs or use a soft brush. Avoid aggressive rubbing, which can spread particulate residue or abrade the surface.
- Escalate carefully. If the mark remains, test laundering. If it still persists, restrict that pencil to the wrong side or seam allowance, or replace it with another marking method.
Sewing.org's guidance on fabric marking tools specifically warns that some chalk pencils are waxier and recommends test-pressing because heat can reveal or set a wax stain.
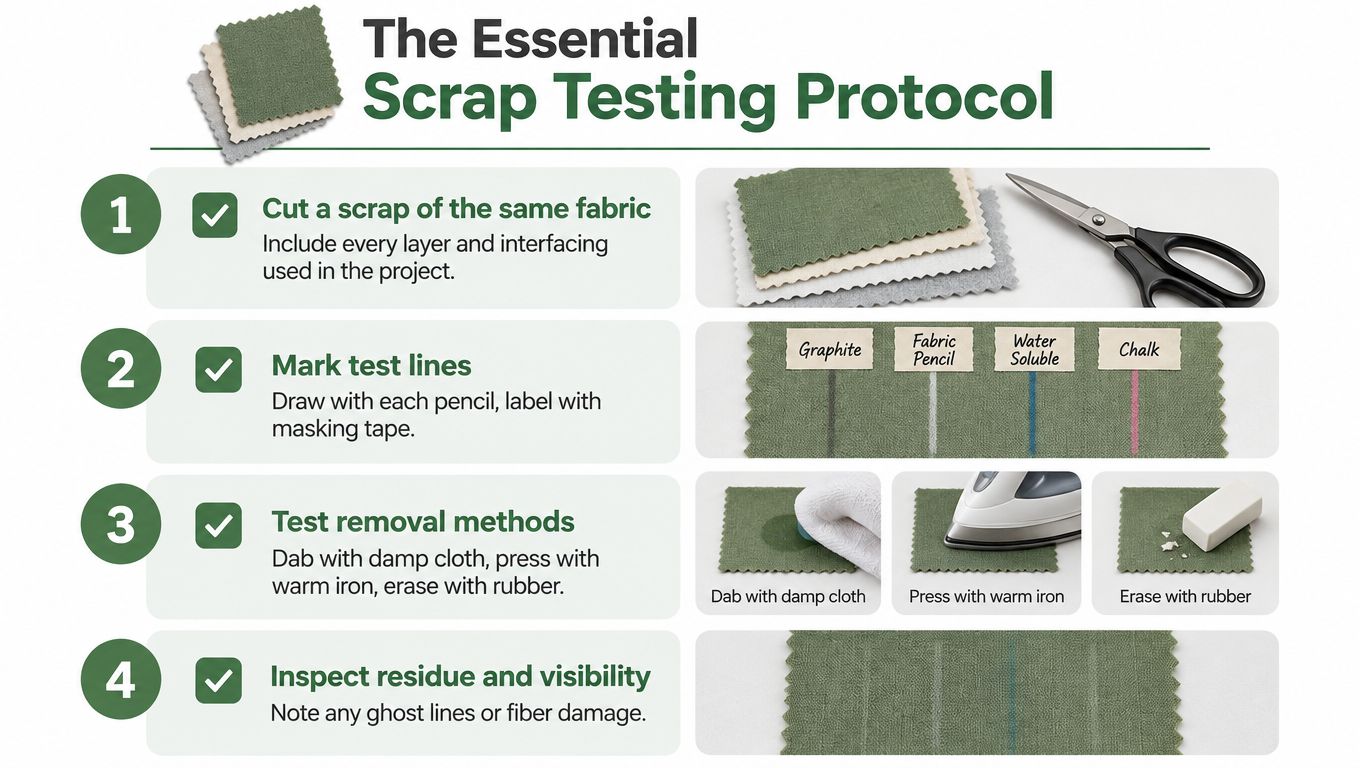
The benchmark is 100% clean removal on the exact production fabric, not a presumed success rate borrowed from another textile. On dark Kona-style solids, inspect for a pale ghost line or halo under different lighting. On batiks and saturated prints, check whether pigment or wax remains after the planned pressing step.
For additional context on how marking tools fit into sewing practice, see this guide to clothing marking pens.
Marking Techniques for Precision Piecing
A tested chalk pencil should leave a readable guide without forcing the fibers flat. I use light pressure and frequent sharpening for precision work, especially on crisp quilting cotton where a deep groove can remain visible after the powder disappears.
On pale fabric, choose a darker contrasting chalk only when the test confirms clean removal. On dark solids and collegiate tailgate panels, a light chalk may give the contrast you need, but keep the mark on the wrong side or inside the seam allowance whenever construction allows.
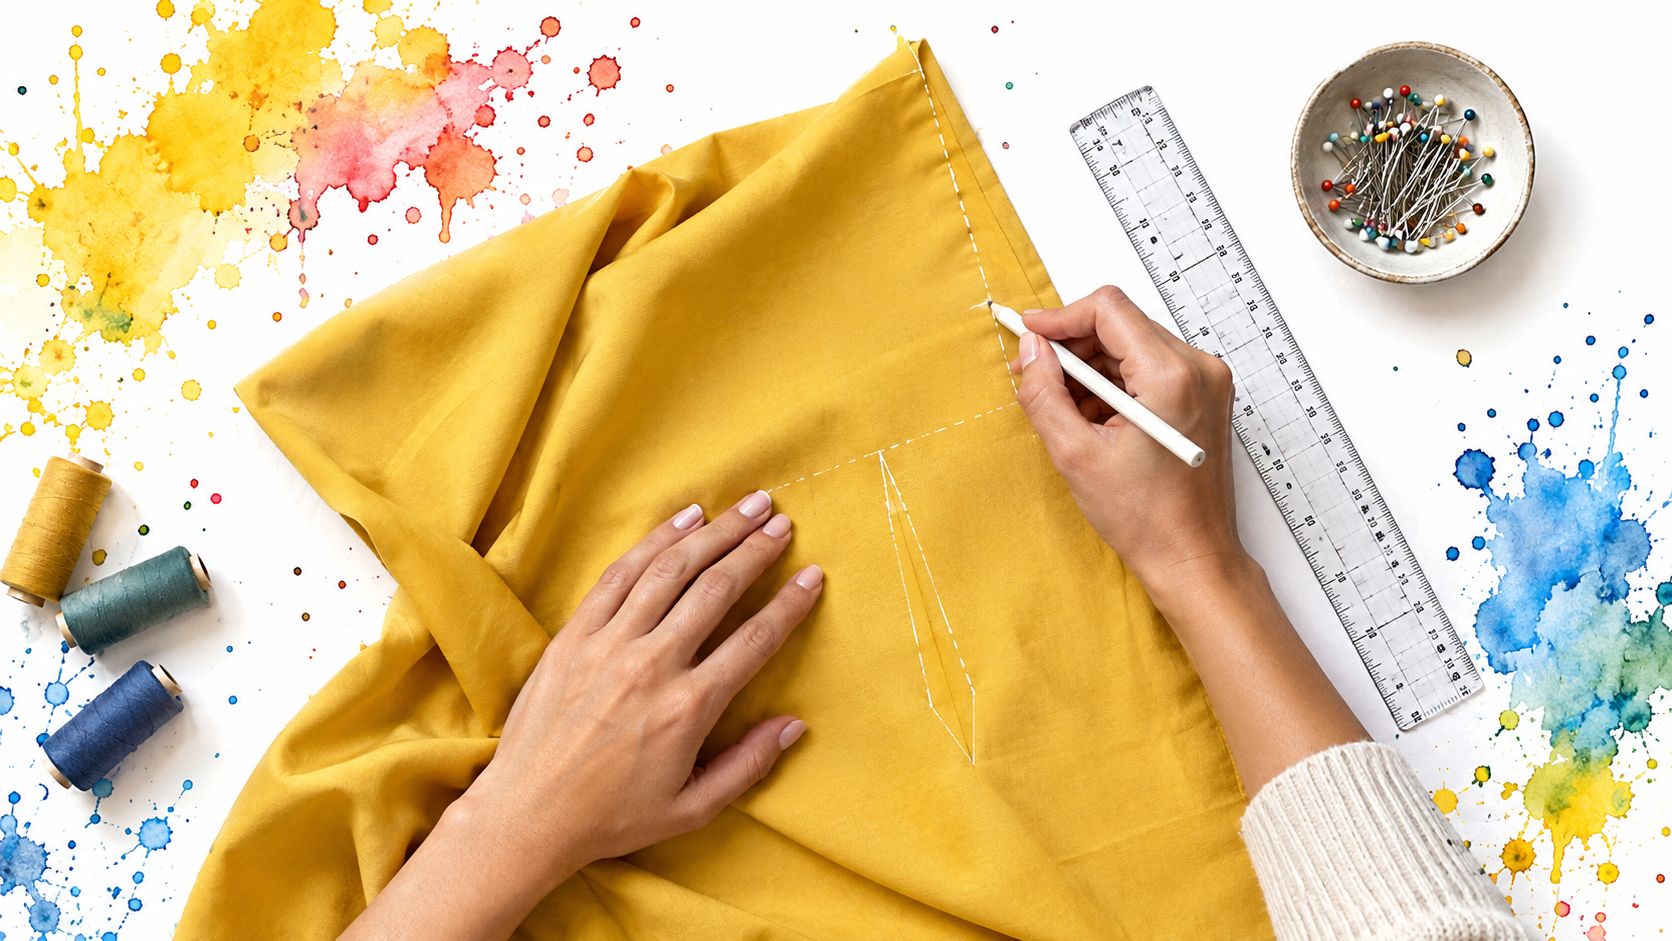
Use short marks instead of heavy lines
Long surface lines invite rubbing and distortion. Short registration marks are easier to preserve and usually give you all the information needed for accurate assembly.
- Seam intersections: Mark only the point or short crossing needed to align adjoining pieces.
- Darts and appliqué: Use a fine point and a light hand so the line doesn't compress the cotton.
- Quilting guides: Mark a short segment, sew it, then continue rather than covering a large area with powder.
- Corners and notches: Sharpen before marking. A blunt point widens the guide and makes precise matching harder.
For matching pieced blocks, the pin-transfer method is more reliable than a long, fragile line. Place a vertical pin through the pattern and fabric layers, mark immediately beside the pin, then flip the layers and repeat where the pin emerges. This transfers the alignment point while limiting chalk exposure.
I found this especially useful on high-contrast modern solids, where even a small mismatch is easy to see. A fine line beside the pin gave me a cleaner target than pressing hard enough to draw a continuous line across the block.
Use a ruler or template edge for straight guides, and consult these quilting templates and rulers when a design requires repeatable spacing. The pencil should glide with enough resistance to stay controlled, not scrape across the weave.
Pressure check: If the line is difficult to see, improve contrast or shorten the mark before pressing harder.
Comparing Chalk Pencils to Alternative Markers
Chalk pencils are excellent for temporary, fine marks, but they aren't the universal answer. A clay-rich pencil may brush away before a high-handling project is stitched, while a water-soluble marker may remain visible longer but demand careful moisture and heat control.
| Marker Type | Best For | Removal Method | Heat Risk |
|---|---|---|---|
| Clay-based chalk pencil | Short seam, alignment, and quilting marks | Dry brushing, gentle shaking, or laundering when tested | Check the product, and test before pressing |
| Wax-based chalk pencil | Visible marks on heavier or textured materials | Manufacturer guidance, dry removal, or laundering if proven safe | Higher concern because heat may make marks harder to remove |
| Water-soluble marker | Light fabrics and marks that need to remain visible during handling | Water or laundering according to the product instructions | Heat may reveal or set some marks |
| Air-erasable marker | Short-term marking for prompt sewing | Air exposure or a damp cloth, after testing | Do not press over untested marks |
| Mechanical fabric marker | Fine lines and detailed placement | Product-specific brushing, water, or laundering | Depends on the core formulation |
Chalk works best when the mark will be sewn or removed promptly. It's less suitable for long-term storage because loose powder can abrade, transfer, or disappear. A marker that stays put longer isn't necessarily safer, either. Persistence can mean more difficult removal.
Beginners often need a simple starting point. Keep a light and dark chalk option, a dedicated sharpener, and one water-based alternative, then test each on the fabric in front of you. The beginner's quilting supplies guide can help organize the rest of a practical notions kit.
Safe Removal Methods and Troubleshooting Stains
Removal belongs in the finishing workflow, not as an emergency after the quilt top is already pressed. Start with the least aggressive method and increase intervention only after a separate scrap test supports it.
Use this removal sequence
- Dry brushing: Brush gently between your thumbs or with a soft brush, moving residue away from adjoining fabric.
- Gentle shaking: Shake or flex the fabric lightly to release loose powder without grinding it into the weave.
- Water testing: If dry removal fails, test laundering or a damp cloth on the scrap using the same fabric and mark.
- Mild soaking: For stubborn residue, test lukewarm water with mild soap on a separate sample before applying it to the project.
- Heat last: Don't press over a remaining mark until you've confirmed that the pencil contains no wax or color that heat could set.
Aggressive wet rubbing often makes a chalk problem worse by moving particles into nearby fibers. Dab or rinse gently instead, and avoid treating a dark halo with repeated friction.
If a waxy mark appears after ironing, stop pressing the project. Return to the scrap and test the manufacturer's recommended removal process, then compare a gentle laundering method before touching the quilt top. A persistent halo means the pencil should be downgraded to wrong-side use or replaced with thread tracing.
Fabric care also matters after marking, so keep the project's laundering and pressing requirements alongside the test record. These fabric care instructions provide a useful reference point for handling the finished textile.
For quilts that will move directly to a longarm or domestic machine, remove loose chalk before final pressing and storage. Marks that disappear during handling indicate insufficient contrast or an unsuitable powdery formula, while marks that survive washing signal that the tool needs a stricter role in your workflow.
Building a Repeatable Marking Workflow
A reliable marking system turns a vague “this pencil seems fine” judgment into a repeatable studio specification. The process works for a quick table runner, a ready-to-sew kit, a detailed appliqué block, or batch work for a guild workshop.
Record what changes the result
Write down the pencil color, lead type if known, fabric name, weave, pressure, time before removal, removal method, and whether pressing occurred first. I also note whether the line stayed visible while sewing and whether the cotton showed crumbling, compression, residue, or a halo.
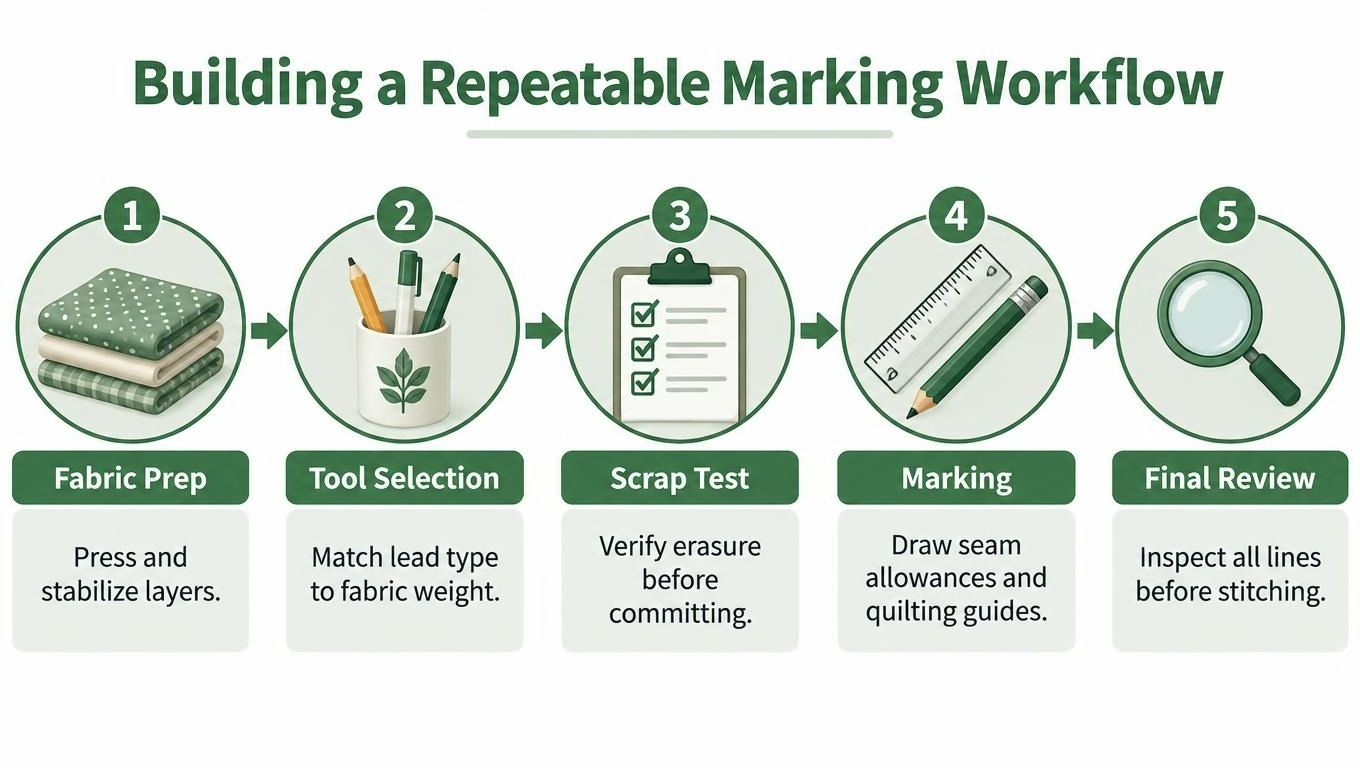
Use the workflow below as a compact quality-control checklist:
- Prepare the fabric. Prewash or stabilize it if that matches the project protocol, then press the layers flat.
- Select the tool. Match a softer removable lead to short-lived marks and reserve stronger or wax-containing leads for situations where the test supports their use.
- Test a scrap. Require clean removal on every distinct fabric or colorway before marking the finished piece.
- Mark economically. Use short registration marks, fine seam guides, and light pressure. Sharpen whenever corners or notches become vague.
- Review before stitching. Inspect visibility, transfer, and residue, then remove marks before final pressing or storage.
A tool is failing when its mark vanishes during ordinary handling, leaves residue after washing, damages the fiber surface, or creates a heat-sensitive stain. At that point, don't compensate by pressing harder. Change the color, change the formulation, move the mark to the wrong side, or use thread tracing.
For a stable pressing surface during this process, use a properly prepared pressing mat for quilting. Google's quality guidance also supports documenting first-hand product use, including the fabric, marking feel, visibility during sewing, and removal result. Google's explanation of experience in E-E-A-T treats that experience as a credibility standard, while the Search Quality Rater Guidelines connect trust with accuracy, honesty, safety, and reliability.
People Also Ask
Are chalk pencils safe for quilting cotton?
They can be, but no pencil is universally safe on every quilting cotton. Test the exact product, color, pressure, and removal method on a scrap from the project before marking the quilt top.
What's the difference between clay and wax fabric chalk?
Clay-based chalk is generally powderier and easier to brush away. Wax-based chalk adheres more strongly, which can help on heavier or textured materials, but heat may make wax residue more difficult to remove.
Can you iron over chalk pencil marks?
Only after a scrap test confirms that the formulation won't reveal, set, or intensify a stain. Treat heat as a final step, not a default removal method.
How do you remove chalk pencil marks from fabric?
Start with dry brushing or gentle shaking. If residue remains, test laundering or a lukewarm mild-soap soak on a separate scrap, and avoid aggressive wet rubbing.
What's the best chalk pencil for dark fabric?
Choose a light contrasting color, such as white, only after testing it on the exact dark fabric. Visibility matters, but complete removal matters more.
QuiltKit.com offers ready-to-sew quilt kits, modern solids, Ruby Star Society fabrics, collegiate panels, wideback cottons, and quilting supplies for the full project workflow. Visit quiltkit.com to choose your next fabric project with a tested marking plan in mind, and join the Email Sign-up Savings list if you're still comparing tools and materials.