


Fusible Batting Instructions How to Fuse Without Bubbles
You've pressed the quilt top, smoothed the backing, and still found a soft ridge moving under your hand. Pins catch your sleeve, spray baste leaves you waiting for the layers to settle, and one careless slide of the iron can push a wrinkle straight across the project. These fusible batting instructions use a dry-iron, press-and-lift method to create a stable quilt sandwich without bubbles or shifting.
I've fused quilts on a home iron and sent fused layers through longarm setups, and the same lesson keeps returning: the smooth fuse starts before the iron is turned on. Hobbs and Pellon offer familiar options for this kind of work, while a carefully prepared backing and controlled heat matter more than pressing harder. If you're short on time, a small table runner, baby quilt, or ready-to-sew project can benefit from the pin-free approach. You can also browse curated quilt kits when you want the piecing decisions handled before you reach the pressing table.

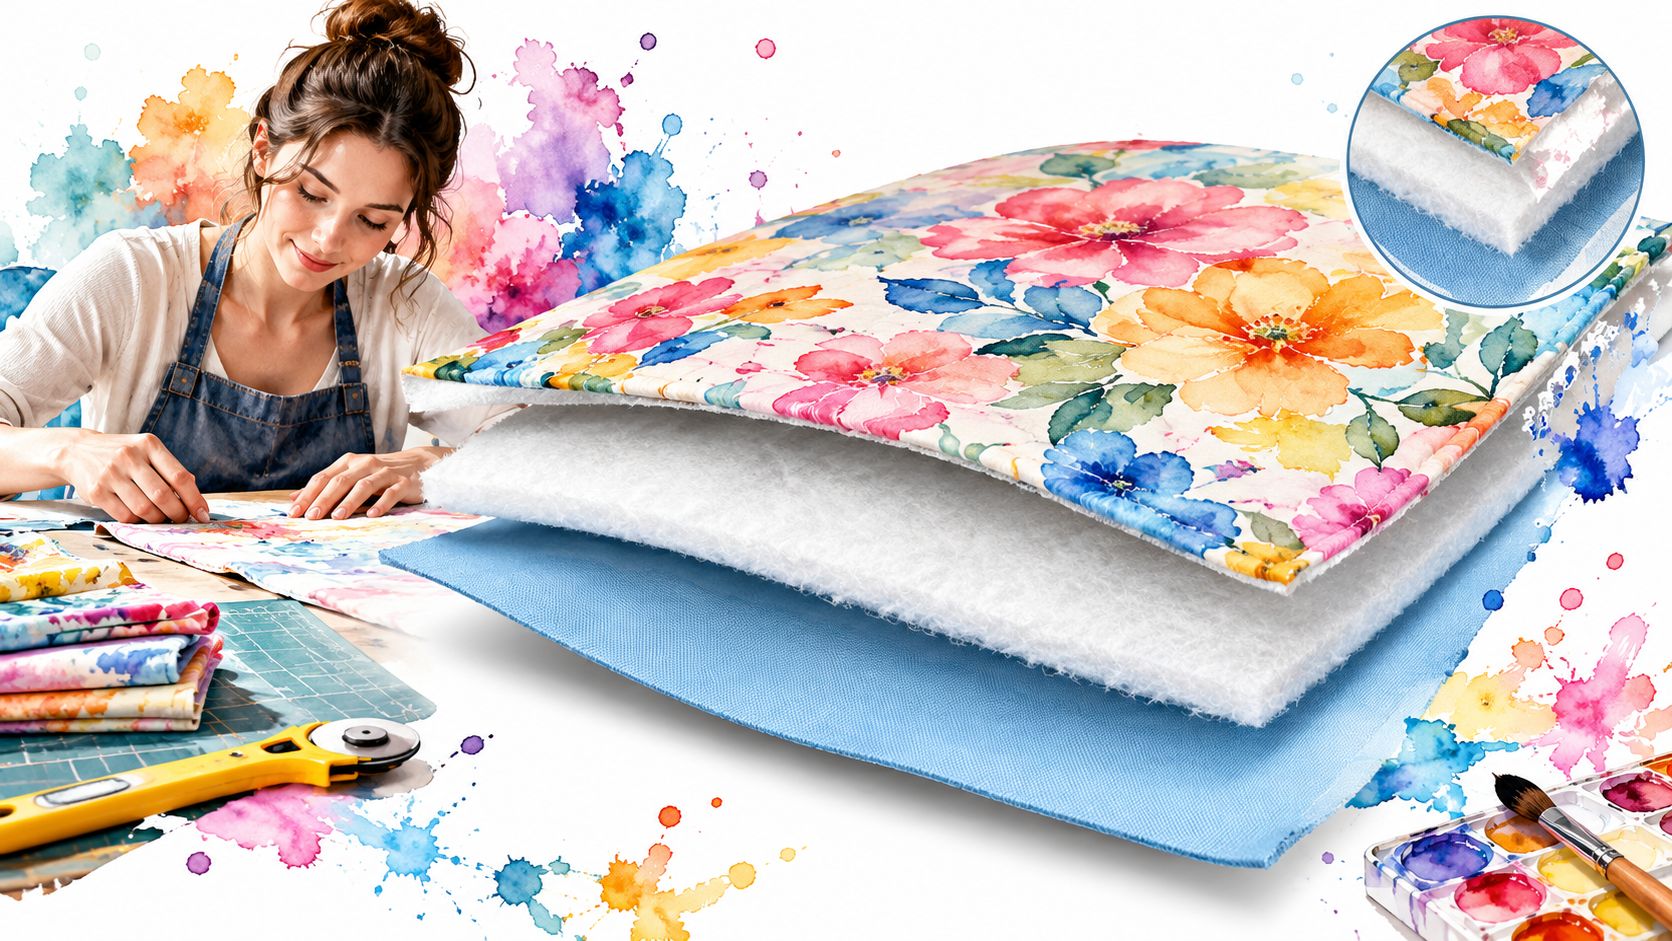
Fusible batting has a heat-activated adhesive on one side or both sides. Heat bonds the batting to the fabric layers, temporarily holding the quilt sandwich so you can quilt with fewer pins or without spray basting. It isn't a substitute for quilting stitches, though. The stitching still secures the layers permanently and controls the finished texture.
The process is straightforward: prepare the fabrics, layer without wrinkles, press in small sections, let the layers cool, then trim and quilt. The tricky parts are orientation, temperature, movement, and knowing when a scrap-saving repair is safer than forcing one oversized piece.
Introduction to Fusible Batting and Why Quilters Love It
On a home iron, a small quilt can become a pin-free project. For example, a baby quilt using Hobbs or Pellon fusible batting can hold its layers in position without placing and removing a field of safety pins. The adhesive is a positioning aid, not a replacement for quilting stitches.
Fusible batting has heat-activated adhesive on one side or both. One-sided products bond batting to a single fabric layer. Two-sided products hold the quilt top and backing together, creating a stable sandwich for stitching. Hobbs and Pellon offer familiar options for this kind of work, and our guide to the best batting for quilts can help compare suitable choices.
The practical advantage is control. You can press a small area, let it cool, and continue without shifting the layers across the table. That suits limited pressing space and reduces pin handling, but the backing still needs to lie flat. A puckered backing, uneven heat, or stretched fabric can leave wrinkles beneath an otherwise well-bonded surface.
Practical rule: If you can see a wrinkle before pressing, the iron will usually set it more firmly.
Use a dry iron and press-and-lift vertically rather than dragging the soleplate across the batting. Build the sandwich by hand, begin near the center, and work outward in small sections. Check the batting's texture before committing to the full quilt, since a flat weave reveals ripples more readily than softly textured cotton.
Save clean offcuts instead of discarding them. Fusible tape can join narrow batting scraps for smaller projects or edge areas, provided the joins lie flat and stay clear of bulky quilting lines. This dry-iron method gives beginners a steady start while preserving material for zero-waste finishing.
What You Need Before You Fuse
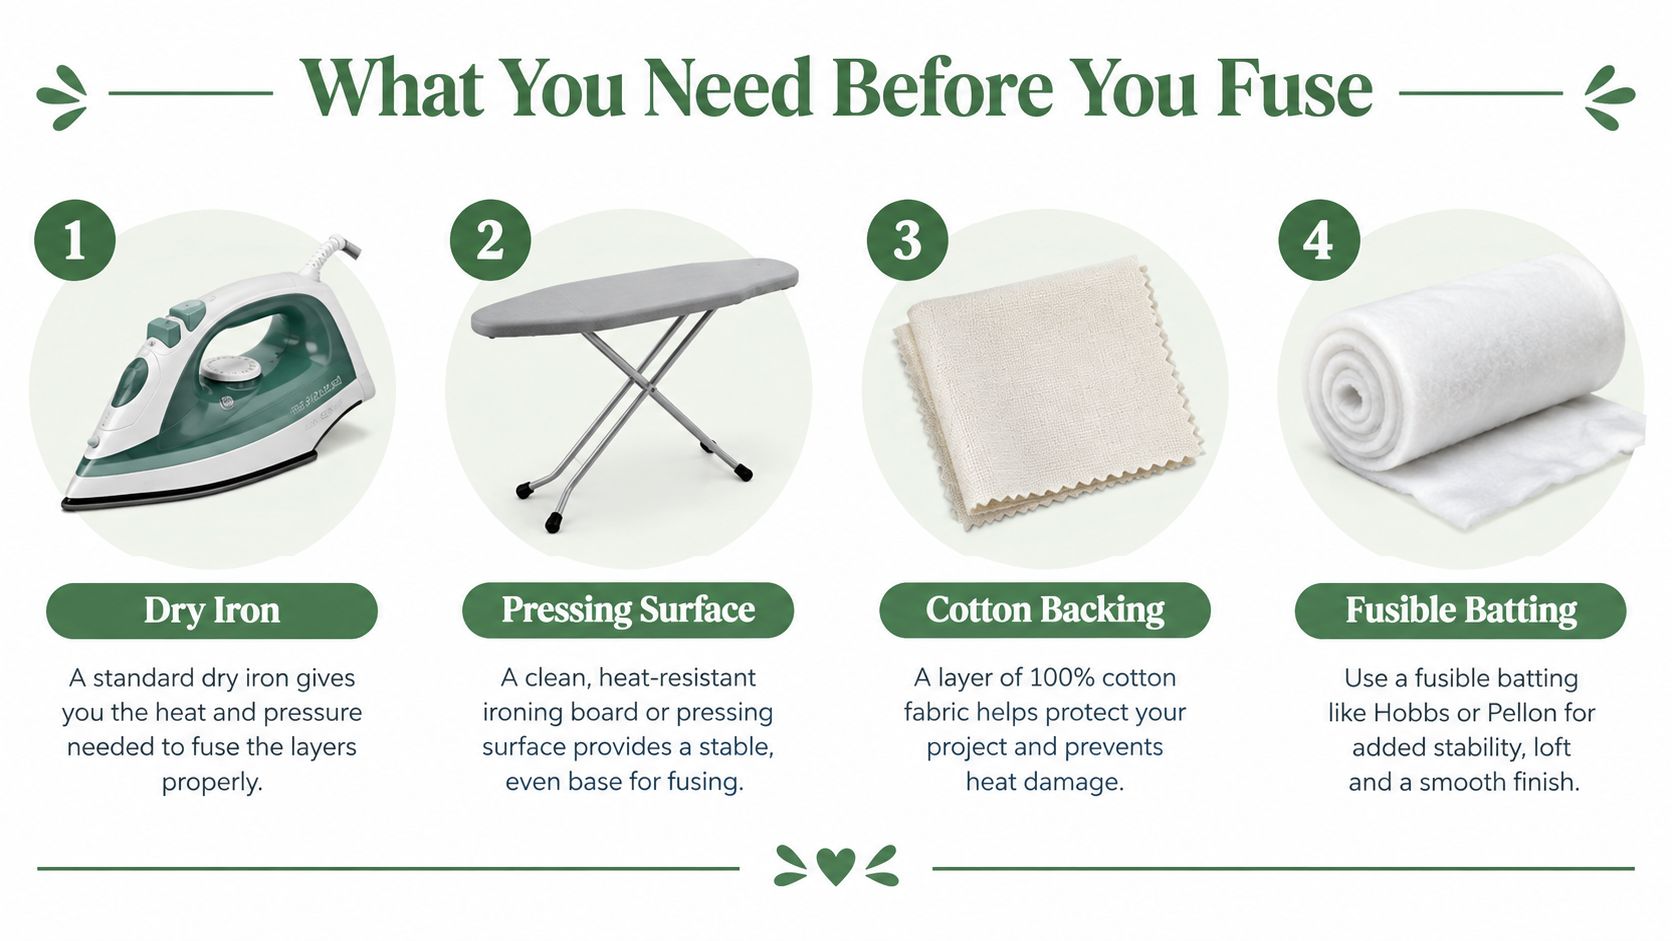
Set up every tool before spreading the batting. Searching for supplies after the quilt sandwich is partly positioned can shift layers and create wrinkles that become harder to remove after fusing.
- Dry iron: Choose an iron that maintains steady heat with steam switched off. A quilting iron guide can help you compare features, but consistent dry heat matters more than extra settings.
- Pressing surface: Use a firm, heat-safe surface without deep ridges or a loose cover.
- Cotton backing: Wash and press a fabric whose weave and weight suit the quilt.
- Fusible batting: Hobbs or Pellon fusible batting can provide iron-on stability. QuiltKit also lists fusible batting by the yard for projects that do not fit a packaged precut.
- Ruler and rotary cutter: Keep them ready for trimming after quilting. Do not cut across a sandwich that is still shifting.
- Test scrap: Combine actual pieces of the quilt top, backing, and batting to check adhesion, heat, and texture before starting the quilt.
Prepare the fabrics before layering. Wash the backing and top if that fits your usual finishing routine, dry them fully, and press until the seams lie flat. Remove loose threads from the wrong side, especially near bulky seam intersections, where trapped threads can create ridges.
The backing should extend 2 to 3 inches beyond the quilt top on all sides, leaving room for handling, quilting, and final squaring (independent quilting instructions). This allowance avoids forcing the top and backing into exact alignment before the adhesive has secured the layers.
Choosing loft and fiber content
Loft controls batting thickness. Stitch definition controls how clearly quilting lines shape the surface. Lower loft tends to produce a flatter, crisper finish, while a loftier batt creates more relief and a softer hand. Also account for machine tension, needle clearance, and how the batting feeds beneath a walking foot or longarm.
An 80/20 blend offers a different balance of drape and stitch definition from 100% cotton. Choose based on the texture you want, quilting density, and fabric weight. For a large backing, the 108-inch Widebacks category can reduce the need for a center seam. For a natural hand, 100% cotton batting rolls are another option.
If folded batting arrives with creases, let it relax on a clean surface before layering. Smooth it gently rather than stretching it flat. Stretching can distort the batt and leave a diagonal pull after the adhesive sets.
Keep clean offcuts beside the pressing area. Fusible tape can join narrow batting scraps for small projects or edge sections, as long as each join lies flat and stays away from bulky quilting lines. This dry-iron, press-and-lift approach saves usable material for zero-waste finishing.
How to Prep and Layer for a Smooth Fuse
A smooth fuse starts before the iron heats. Lay the backing wrong side up on the pressing surface or a clean table. Smooth it from the center toward the edges with open hands, keeping the fabric relaxed. Leave the extra 2 to 3 inches on every side around the quilt top so the layers remain easy to handle.
Identify the fusible batting's adhesive side. Some products show a coated face, while others require the package instructions or a small test scrap. Test before layering when both sides look alike. The scrap test confirms which side bonds and whether the adhesive transfers at your selected setting.
Build the sandwich without stretching
Place the batting over the backing with the adhesive side facing the correct layer. Center it instead of pulling it into position. If a fold line remains, ease it flat with your palms and let the batting settle before adding the quilt top.
Set the quilt top right side up. Smooth one area at a time, working outward from the center. At seam intersections, flatten the seam allowance with your fingertips rather than pushing it sideways. A nested, bulky seam can leave a ridge that resembles a bubble after bonding.
Keep the backing larger than the top. This extra fabric provides a handling margin during fusing and quilting, then gives you room to square the quilt later. Trim it only after quilting.
Keep clean batting offcuts near the pressing area. Narrow scraps can be joined with fusible tape for small projects or edge sections. Place each join flat and away from dense quilting lines. The dry-iron, press-and-lift method makes this practical, saving usable scraps for zero-waste finishing.
Pressing the layers in sections
Arrange the sandwich before applying firm heat. Fold or roll unused sections loosely so they do not drag across the surface. A firm, smooth pressing area supports consistent contact. A soft or uneven cover can leave adhesive patches unsecured.
Lift one corner and inspect the underside before fusing the full project. The layers should lie flat, without a crescent-shaped pull or diagonal wrinkle. If the batting looks stretched, lift the quilt top, relax the batting with your hands, and realign it.
For handling details, follow this batting placement guide. Once the layers are flat and correctly oriented, use the dry iron in small sections, pressing straight down and lifting it before moving to the next area. This preserves alignment instead of dragging wrinkles across the sandwich.
Fusing Techniques That Prevent Bubbles and Shifting
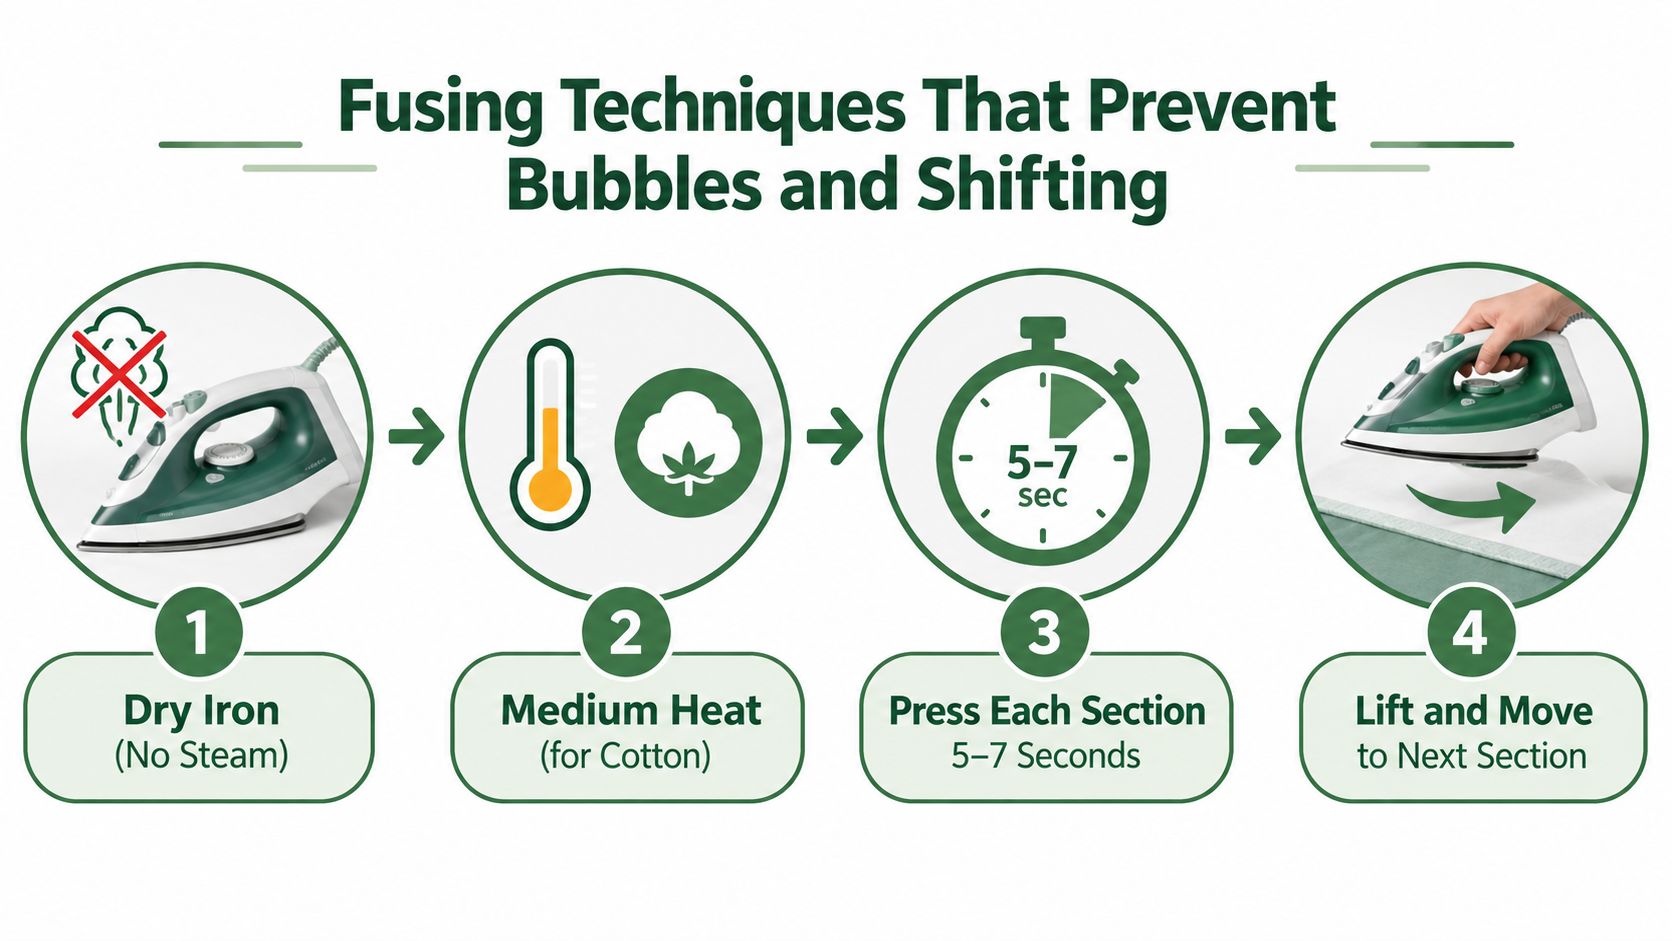
A dry iron and a controlled press-and-lift motion keep the quilt top aligned while the adhesive bonds. Set the iron to medium heat for cotton, with steam turned off, and clean the soleplate before starting. Product instructions take priority if they call for another setting.
Work from the center outward. Sliding the iron across the sandwich can drag the quilt top over the adhesive, stretch the fabric, and create ripples. Pressing in place gives each section direct, even contact.
- Start at the center. Place the iron flat on one area and hold it for about 5 to 7 seconds, following the product guidance in these fusible batting pressing instructions.
- Lift straight up. Raise the iron fully, then set it down on the next area with a slight overlap over the bonded section. Avoid back-and-forth ironing.
- Press toward the edges. Continue in small sections from the center to the perimeter. This lets air escape before the surrounding area is sealed.
- Give corners and edges extra attention. Fabric can relax away from the batting in these spots. Realign any lift, then apply the same steady contact.
- Let the quilt cool flat. Moving the layers while warm can disturb the alignment and weaken the fresh bond.
- Fuse the second side when required. If the batting has adhesive on both faces, turn the sandwich carefully and repeat the dry press-and-lift process from the quilt-top side.
Keep the iron moving by lifting it, not by dragging it. If fabric shifts, stop, separate the layers as needed, and smooth the layout by hand. Pressing over a wrinkle usually fixes the wrinkle in place.
Test before committing: Fuse a scrap using your Ruby Star solids, backing, and batting. Check heat tolerance, adhesive behavior, and the finished texture before working on the quilt.
Let the test piece cool, then view it at an angle and flex it gently. A sound bond should not leave shiny patches, stiff spots, or visible distortion through pale fabric. The scrap also reveals whether the adhesive has fused evenly without requiring excessive pressure.
For a visual demonstration of controlled pressing, watch the embedded video below.
A firm pressing surface helps maintain contact when an ironing board feels soft or uneven. A dedicated quilting pressing mat is one option. Whatever approved surface you use, support the area beneath the iron and keep unpressed quilt weight from pulling against the section being fused.
Keep clean batting offcuts beside the work area. Narrow pieces can be joined with fusible tape for small projects or edge sections, provided their loft and weight match. Fuse each tape join with the same dry, press-and-lift technique, keeping joins flat and away from dense quilting lines. This saves usable scraps for zero-waste finishing without introducing a bulky ridge.
Fusible batting reduces pins and spray basting, but careful quilting remains necessary to secure the finished layers.
Trimming Quilting and Joining Scraps Without Waste
Once quilting is complete, trim the excess batting and backing together. Use a long ruler to square the edges, and check that the quilt top has not curved before cutting. Keeping the extra material until stitching is finished leaves room to correct slight movement and accommodate changes caused by quilting.
Your quilting pattern must suit the batting. Product instructions may require quilting or stitching every 4 inches or closer, so check the label before leaving broad unstitched areas. Dense quilting adds stitch definition and controls lofty texture. Wider spacing preserves more loft, but it can exceed the product's limit.
Some batting shrinks 3 to 5% after use. Account for that change before trimming to an exact finished size. Pre-shrinking compatible materials and choosing the quilting density early both affect the final dimensions and surface.
Joining leftover batting
Clean scraps become useful when their loft and weight match. Joining a thin cotton piece to lofty synthetic batting can leave a ridge, alter how the quilt feeds, and produce a different feel after washing.
For a larger assembly, place the pieces on a clean surface and align their edges without overlap. Cut complementary wave-like seams instead of straight seams that may become visible. Apply fusible batting tape across the join according to the tape manufacturer's directions.
- Match the loft: Join pieces of similar thickness so the quilted surface stays even.
- Match the weight: Keep dense batting separate from light, airy scraps unless the transition sits where a texture change will not matter.
- Close the seam: Center the tape over the join so it covers the cut edges without leaving a gap.
- Test the bond: Fuse a small sample, let it cool flat, then flex it before adding the joined batting to a large quilt.
For small edge sections, use the same dry-iron press-and-lift method. Set the iron down without sliding, hold it for the product's recommended time, lift, and reposition over the next area. This keeps the tape from stretching or dragging the batting out of shape, while saving narrow offcuts for zero-waste finishing.
The method turns leftover strips into a usable batt, but the join still has trade-offs. Extra adhesive can create a firmer area, and differences in batting color or texture may remain visible. Keep joins away from prominent quilting lines when possible.
King-size and longarm quilts need careful handling because a small wrinkle can spread across a wide surface and become difficult to correct. Fusible batting reduces pinning, yet adhesion limits, seam visibility, and temperature restrictions matter more as the quilt grows. Compare compatible fusible tape and Hobbs batting rolls before assembling a large scrap batt.
Troubleshooting Common Fusible Batting Problems
Bubbles usually begin as a preparation problem, not an iron problem. Steam, a soft pressing surface, a dragging motion, or a backing that wasn't smoothed can leave air pockets under the bonded layers.
A quick diagnosis checklist
- Bubbles or ripples: Lift the nearby area if possible, smooth from the center outward, and re-press with dry heat using the product's recommended contact time.
- Poor adhesion: Check that the adhesive side faces the correct fabric, then test a slightly longer controlled press on a scrap before returning to the quilt.
- Adhesive showing through: Stop applying heat and inspect the test piece. The fabric finish, batting orientation, or temperature may be incompatible.
- Edges lifting: Re-press the edge after cooling the quilt flat, then plan quilting lines that secure the perimeter.
- Puckering after washing: Pre-shrink compatible fabrics when appropriate and add quilting support where the surface needs more control.
A common assumption is that more heat always means a stronger bond. In practice, excess heat can distort fabric, flatten loft, or expose adhesive, while insufficient contact leaves loose areas. During my own heat-setting tests, the cleanest results came from a stable surface, a dry soleplate, and patient repositioning rather than a hotter setting.
Advanced quilters should also watch machine tension and stitch definition after fusing. A bonded sandwich can feel firmer than a loosely basted one, so test the needle, thread, and feed on a sample. If stitches sit high on the top or pull the backing into tiny ridges, adjust the setup before quilting the full piece.
Keep the iron plate free from residue. If you suspect transfer, follow a safe iron plate cleaning guide before pressing another fabric. Beginners don't need to master every variable at once. Start with a scrap, make one controlled change, and judge the cooled result rather than the warm surface.
QuiltKit.com offers fusible batting, Pellon and Hobbs options, batting tape, cotton batting rolls, pressing tools, and quilting kits for projects from small runners to larger finishes. Visit quiltkit.com, and join the Email Sign-up Savings list if you're not ready to buy today but want practical supplies and project options in one place.