


Halloween Fabric Panels Guide for Quick Seasonal Quilts
It's mid-October, guests are coming Friday, and your sewing table is covered with fabric, thread, and an unfinished seasonal idea. Halloween fabric panels give you a practical shortcut: the main artwork is already printed, so you can spend your limited sewing time on framing, quilting, and finishing instead of building every motif from small pieces.
These panels work especially well for table runners, wall hangings, pillows, lap quilts, and other seasonal home accents. The key is to treat the printed design as the focal point, check the usable image area before cutting, and choose batting, backing, and borders that support the artwork rather than compete with it.
How to Use Halloween Fabric Panels
A Halloween fabric panel is a pre-designed piece of quilting fabric with a complete scene, block arrangement, or coordinated set of motifs printed onto one length. Panels are usually sold as quick-project textiles in standardized formats, rather than as continuous garment yardage. One seasonal example measures approximately 44 by 36 inches, a format suited to fast decorative sewing and adaptable enough for runners, pillows, bed runners, wall hangings, and tote bag inserts (Nancy Zieman's fabric panel overview).
Start by deciding what the printed image should become. If the panel already has a strong central scene, keep it intact and add borders. If it contains separate blocks, you can trim them individually and combine them with sashing, meaning narrow strips of fabric placed between blocks.
A simple panel workflow
- Measure the full fabric piece. Record the panel's outside dimensions, then measure the printed motif separately. The image may not fill the entire panel.
- Choose the finished project. A runner needs length and stability, while a wall hanging benefits from a flat, structured finish.
- Plan the frame before cutting. Borders can make a small image feel intentional, and coordinating prints can extend a single panel into a larger quilt top.
- Square the panel carefully. Use the selvage and printed design as references, not just the outer fabric edges.
- Layer and finish. Batting, backing, quilting, and binding determine whether the final piece feels polished and holds up through seasonal use.
Practical rule: Preserve the focal character, phrase, or scene first. Trim away unused margins only after you know how much space the finished border requires.
The category also has a useful historical logic. Commercial Halloween décor moved toward ready-made domestic goods during the twentieth century, and Dennison Manufacturing Company introduced mass-produced Halloween-related felt pillows in 1938 (Ball State University's history of Halloween decorations). Modern panels follow the same convenience principle, but with printed cotton and quilting-friendly construction.
For additional inspiration on using printed fabric efficiently, compare the approach with these baby fabric panel project ideas. The subject changes, but the design lesson stays useful: let the preprinted image do the visual work.
Standard Panel Sizes and What They Fit
Panel dimensions vary, so don't cut from a product title alone. Quilting panels commonly appear in widths around 24, 36, or 44 inches, with lengths such as 1 yard, 1.5 yards, or 2 yards (panel construction guidance). The fabric's total size may also include blank margins that aren't part of the usable motif.
Halloween Panel Sizes at a Glance
| Panel Size | Best Project | Border Needed |
|---|---|---|
| Around 24 inches wide | Small wall hanging, bench pillow, or quilt center | Often useful for framing and increasing finished size |
| Around 36 inches wide | Table runner, larger wall quilt, or central décor panel | Usually optional, depending on the image and desired finish |
| Around 44 inches wide | Broad centerpiece, bed runner, or larger quilt focal area | May need side borders or pieced construction |
| Around 18 by 22 inches | Book-style blocks, sampler blocks, and small coordinated projects | Usually needed if the blocks are being enlarged |
| Near 30 by 30 inches | Pillow cover, medallion, or compact wall piece | A narrow frame can stabilize and define the design |
A 24-inch panel can suit a small project, but its actual motif may be smaller once selvage, printing margins, and trimming are accounted for. A 36-inch panel often gives you more freedom for a runner or wall quilt, while a book-style panel can be more flexible because its printed rectangles are intended to separate into blocks.
The familiar 44 by 36 inch format is particularly adaptable. It can act as a single decorative centerpiece, or you can cut around the scene and combine the pieces with sashing and coordinating fabric. Always compare the image area with the intended finish size before buying borders or backing. Northcott fabric guidance also emphasizes checking the total fabric piece rather than assuming the printed design fills it completely.
Measure before ordering companions
Write down these measurements:
- Outer panel dimensions, from edge to edge.
- Usable image dimensions, excluding blank printed margins.
- Trim allowance, including the fabric needed to square the piece.
- Finished border width, measured after sewing.
- Backing and batting size, large enough to extend beyond the quilt top for quilting and trimming.
That small planning exercise prevents the most common beginner mistake, buying coordinating fabric for a finished size the panel can't support.
Best Project Ideas for Seasonal Panels
Panels work best when the artwork remains visible and the construction stays manageable. I usually start with the project's viewing distance. A bold haunted-house scene can carry a wall hanging by itself, while smaller pumpkins or character blocks benefit from sashing that gives each image breathing room.
Table runners
A table runner is often the quickest satisfying finish. Center a panel, square the ends, and add borders only if the composition needs more length or contrast. A narrow black, charcoal, orange, purple, cream, or neutral border can frame the print without slicing through important lettering.
A panel around 24 by 44 inches can be adapted into a runner by trimming excess fabric and adding coordinating strips. Don't assume the finished measurement from the panel size alone. Seam allowances, uneven printing, and the border width all change the final proportions.
For more seasonal layout ideas, browse these fall table runner patterns. The same planning habits apply to Halloween fabric, especially when you want the centerpiece to remain readable from both ends of the table.
Wall hangings
A larger panel can become a strong wall accent with a simple frame. Use black or charcoal sashing when the artwork is orange-heavy, or choose a quieter neutral if the print already contains a dark background.
Add a hanging sleeve to the back after quilting. Straight-line quilting around the main motifs keeps the piece stable and can create a clean echo effect without requiring free-motion skill.
Bench pillows and cushions
Square panels are natural candidates for pillow fronts. Trim the printed image only after checking that the characters, borders, or text will remain centered within the finished cover.
An envelope closure made from coordinating fabric keeps the construction simple. For a bench cushion or floor cushion, choose a firm, tightly woven quilting cotton and flatter batting so the pillow doesn't become overly soft or lose its shape.
Small quilts and kitchen accents
You can enlarge a single panel by surrounding it with pieced blocks, strips, or coordinating squares. Layered Halloween prints can create contrast around the focal image, but keep the secondary fabrics quieter than the main scene.
A panel can also become a tea towel with folded hems and a hanging loop. Save leftover blocks and narrow strips for mug rugs, small banners, or future mini wall hangings rather than trimming them into unusable scraps.
Cutting and Layout Tips for Clean Results
Printed fabric can look straight on the bolt and still be slightly skewed. Put the panel on a flat surface with the wrong side facing up, then square the edges with a rotary cutter before making project-specific cuts. This protects the placement of faces, lettering, and borders.
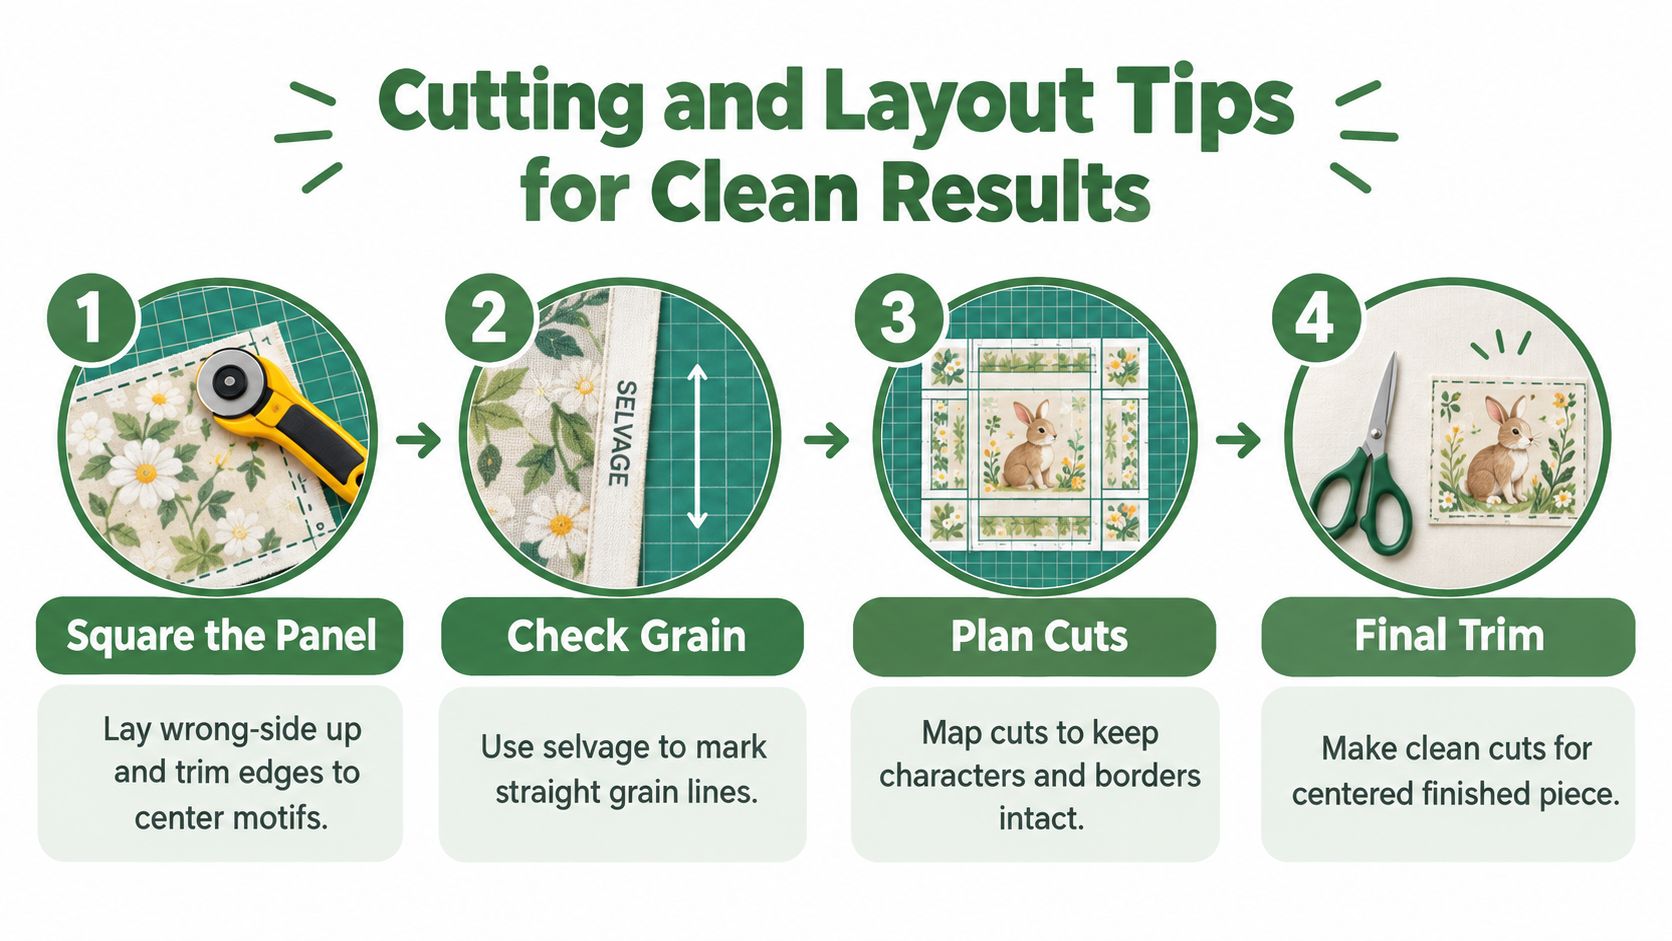
Align the grain and the artwork
Use the selvage as your straight-grain reference. Mark a grain line with a removable fabric marker, then compare it with long borders and vertical characters in the design.
If the printing is skewed near the edges, a small trim can release the distortion. Don't remove fabric automatically, though. First measure the focal image and calculate how much border remains after squaring.
A panel intended for quilting needs to tolerate machine quilting tension and repeated washing. Quilting cotton is commonly described as an even weave around 68 by 68 threads per square inch, while fabric around 60 by 60 is considered lighter and more prone to fraying, shrinkage, and batting show-through (thread-count guidance for quilting fabric).
Cutting advice: Measure the printed motif, not just the fabric rectangle. A generous outer margin isn't useful if trimming it removes the balance of the design.
Map the layout before the rotary cutter
For a wall hanging, plan the borders around the focal scene. A 2-inch strip can create a clean frame, but the right width depends on the motif and the seam allowance you need. Sashing is especially useful for long runners or separated blocks because it makes the panel pieces read as deliberate units.
When fussy cutting secondary images, place the fabric over a lightbox or against a bright window. Painter's tape labels can identify the top edge, row order, and orientation of each piece.
Use a square ruler for final checks and a long ruler for borders. These quilting templates and rulers can help you verify that a cut is square before it becomes part of the quilt top.
The video below demonstrates the kind of clean, measured handling that helps prevent a crooked panel from becoming a crooked finished project.
Batting and Backing Choices for Panel Projects
The best batting depends on whether the finished piece must hang flat, drape softly, or withstand contact on a table or bench. 80/20 cotton-poly batting offers a soft hand and gentle loft, while cotton batting gives a flatter, more stable finish. Dark backing fabrics can also reduce the visual distraction of show-through beneath a busy panel.
Batting and Backing Matchup for Panel Projects
| Batting Type | Best Project Match | Recommended Backing Tone | Loft Level |
|---|---|---|---|
| 80/20 cotton-poly blend | Wall hanging or softly draped seasonal quilt | A tone slightly darker than the panel's dominant color | Soft, moderate loft |
| 100% cotton | Table runner, pillow, or bench project | Neutral, charcoal, or coordinated dark print | Flatter finish |
| Wool | Warm lap quilt or dimensional décor | Coordinating tone that supports the artwork | Noticeably lofty |
| Low-loft polyester | Fast decorative finish | Dark or medium tone to limit show-through | Low and quick-drying |
Pure cotton batting suits projects that will be leaned against or used on a table because it creates a flatter surface. Wool adds warmth and stitch definition, but its loft can overpower detailed Halloween imagery, especially where the panel contains small faces or fine linework.
I found that dense printed areas usually look cleaner with restrained quilting. Echo the main motifs with straight lines, or quilt a simple grid through the background so the design remains the first thing the eye sees.
Choose the backing with the front in mind
A backing one shade darker than the dominant panel color can disguise minor show-through at seams. Black or charcoal works well behind orange-heavy designs, particularly when the quilting thread travels through light areas.
Prewash the backing and any coordinating fabrics according to their care instructions. This helps limit uneven shrinkage and later puckering. A low-loft polyester option can be practical when speed matters, but test the needle, thread, and quilting tension on a scrap first.
For a flatter cotton finish, review these 100% cotton batting options. The material choice affects not only warmth, but also drape, opacity, and how sharply the quilting lines define the printed scene.
Buying Tips and What to Check Before You Sew
A pretty panel can still create trouble if the printing is off-register or the fabric is badly skewed. Before cutting, unfold the full piece and inspect the artwork from edge to edge. Look for shifted outlines, faded fold lines, missing portions of borders, and motifs that drift away from the grain.
Run a fingernail lightly across an inconspicuous area. The ink should feel integrated into the fabric rather than sitting as a brittle surface layer that may flake with handling or washing.
Read the selvage
The selvage should help you identify the designer, collection, and care information. Keep that strip until you've matched the panel with companion fabric, because seasonal collections can include several oranges, purples, creams, neutrals, and multicolor prints that look similar online but behave differently beside the artwork.
A tight weave with minimal fraying is more important than a vague label such as “premium.” The fabric should feel stable under a rotary cutter and should support accurate seams without excessive distortion.
Match thread to the visual density
Thread doesn't need to match every color. A medium gray can disappear across busy illustrations, while a variegated orange-and-black thread can move naturally through a traditional Halloween palette without constant re-threading.
For modern panels using purple, peach, cream, or muted neutrals, test the thread against the lightest and darkest areas. The goal is a balanced stitch appearance, not a perfect color match.
- Busy motif: Choose a blending neutral such as medium gray.
- Orange-and-black artwork: Test variegated orange-black thread or a dark neutral.
- Minimal artwork: Use thread that supports the panel's strongest line or border.
- Large project: Keep a pre-wound bobbin in a compatible neutral to reduce interruptions.
Seasonal kits can simplify sourcing because the panel, border fabric, binding, and backing are coordinated for a defined project. That convenience is valuable when your deadline is a holiday gathering rather than an open-ended quilting plan.
For broader fabric-selection guidance, use this guide to the best quilting fabric brands and compare the hand, weave, and color stability of fabrics before committing to a full project.
FAQ and Quick Answers for Halloween Panels
Halloween panels reward careful preparation more than complicated piecing. Prewash dark prints, measure the usable design, square the fabric before trimming, and choose a quilting plan that supports the artwork.
Should you prewash Halloween fabric panels?
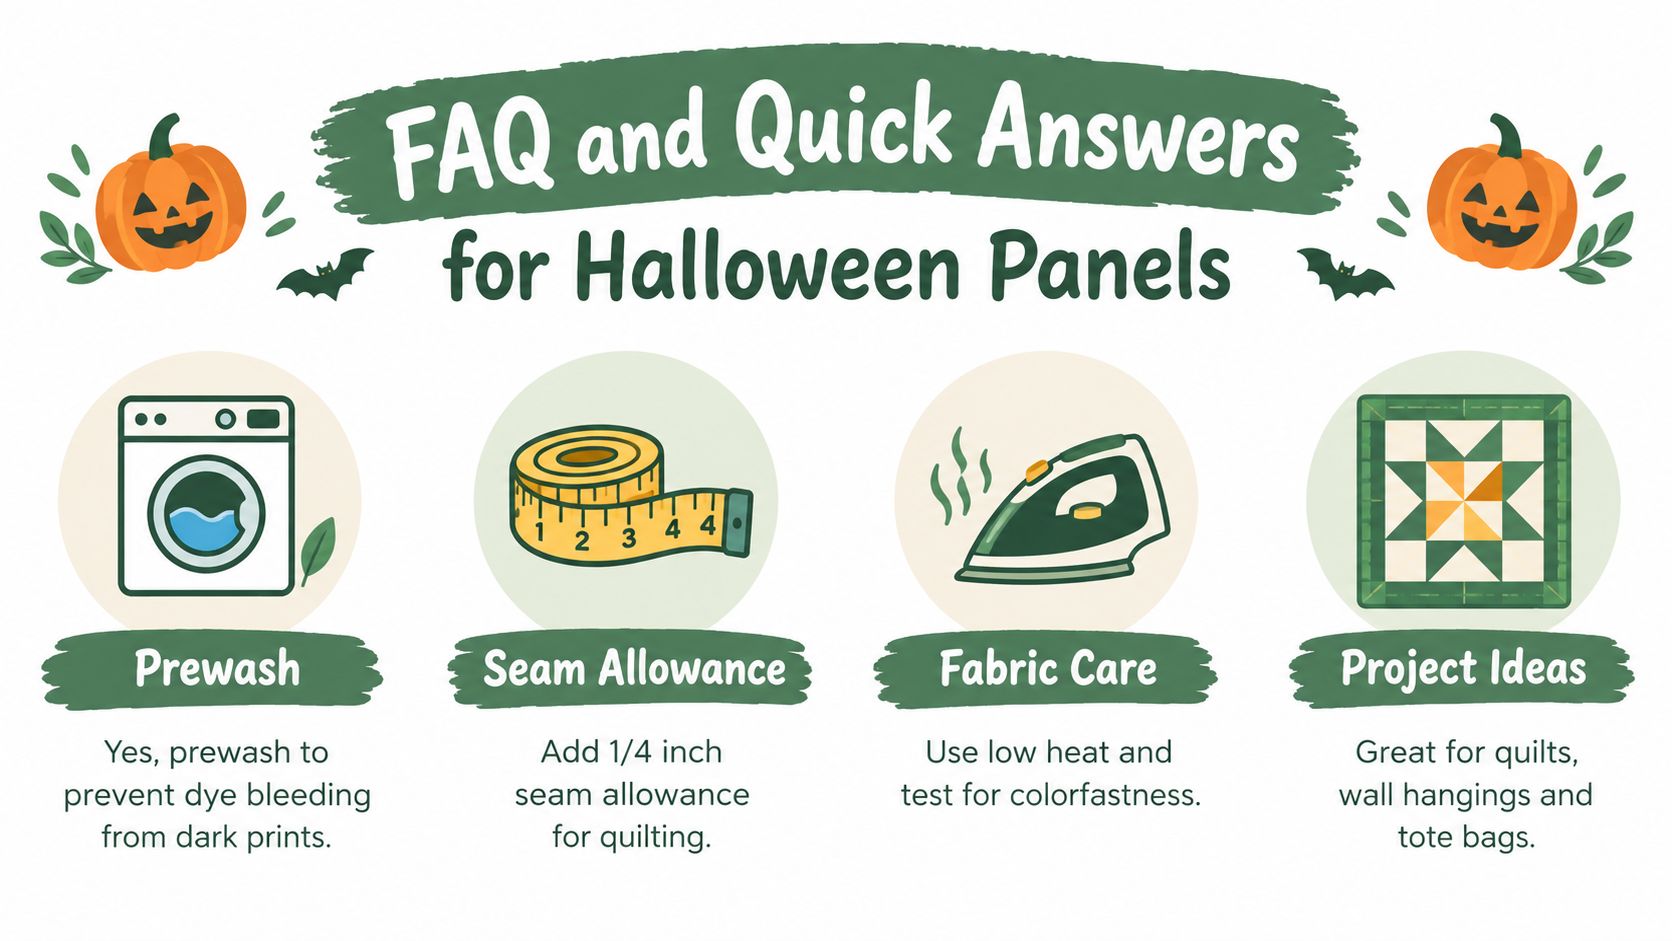
Yes. Prewashing helps limit dye bleeding from dark orange, black, purple, and other saturated prints. It also reveals how the fabric behaves before you add batting, backing, and binding.
Use low heat when pressing and test colorfastness on a scrap or hidden edge. If the panel contains a particularly dark background, place a clean white cloth between the iron and fabric during the first pressing.
What seam allowance should you use?
Use a 1/4-inch seam allowance for patchwork and framed panel blocks. That measurement keeps the panel compatible with standard quilting construction and gives you a predictable finished size.
If you're adding a border directly around a printed image, measure the image after trimming and calculate the border from that new measurement. Don't assume the border strips will finish at their cut width.
How do you square an off-grain panel?
Lay the panel flat, identify the straight grain from the selvage, and use a long ruler to establish a square reference. Trim the outer edges only after checking that the focal image remains centered.
When the design itself is slightly skewed, decide whether preserving the characters matters more than making every printed border perfectly parallel. For most seasonal décor, a centered image is the better visual choice.
Which batting suits a wall hanging or runner?
Choose a flatter batting for table runners and bench pillows, where excess loft can make the surface unstable. An 80/20 blend can give a wall hanging a soft hand while keeping the piece manageable.
Black batting can help hide dark shadows beneath black or charcoal fabric, but it can also influence the overall depth of lighter areas. Test a layered sample before using it on a pale or cream-heavy panel.
What thread and quilting method work best?
Medium gray, dark neutral, or carefully chosen variegated thread can blend across orange-and-black motifs. For a beginner-friendly finish, use straight-line echo quilting around the major characters, pumpkins, or lettering.
Heavy embroidered panels may need fusible interfacing if the fabric feels unstable, but don't add it automatically. First test the panel with batting and backing, because unnecessary interfacing can make the finished piece stiff.
What should you do with leftover scraps?
Keep recognizable blocks, border strips, and larger motifs in labeled envelopes or clear bags. They're ideal for mug rugs, mini wall hangings, small banners, and future tote bag inserts.
Write the collection name on the label if you still have the selvage. That note makes it easier to match a future repair or add a coordinating fabric without relying on memory.
Ready to turn a printed scene into a finished seasonal accent? QuiltKit.com offers ready-to-sew kits, seasonal project bundles, coordinated quilting fabrics, backing, and batting from brands such as Hobbs, Pellon, The Warm Company, Kona Cotton, and Ruby Star Society. Visit quiltkit.com to find a panel-friendly project, and join the Email Sign-up Savings list if you're still planning your next seasonal make.