


How to Use a Rotary Cutter Safely and Accurately
You're standing at the cutting table with freshly pressed fabric, a ruler, and a rotary cutter that looks wonderfully simple. Then you pause. Which hand holds the ruler? How much pressure should you use? What keeps the blade from slipping?
Learning how to use a rotary cutter safely and accurately answers those questions before the first cut. With a self-healing mat, a proper quilting ruler, controlled hand placement, and an ergonomic setup, you can cut clean pieces without turning the process into a race. I still slow down for the first edge of every fabric, because a square foundation makes every later seam easier.
Why Learning to Use a Rotary Cutter Changes Your Quilting
At the cutting table, a beginner kit can look deceptively simple: coordinated strips, squares, or precut pieces, all expected to meet neatly. The first uneven edge can shift every later piece. Learning how to use a rotary cutter gives you a repeatable way to prepare fabric instead of relying on traced templates and scissors.
Before rotary cutters, quilters generally marked a 6.4 mm (0.25 in) seam allowance by hand, traced each shape, and cut pieces individually. The method worked, but repeated pieces were harder to match. A rotary cutter paired with a thick ruler and mat made straight strips and geometric shapes easier to reproduce.
OLFA introduced the rotary cutter in 1979 for garment making. Quilters adopted it quickly in the early 1980s, as it made cutting faster, straighter, and more accurate than tracing and scissor cutting. The history of the rotary cutter describes this as a practical change that reshaped quilting workflows.
By the end of the 1990s, strip-piecing and precision cutting were standard parts of modern quilt construction. That history explains why current patterns and kits assume consistent measuring and cutting.
The useful promise: You don't need a fast hand. You need a stable setup and a repeatable motion.
Your body affects that repeatability, too. Stand square to the table, keep the mat high enough that you are not hunching, and let the ruler do the guiding rather than pressing harder with the cutter. For several repeated cuts, reset your shoulders and hands between strips. Small pauses help prevent fatigue from turning a straight workflow into a drifting one.
I have seen beginners blame themselves when pieces fail to match, although the problem began with a crooked first edge or a ruler that moved. Learning to quilt from the beginning connects cutting, seam allowance, pressing, and piecing as one practical workflow.
Precuts and ready-to-sew kits reduce preparation, but careful trimming still matters. Whether you are cutting tightly woven Kona Cotton solids or arranging Ruby Star Society prints, controlled, repeatable cuts give the edges a better chance to meet cleanly.
What You Need Before You Make Your First Cut
A rotary cutter belongs on a self-healing cutting mat, never directly on a table, countertop, floor, or lap. Put the mat on a stable, flat surface so it won't wobble while you guide the blade. A steady base gives the ruler a better chance of staying aligned and keeps the cutter from skipping.
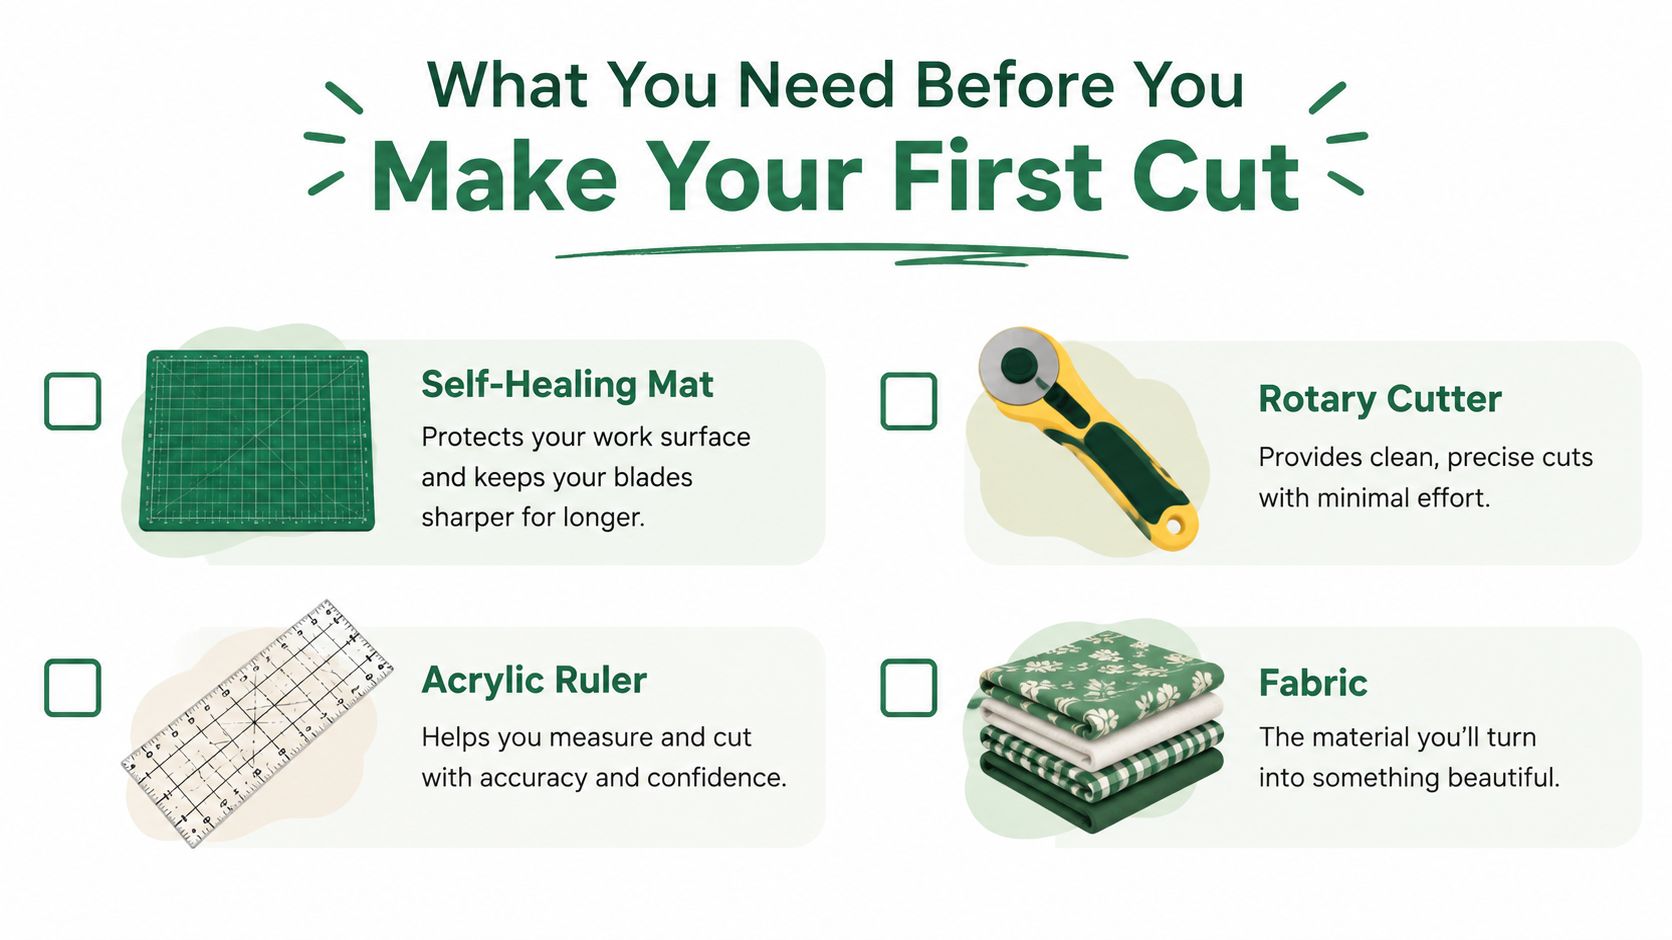
Gather the core tools before you unfold the fabric:
- Rotary cutter: Check that the blade guard or safety lock works smoothly before cutting.
- Self-healing mat: Choose a surface large enough to support the fabric area you're cutting, without letting the project hang and pull.
- Thick acrylic quilting ruler: The ruler measures the fabric, guides the blade, and creates a physical barrier between your hand and the cutting path.
- Pressed fabric: Smooth wrinkles before measuring. A fold or ripple can change the apparent width of a strip.
- A stable work surface: A wobbly table makes both ruler control and blade pressure less predictable.
Blade size should match the work. A standard cutter is useful for ordinary fabric cuts, while a smaller blade can follow tighter shapes more easily. A larger blade may suit thicker layers, but never force a cutter through fabric because the blade is larger.
Square the first edge before trimming strips or blocks. Place the ruler against the fabric's edge, check the grain against the mat markings, and remove the uneven portion first. That clean edge becomes your reference for later measurements.
For a setup that keeps these notions together, browse QuiltKit's quilting cutting essentials. The important point isn't having every specialty tool. It's having the correct mat, ruler, cutter, and prepared fabric within reach.
How to Hold and Guide Your Rotary Cutter With Control
At the cutting table, stand squarely in front of the mat when possible. This position gives you a wider view of the ruler edge and lets your shoulder and forearm guide the cutter. Your wrist should steer lightly, not carry the whole movement.

Lay the fabric flat on the mat and align the ruler with the required measurement. Read the ruler markings for the measurement, then use the mat grid as a visual check. If the starting edge is not square, correct it before measuring another cut. A clean reference edge keeps repeated strips from gradually drifting out of line.
Set your non-cutting hand on top of the ruler, fingers spread comfortably. Keep each fingertip well inside the ruler's edge, never curled over the side near the blade path. During a long cut, slide your hand along the ruler only after the cutter has stopped. Continuous ruler pressure prevents the fabric and ruler from shifting together.
Hold the cutter with a relaxed grip. Press the blade against the ruler edge and push it away from your body in one smooth motion. A steady pass cuts more cleanly than sawing back and forth. Pulling the cutter toward yourself reduces control and brings the blade into a riskier path.
Safety rule: Keep the ruler hand spread on the ruler, and move the rotary cutter away from your body.
Square the leading edge before making the long cut. If the fabric moves, stop immediately, retract or lock the blade, and reset the ruler. Never correct the alignment while the blade is engaged.
Mat height affects both accuracy and fatigue. If you hunch, your sightline narrows and your wrist bends sharply. Raise the table or adjust your stance until your forearm can travel naturally. While seated, support both feet and avoid reaching across the mat. For repeated quilt-kit cuts, relax your grip between passes, change tasks occasionally, and pause as soon as your wrist or shoulder begins compensating.
Use a repeatable rhythm: measure, check, hold, cut, guard. I follow it when preparing several matching strips, because it keeps safe handling in the same routine as accurate measuring.
The motion becomes clearer when you watch both hands work together:
Cutting Straight Lines Curves and Strips Like a Pro
Set up the cutting table before choosing a technique. Stand with your shoulders relaxed, keep the mat high enough that you do not hunch, and position the fabric where you can see the full cutting path without reaching across it. For a quilt kit with many repeated pieces, this setup protects accuracy and helps delay wrist and shoulder fatigue.
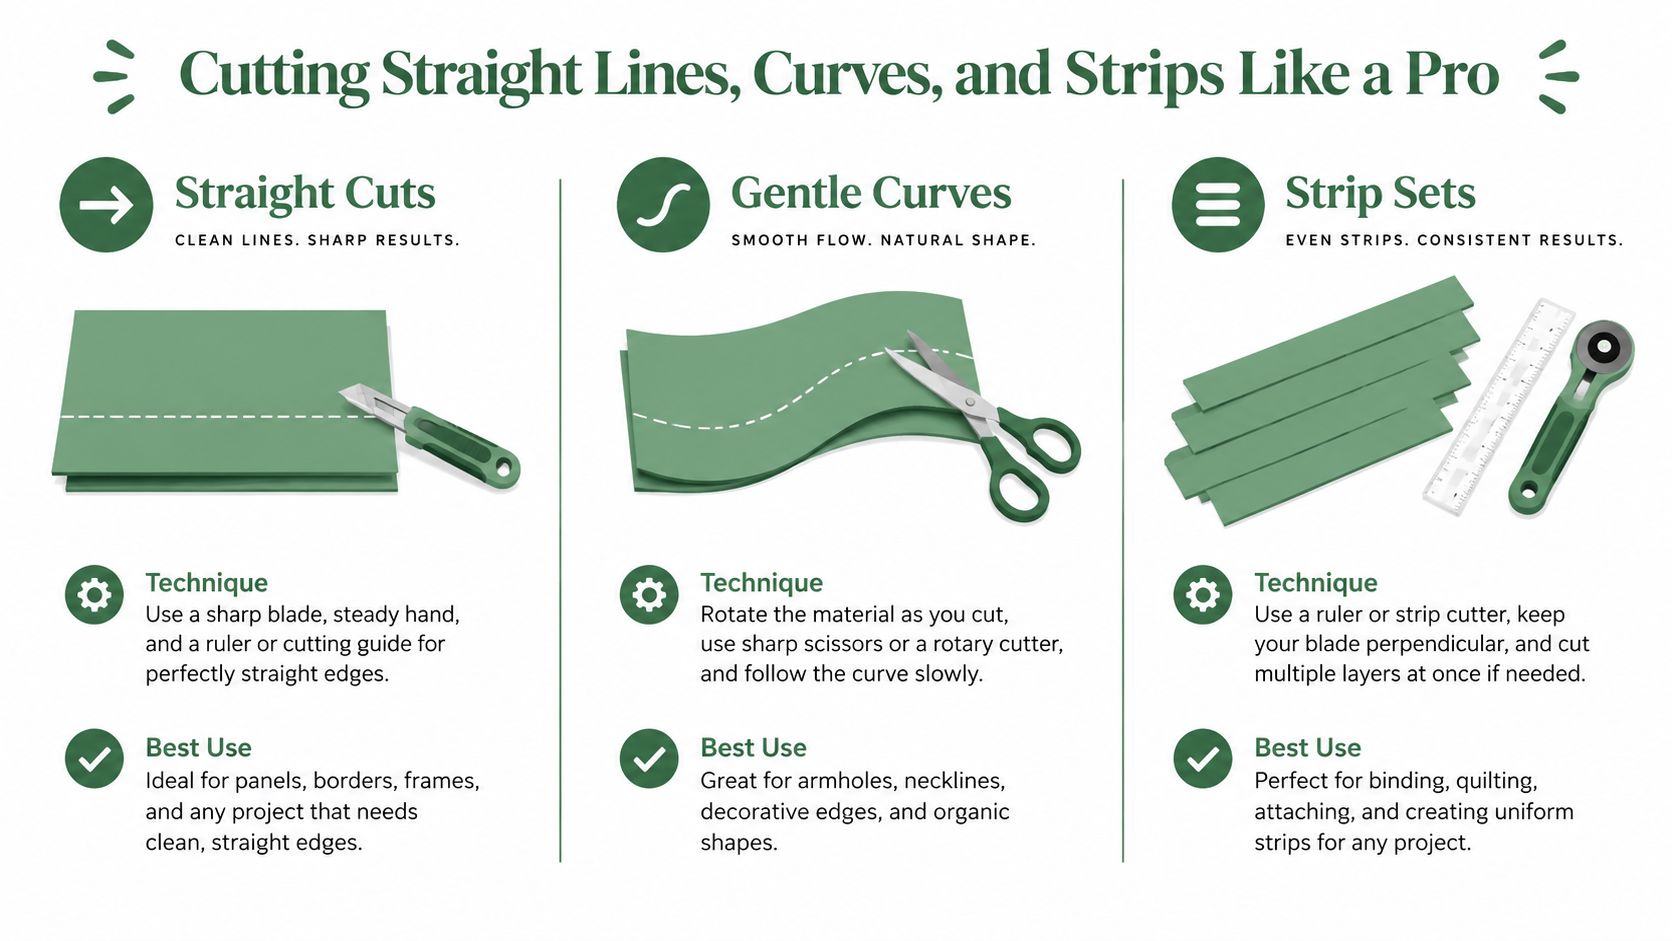
Straight lines depend on a trustworthy reference edge. Align the fabric grain with the mat grid, place a long ruler over the measurement, and check that its markings match the pattern before cutting. Keep the ruler steady while the cutter follows its edge. For the next strip, reset the fabric and ruler rather than trying to continue from a questionable position.
A small visual check saves fabric: confirm the width near both ends of the ruler before making a long cut. If the measurements disagree, correct the alignment before the blade moves.
Gentle curves need a different rhythm. Use shorter, controlled movements and turn the mat or fabric so the next part of the curve stays in front of you. Let the work rotate instead of twisting your wrist around a fixed position. A smaller cutter or template can make the path easier to follow, especially where the curve changes direction.
Strip sets are useful in quilt kits because repeated pieces must share the same width. Press the fabric first, then fold or layer it only when every layer lies flat and remains supported by the mat. Keep your measuring edge square, and check the width at more than one point before cutting the full set. Between passes, loosen your grip and let your arm rest briefly. That small pause matters during a long cutting session.
| Cut Type | Best Technique | Pro Tip |
|---|---|---|
| Straight line | Use a long acrylic ruler and one smooth outward pass | Square the first edge before measuring |
| Gentle curve | Use a smaller cutter and reposition the mat as needed | Follow the curve in short, controlled movements |
| Strip set | Keep layers flat and reference the ruler markings | Check the width at more than one point before cutting |
The quarter-inch seam allowance remains central to patchwork because rotary cutting supports repeatable measurements around that standard. Rotary cutter history and construction explains how the cutter, ruler, and mat work together during fabric preparation.
For coordinated precuts, pixel layouts, or repeated strips, quilting templates and rulers for precise layouts can help match the measurement system to the project.
Common Mistakes to Avoid and How to Fix Them
Most cutting errors have a visible cause. The fabric may shift, the blade may drag, or the ruler hand may be working too close to the danger zone. Stop as soon as the motion feels forced.
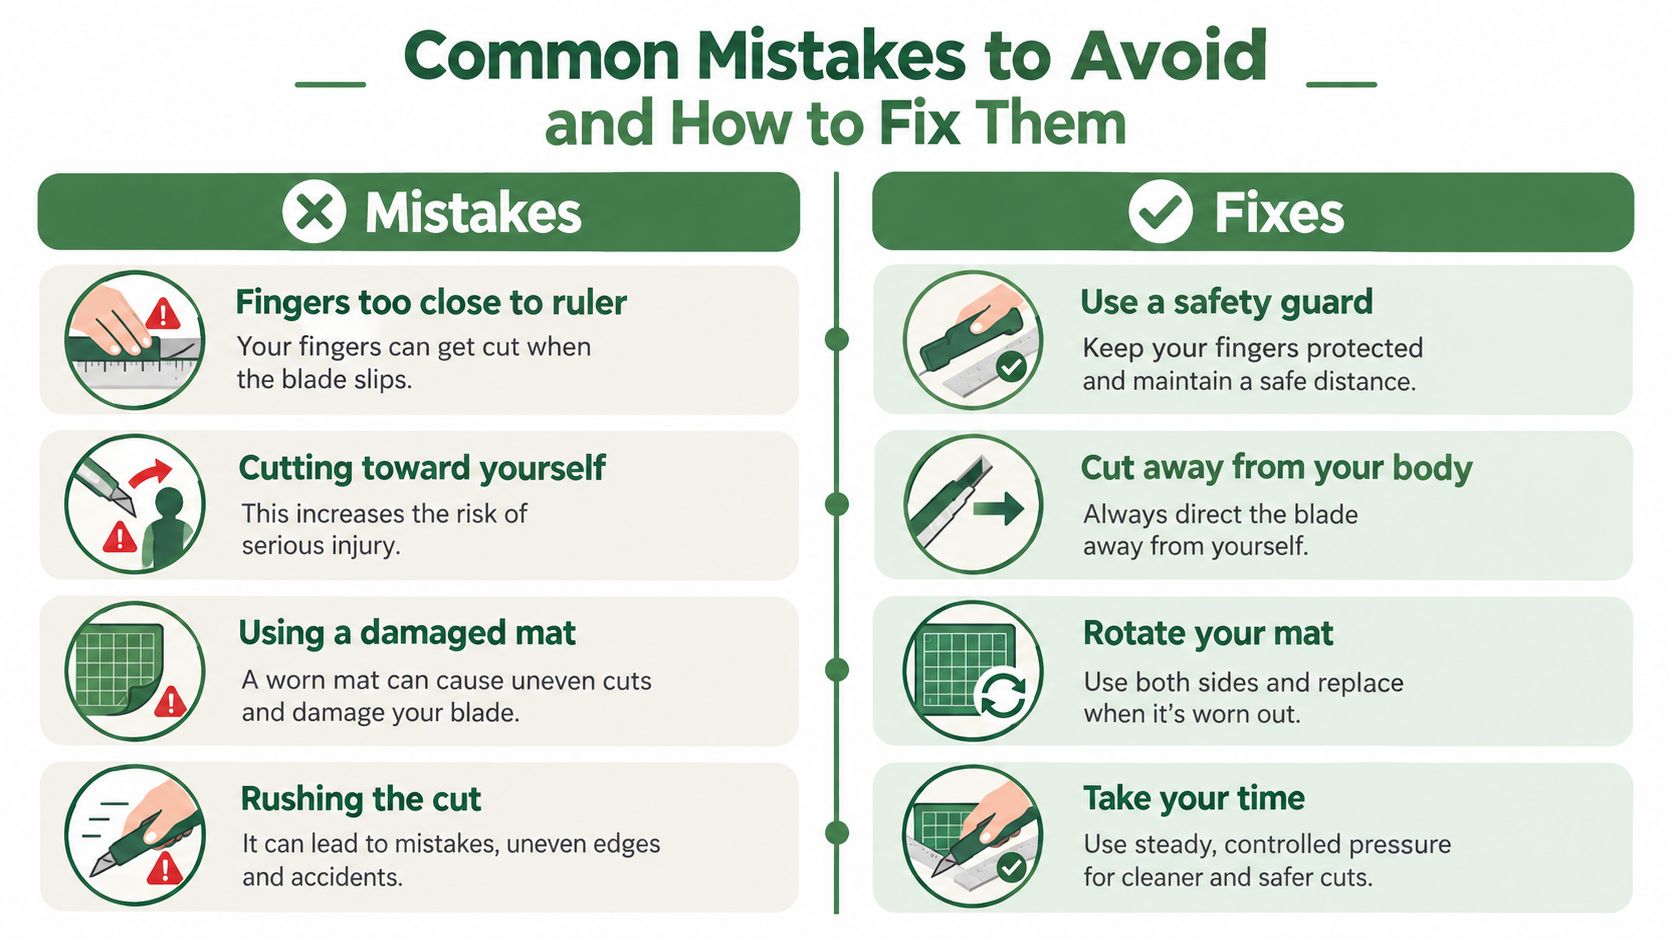
- Fingers too close to the ruler edge: Spread your hand across the ruler and keep fingers fully behind the cutting path.
- Cutting toward your body: Turn the work so the motion travels away from you. Never pull an active blade inward.
- Ruler slipping: Increase contact with the mat and fabric. Use a thick acrylic ruler, press down evenly, and check that the mat sits flat.
- Dull blade: Replace it promptly. A dull blade can demand more force, skip sections, or require repeated passes, making control worse.
- Wobbly surface: Move to a stable, flat table with a self-healing mat. Don't cut on your lap or an unstable surface.
- Uneven first edge: Square the edge before measuring strips. Later measurements depend on that reference.
A sharp blade isn't permission to rush. It lets you use controlled pressure instead of forcing the cutter through the fabric. Rotary blade replacement guidance notes that dull blades may skip, break, or require multiple passes, which can compromise both safety and accuracy.
I notice the same issue when trimming pieces for finishing. If the quilt blocks aren't square, adding Hobbs or Pellon batting won't correct the mismatch. Accurate cutting and block preparation come first, then batting and backing can support the finished quilt properly.
For a refresher on correcting block edges, use this guide to square up quilt blocks accurately. It's better to recut a small piece than to keep pushing a blade through a setup that's already unstable.
Keeping Your Cutter Safe Sharp and Ready for the Next Project
The blade guard should close immediately after every cut. Don't leave an open cutter on the table while you adjust fabric, answer a message, or reach for a ruler. Rotary cutter safety guidance emphasizes protecting the blade as soon as the tool is set down.
Use the cutter only on a self-healing mat placed on a stable, flat surface. Stable rotary cutting setup guidance warns against wobbly tables and laps because stability improves control and reduces slips.
Create a small maintenance routine:
- After each cut: Close or lock the blade guard.
- When the cut feels rough: Inspect the blade rather than adding pressure.
- When changing blades: Use the correct replacement size for your cutter and follow the manufacturer's handling directions.
- After the session: Store the locked cutter where children and pets can't reach it.
- During long preparation: Change position, relax your grip, and pause before fatigue changes your alignment.
A dull blade can look harmless because it doesn't feel as smooth, but extra force is exactly what you want to avoid. Replace it when it starts skipping or leaving uncut sections instead of trying to rescue the cut with repeated passes.
For a broader review of cutter types and safe handling habits, see rotary cutter guidance for quilting. Once your cutting routine feels steady, you can spend less time correcting edges and more time piecing modern solids, coordinated bundles, or a seasonal table runner.
QuiltKit.com offers ready-to-sew quilt kits, precut fabric rolls, rotary cutting tools, quilting rulers, Hobbs and Pellon batting, and wideback cottons up to 108 inches, including options for modern, seasonal, pixel, and collegiate projects. Sign up for Email Sign-up Savings, then visit quiltkit.com to choose a project that lets your safer, more accurate cutting habits lead directly to finished quilting.
People Also Ask
Can I use a rotary cutter without a mat?
No. Use a rotary cutter only on a self-healing cutting mat placed on a stable, flat surface. The mat protects the work surface and supports controlled cutting.
Which hand holds the ruler when using a rotary cutter?
Your non-cutting hand holds the ruler. Spread your fingers across the ruler, keep them away from its edge, and press down evenly so the ruler stays aligned.
Should I stand or sit while rotary cutting?
Standing can improve your control and sightlines, especially for long cuts. Sitting can work when your feet are supported and the mat is positioned so you aren't bending your wrist or reaching across the fabric.
How do I know when to replace a rotary cutter blade?
Replace the blade when it skips fabric, leaves uncut sections, requires extra force, or needs repeated passes. A dull blade can reduce control and create a greater safety risk.