


Log Cabin Quilt Block Pattern: A Complete Piecing Guide
You're at the cutting mat with two neat piles of strips, one light and one dark, and the center square waiting beside your ruler. The log cabin quilt block pattern looks almost too simple to fail, but the first seam decides whether those later rounds will sit square or slowly wander.
I've pieced enough log cabin blocks in a longarm studio to respect that small beginning. The pattern is forgiving, but it rewards accurate cutting, a dependable scant quarter-inch seam, consistent pressing, and a trim after every round. Once those habits are in place, you can scale the block, change the palette, and arrange the same units into traditional, barn-raising, or courthouse-steps layouts.
Why the Log Cabin Block Still Earns Its Place
At the sewing machine, a log cabin block grows from one small center square into a larger, orderly unit. Each fabric strip, or “log,” joins one side before you rotate the block and sew the next. Continue in a clockwise or counterclockwise direction, and the square expands without Y-seams or set-in pieces. That predictable sequence makes the log cabin quilt block pattern approachable for a first block while still giving experienced guild members room to control color, scale, and layout.
Its printed history reaches back to 1863, with archival examples dating to 1874. Popularity grew through the late nineteenth century, when county fairs created dedicated prize categories. The block remained widely used through the 1870s and 1880s, faded in the 1930s, and saw renewed interest in the 1970s. Its popularity also grew alongside reproduction fabrics discussed in this guide to Civil War fabrics. For a concise historical reference, see the history of the log cabin quilt block).
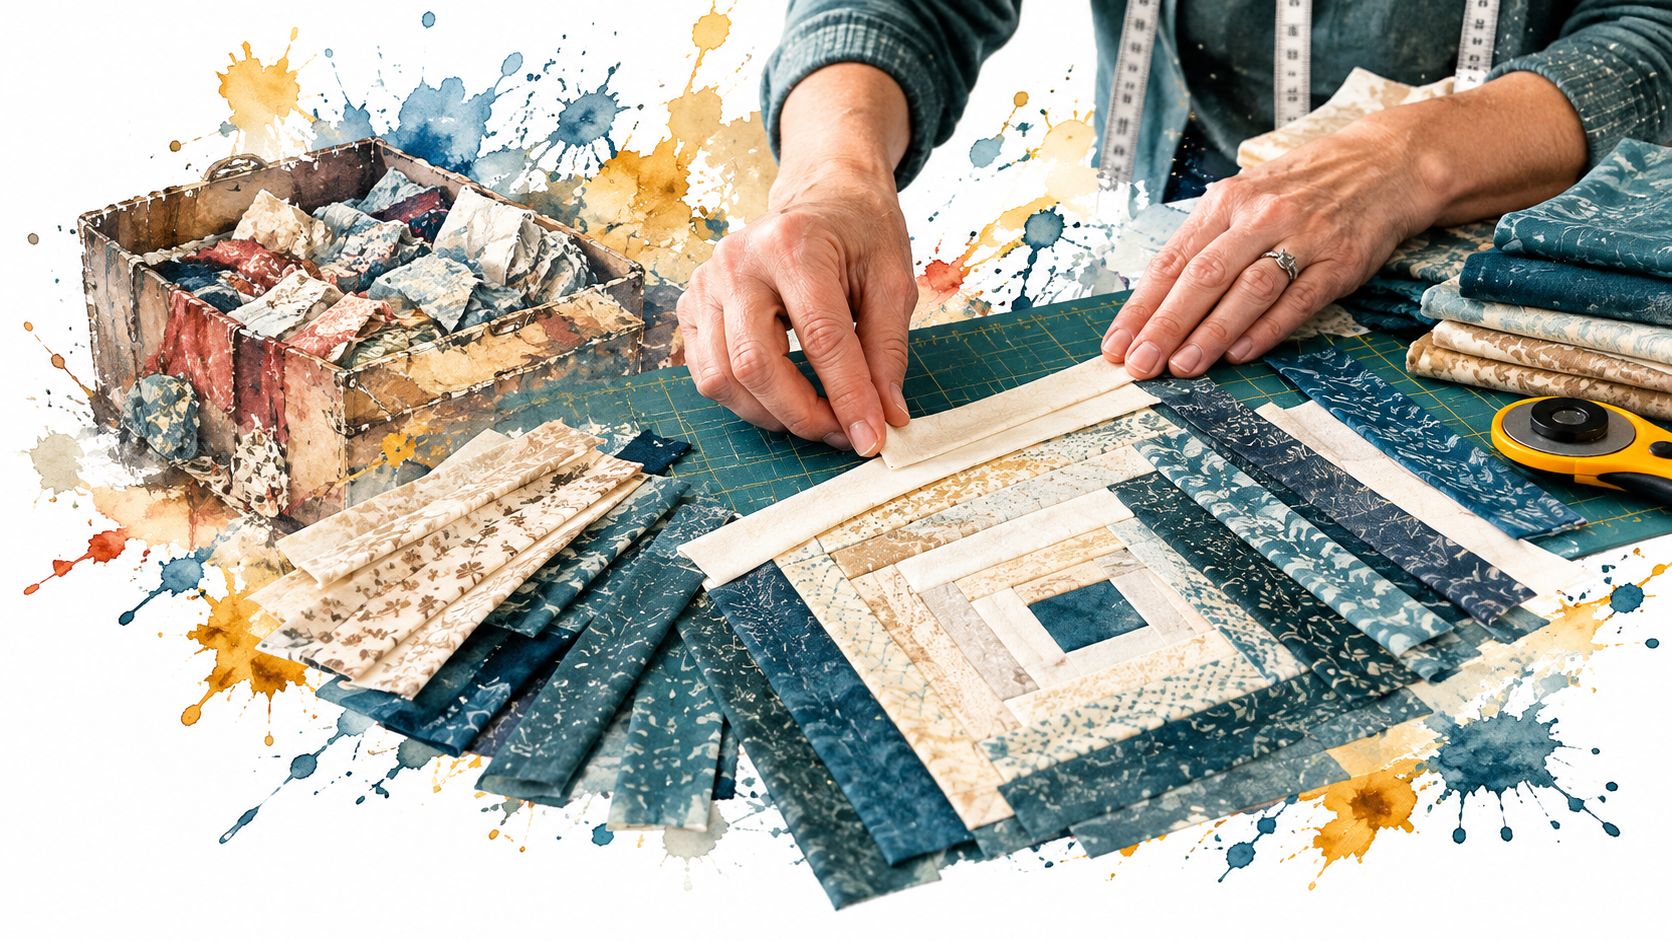
The geometry does the visual work
The center square anchors the eye. The logs spiral around it, while light and dark placement creates a diagonal that can suggest sunlight, shadow, warmth, or depth, even when the blocks use varied scraps.
That diagonal gives the block its visual pull. In a scrappy reproduction quilt, it may look aged and irregular. In a two-color quilt made with Kona Cotton solids, the same division becomes graphic and architectural. Improv blocks, narrow strips, and restrained palettes all use the same underlying construction.
The straight seams explain much of the block's staying power. You build outward with ordinary strip units rather than matching complicated center points. That simplicity has a limit. Every new log follows the edge created by the previous seam, so a small error can steer later rounds off square.
Studio rule: A log cabin forgives an unusual fabric choice more readily than it forgives a wandering seam allowance.
A straight setting can keep the finished quilt quiet, while a barn-raising arrangement makes the radiating structure more dramatic. Courthouse steps uses the same basic materials for a squarer, framed appearance. The scaling math, strip-cutting chart, and pressing sequence in the later sections let you apply this construction to finished blocks from 6 inches to queen-bed scale, with trimming keeping each round under control.
Choosing Fabric and Color Palettes That Pop
Light and dark aren't determined only by color names. They're determined by value, the relative lightness or darkness that remains visible when color disappears. For a practical starting point, treat light fabrics as value 1-4 and dark fabrics as value 6-9, using the value ranges shown in this fabric scale and proportion guide.
Make the light-dark contract clear
Place your center square beside both groups before cutting the full bundle. A red center may appear strong beside cream logs but disappear beside a deep burgundy. I've learned to photograph the proposed fabrics with my phone and convert the image to grayscale. If the two groups still separate clearly, the diagonal will survive across the quilt.
Quilting cotton is the dependable baseline for precision piecing. A fabric around 4 ounces per square yard is identified in the supplied project guidance as a reliable quilting weight, while heavier home-dec fabrics and flannel can distort narrow strips or feed unevenly. Look for a tight weave, minimal fraying, and enough body to hold a crisp fold without feeling stiff.
Pre-washing is a choice rather than a universal rule. Colorfast fabrics can be washed before cutting if you want to remove shrinkage early. Reds and other saturated dyes deserve a colorfastness test, especially when they'll sit beside pale cream or white. If you skip pre-washing, keep the same practice for the fabrics used throughout the quilt.
Choose a palette that supports the layout
Several approaches work well:
- Scrappy reproduction: Mix prints with related values so the historical character comes from variety rather than exact matching.
- Two-color modern: Pair a calm light group with a dark solid or near-solid for a clean diagonal.
- Tonal gradient: Move gradually from pale to deep within each side, taking care that adjacent logs still separate.
- Seasonal holiday: Use coordinated greens, reds, creams, or winter neutrals, but check the grayscale relationship before committing.
For cutting, 2.5-inch strips provide a repeatable rhythm and work naturally with many precut strip bundles. If you use jelly-roll precuts, square the ends before measuring strip lengths. With yardage, rotary-cut against a marked line and keep the strips stacked in their sewing order.
The center square carries more visual weight than its size suggests. Audition it against the light and dark piles, then make one test block before cutting every strip. QuiltKit carries coordinated fabric bundles and precut options, including Ruby Star Society fabrics for a modern palette, so you can keep the value relationship deliberate rather than sorting by color alone.
Cutting Charts and Strip Math for Any Finished Size
A block that finishes at 6 inches and one made for a queen-bed quilt follow the same arithmetic. Choose the finished center, the finished width of each log, and the number of rounds before cutting. Each round adds twice the finished log width to the square. With 2.5-inch cut strips and a 1/4-inch seam allowance, the logs finish at 2 inches, so each completed round adds 4 inches.
For example, a 3.5-inch center square, 2-inch-wide cut strips, and a 12.5-inch unfinished block produce a block that finishes at 12 inches, as shown in this published 12-inch log cabin block example. The center and strip width may change, but the relationship between them must remain consistent.
The scaling formula
Use this formula for a square block:
Finished size = finished center size + (2 × finished strip width × number of rounds)
Cut the center with seam allowance included. A center that finishes at a chosen measurement needs a cut square 1/2 inch larger. Thus, a center that finishes at 3 inches is cut at 3.5 inches. The supplied 12-inch finished block example uses that 3.5-inch cut center with 2-inch finished logs, reaching a 12.5-inch unfinished target.
Here is a self-contained chart using 2.5-inch cut strips and 2-inch finished logs. The center cut size determines how many 4-inch rounds are needed. Strip lengths are calculated for the side being covered, with 1 inch of extra length for trimming. Cut two strips of each listed length for each round if your design places one log on each side.
Log Cabin Block Cutting Chart by Finished Size
| Finished Size | Center Square (cut) | Rounds | Strip length by round |
|---|---|---|---|
| 6 inches | 2.5 inches | 1 | 3.5 inches |
| 8 inches | 2.5 inches | 1.5 | Use a different center or round plan |
| 10 inches | 2.5 inches | 2 | 3.5, 7.5 inches |
| 12 inches | 3.5 inches | 2 | 4.5, 8.5 inches |
| 14 inches | 2.5 inches | 3 | 3.5, 7.5, 11.5 inches |
| 16 inches | 2.5 inches | 3.5 | Use a different center or round plan |
| 18 inches | 2.5 inches | 4 | 3.5, 7.5, 11.5, 15.5 inches |
| 20 inches | 4.5 inches | 4 | 5.5, 9.5, 13.5, 17.5 inches |
| 22 inches | 2.5 inches | 5 | 3.5, 7.5, 11.5, 15.5, 19.5 inches |
| 24 inches | 4.5 inches | 5 | 5.5, 9.5, 13.5, 17.5, 21.5 inches |
Whole rounds keep the arithmetic straightforward. For an in-between finished size, change the center size or use a narrower finished log. A half-round plan requires adding logs in a controlled sequence, so test the unit before cutting a full batch.
The chart's strip lengths describe a practical starting cut, not a command to sew without checking. A log needs to extend beyond the current edge on both ends, much like a stair tread that overhangs before it is trimmed flush. Seam drift, fabric stretch, and a slightly generous cut can change the final measurement.
An 18-inch finished example follows a different plan. It uses a 5-inch center square, 2.75-inch-wide cut strips, and lengths of 5, 7.25, 9.5, 11.75, 14, 16.25, and 18.5 inches, according to this 18-inch log cabin pattern document. Use that example as its own cutting system rather than mixing its measurements with the 2.5-inch-strip chart.
Cut one test round first. Measure the unfinished unit, confirm that the center remains square, and adjust your notes if the growth differs from the formula. Once the block dimensions are reliable, use this fabric yardage calculation guide to estimate fabric for the larger quilt.
Piecing Rounds, Pressing Direction, and Trimming
Set the center square in front of you and mark the first sewing side with a removable pencil or a small fabric clip. The order matters more than whether you rotate clockwise or counterclockwise. Once you choose a direction, keep it for every block in the batch.
Build the rounds in a repeatable rhythm
- Sew the first light log to one side of the center, using a scant 1/4-inch seam allowance. Add the first dark log to the adjacent side, then continue around the center in the selected direction.
- Press the seam outward after each addition. Pressing toward the darker log can emphasize the value division and give the seam a stable ridge, though pressing open is also workable if you use that choice consistently.
- Add the next round in the same rotation. Place the strip right sides together, stitch, open the unit, and check that the new edge extends evenly beyond the previous square.
- Chain-piece only after the seam allowance has been tested. Feed multiple blocks through the machine without cutting the thread between units, then separate and press the batch together.
- Trim the completed round flush with the block. Keep the ruler centered over the center square, and confirm that the target measurement appears on every side before cutting.
- Continue outward until the planned finished size is reached. For a large block, each added round increases the square by twice the finished strip width. One tutorial demonstrates intermediate block sizes of 6.5 inches, 10.5 inches, and 14.5 inches after 1, 2, and 3 log rounds, respectively, in this large-block geometry tutorial.
A wooden pressing stick helps when you're finger-pressing a fresh seam before taking the unit to the iron. It supports the fabric without dragging it, which matters when a cut edge has a slight bias tendency. Use a dry iron or minimal steam if steam makes your strips stretch.
The most useful trimming habit is to treat every round as a checkpoint. If the block has become rectangular, don't assume the next log will correct it. A quilt block squaring guide shows the same principle used across pieced blocks, keep the ruler aligned with the center and trim only what the target measurement allows.
Pressing check: Press every round in the same direction, or press seams open throughout. Inconsistent choices can create bulky intersections and make later nesting less predictable.
Use nested seams when joining completed blocks or adding sashing. Press adjoining seam allowances in opposite directions, align the seam ridges with your fingers, pin on both sides of the intersection, and stitch slowly. The center of the block is forgiving. Repeated outer intersections are where small inaccuracies become visible.
The video below provides a visual reference for the rotation and pressing rhythm.
Traditional, Barn-Raising, and Courthouse-Steps Layouts
A log cabin quilt can change completely on the design wall. Rotate the same pieced blocks, and the light and dark logs begin directing the eye in new ways. Before sewing rows, lay out every block with both value groups visible. Photograph the arrangement, then use that image as your orientation map at the machine.
Log Cabin Layout Comparison
| Layout | Visual Effect | Min. Blocks | Best Quilt Size |
|---|---|---|---|
| Traditional | Repeating diagonal movement with a steady directional texture | 9 blocks (3x3) | Small wall quilts through larger bed quilts |
| Barn-raising | Light and dark areas radiate outward in a roof-like arrangement | 16 blocks (4x4) | Larger square or rectangular compositions |
| Courthouse-steps | Concentric squares and framed centers, created by rotating the construction rhythm | 4 blocks | Small wall quilts, table projects, and structured modern quilts |
The traditional straight layout keeps each block's light-dark diagonal pointing in the same direction. It is the simplest arrangement to assemble because one orientation rule repeats across the rows. Fabrics with similar values create a quiet, woven texture, while stronger contrast makes the diagonal movement easier to read.
Barn-raising requires a more deliberate layout. Turn blocks so matching light or dark sections gather into radiating bands, much like roof lines spreading from a central peak. A 4x4 arrangement gives the pattern enough room to show its structure, while larger quilts let the eye follow the broad configuration instead of isolated blocks.
Courthouse-steps blocks use a different visual rhythm. Strips are added in opposite-side pairs, producing squares within squares rather than a continuous spiral. Keep the values balanced for a symmetrical center, or rotate finished units to introduce a secondary pattern.
Choose the layout according to the project's scale and mood. Traditional placement gives a table runner immediate direction. Courthouse-steps suits compact projects and crisp, modern fabrics. Barn-raising benefits from the broader field of a larger quilt, where its radiating bands have room to develop. A two-color palette can make any of the three arrangements look sharply graphic, so the layout and value contrast should be planned together.
Troubleshooting Wavy Seams and Drifting Logs
Most log cabin problems come from a small error repeated around the square. The block may look acceptable after the first seam, then show a wave, a lean, or a mismatched corner after several additions.
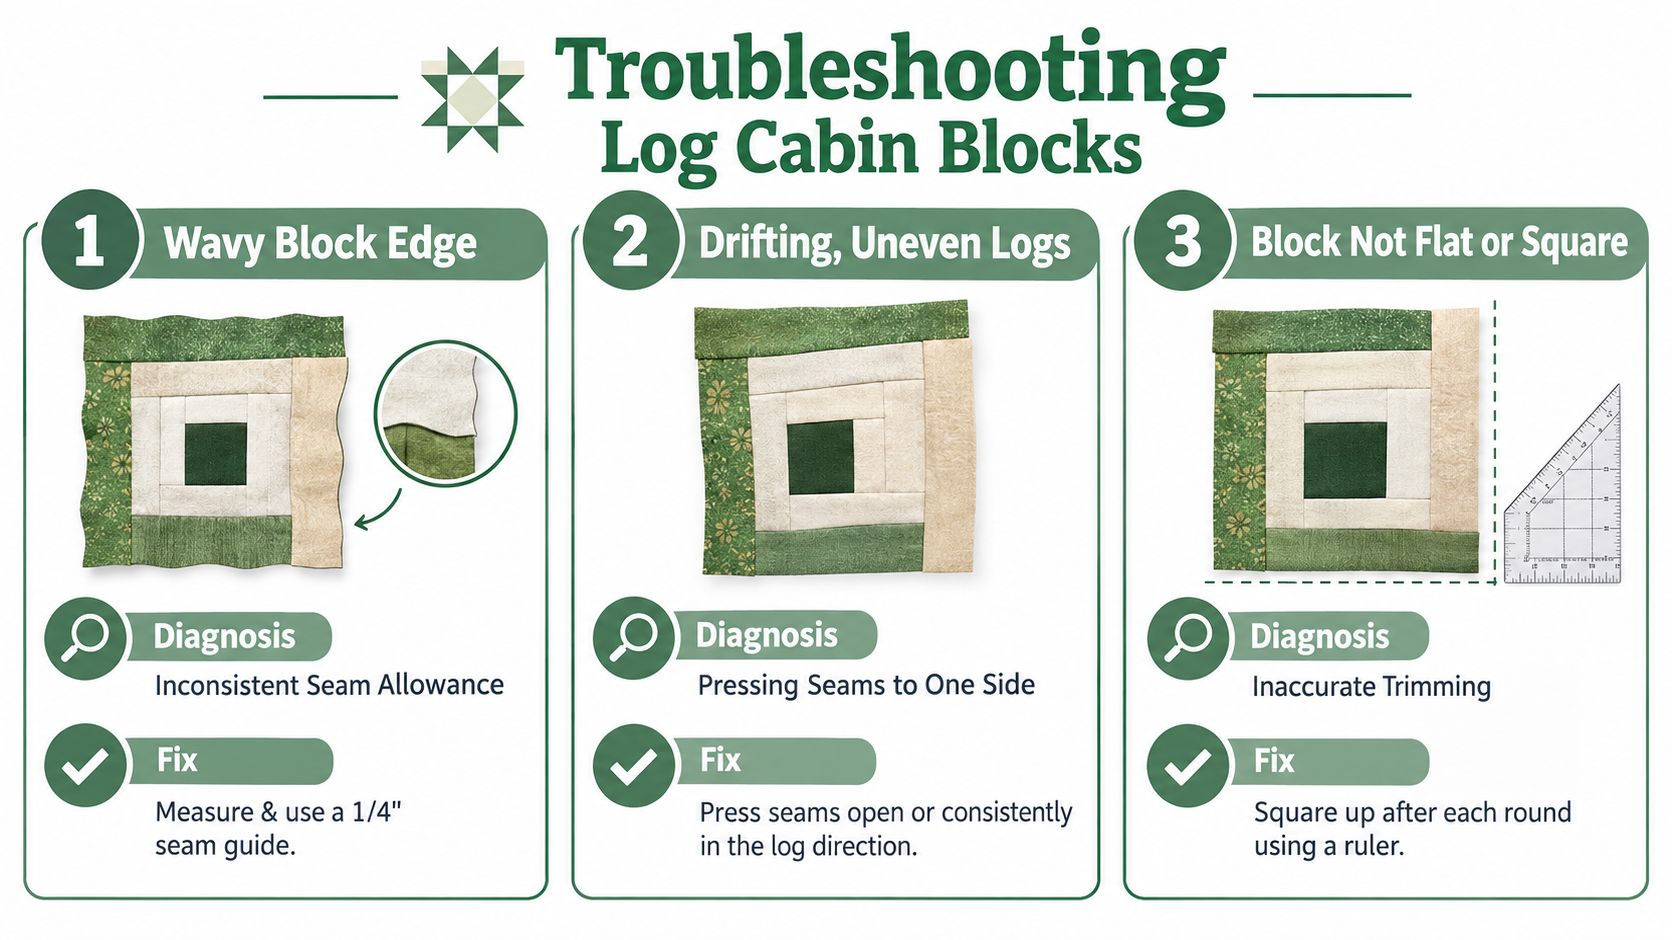
Three failures have three direct fixes
- Wavy block edges: An allowance that's too loose or too tight changes the finished width of every log. Sew a tester strip, measure a true 1/4-inch seam, and recalibrate your machine or seam guide before continuing.
- Drifting rounds: Strips with inconsistent widths make one side grow faster than another. Rotary-cut each strip against a marked line with a fresh blade instead of estimating from the ruler edge.
- Mismatched corners: Skipping the trim after each round leaves uneven edges for the next seam. Square the block to its target dimension before adding another log or joining it to a neighbor.
The supplied technical guidance specifically warns that log cabin blocks are sensitive to seam drift and recommends checking size after each seam or round. A few practice blocks can confirm machine accuracy before you cut and chain-piece a larger batch.
Before assembly, check the following:
- Seam allowance: The tester seam measures consistently across the strip.
- Strip width: The cutting stack has straight, even edges.
- Pressing: Every seam follows the chosen direction or is pressed open.
- Round size: The block is square at the current checkpoint.
- Orientation: Light and dark sides face the intended direction on the design wall.
If one block is slightly off, don't force it into the next seam. Trim what you can, mark the altered size, and keep neighboring blocks consistent. A controlled adjustment is easier to manage than stretching a block into submission.
Batting, Quilting Lines, and Finishing Touches
A low-loft cotton or 80/20 batting lets the strong diagonal structure remain visible without making the quilt feel overly raised. Hobbs, Pellon, and The Warm Company are familiar batting names to compare when you need different loft, drape, or stitch definition.
For the quilting design, reinforce the geometry instead of competing with it. Straight-line quilting 1/4 inch from each seam gives a crisp modern finish, while gentle curves soften the rigid square structure. Matchstick crosshatching adds texture, but it requires careful basting and even feeding.
Use a walking foot for straight lines and set the machine to a 2.5 mm stitch length. Baste with spray or pins placed every 4 inches, then check the quilt on a flat surface before quilting so the top, batting, and backing lie square.
Finish the edges cleanly
Trim the quilt after quilting, keeping the edges straight and the corners square. A double-fold binding cut on the grain gives a firm edge and produces clean miters when you ease the binding around each corner.
For larger projects, a wideback can eliminate unnecessary seams on the backing. QuiltKit offers wideback cottons up to 108 inches, along with batting, precut bundles, thread, tools, and ready-to-sew formats. You can review the general quilt finishing process before choosing a backing and binding plan.
A Creative Grids Log Cabin Trim Tool can also make repeated trimming more controlled, especially when you're producing a batch of identical blocks. QuiltKit carries log cabin trim tools in multiple sizes, including options for smaller and larger blocks, as well as specialized tools for curvy, wonky, and skinny curvy variations.
Ready to cut your first accurate round? Visit quiltkit.com to compare coordinated precuts, Ruby Star Society and Kona Cotton fabrics, batting, widebacks, thread bundles, and log cabin-friendly rulers. If you're not ready to order, join the email list for Email Sign-up Savings and keep your next block planned before you return to the cutting mat.