


Blade Sharpener for Rotary Cutter: Safe Sharpening Guide
You're halfway through a stack of strips when the cutter starts to drag. You press harder, the ruler shifts a fraction, and the edge comes out ragged instead of clean. A blade sharpener for rotary cutter maintenance can help in that moment, but only after you know whether the blade is dull, dirty, damaged, or fighting a worn mat.
Start With the Cutting Problem
Most cutting trouble announces itself through feel before it shows on the fabric. You lean on the handle, make a second pass, or notice skipped fibers along a line that should've severed in one smooth roll. Beginners often blame their hands first, especially when working through layered precuts for a table runner or a ready to sew kit.
Start here: Before you sharpen anything, clean lint from around the blade, inspect the edge under direct light, and test on scrap fabric. A blade that's uniformly dull may respond to honing. A blade with nicks, rust, cracks, or distortion needs replacement, not more abrasion.
That short pause matters because several different problems feel identical at the handle. Adhesive residue can make a sound edge drag. A compressed channel in your mat can steer the blade sideways. Too many fabric layers can overwhelm a blade that still cuts two layers cleanly.

What a Sharpener Can and Cannot Do
Treat a sharpener as a precision maintenance accessory, not a repair shop. It can refine a sound, evenly worn edge so you don't need excessive pressure. It can't rebuild missing steel, straighten a warped disc, or make a cracked blade safe again.
When I check a cutter that's suddenly misbehaving, I look at the blade, the mat, and the last fabric I cut before I reach for any abrasive. That habit saves good blades from unnecessary grinding and stops damaged ones from ruining good fabric. QuiltKit groups the basics you'll use together, so you can browse essential quilting tools and precision finishing supplies alongside the cutters, mats, and notions that affect every cut.
The calm rule is simple. Clean, inspect, test. Sharpening comes fourth, and only when the first three checks point to plain, uniform dullness.
Know the Blade and the Sharpening System
A rotary cutter has four parts you need to recognize before you touch a sharpener. The circular blade does the cutting, the guard covers the edge when it's retracted, the handle gives you grip and control, and the thin beveled perimeter itself is the active part of the disc. If you can't name which part you're holding, stop and reread your cutter's instructions.
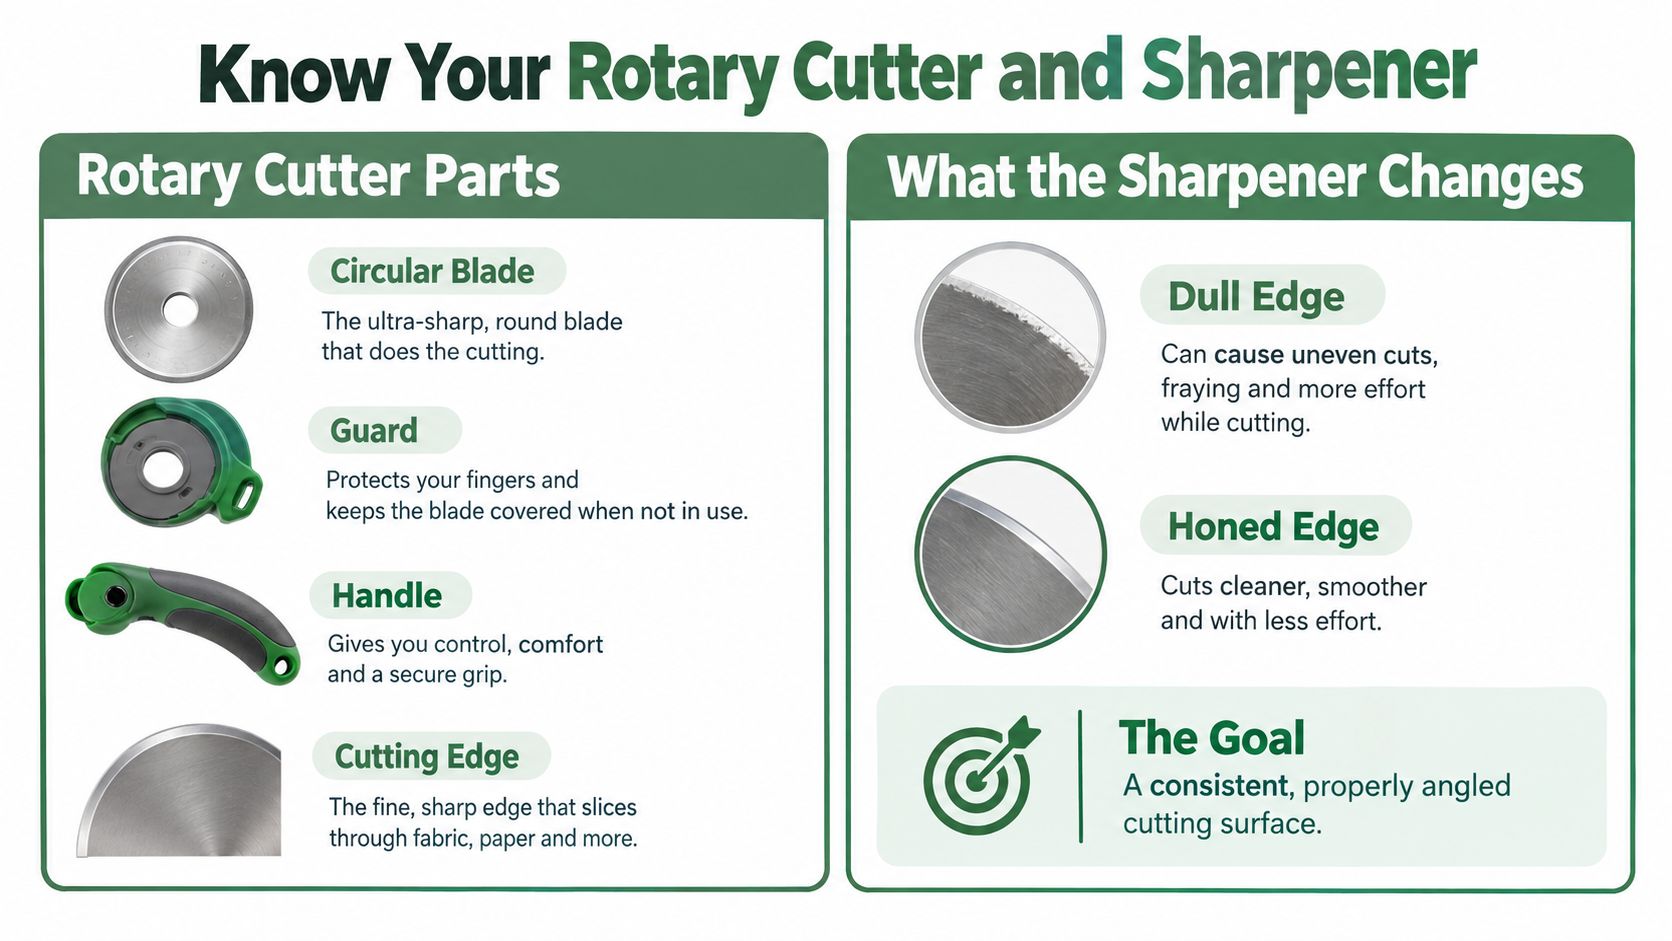
A sharpener doesn't polish the whole blade. It works only on that beveled perimeter, removing a small amount of steel to restore a consistent, properly aligned edge. Shiny metal isn't the goal. A blade can look bright and still cut poorly if the bevel is uneven or a rough burr remains on one side.
Two Ways Sharpeners Control the Edge
A guided system holds the blade or guides the cutter along a track, so alignment stays repeatable from pass to pass. A manual abrasive method puts that control in your hands, which means you must hold one angle on a flat, stable surface without rocking. Both approaches depend on the manufacturer's instructions for your specific blade size and material.
| Method | Best fit | Main control | Watch for |
|---|---|---|---|
| Guided sharpener | Uniformly dull, sound blade | Fixed track and alignment | Wrong blade diameter for the guide |
| Manual abrasive | Experienced hands, light dullness | Angle and stroke count | Rocking that changes the bevel |
| Replacement first | Nicked, cracked, or rusty blade | New, undamaged edge | Incorrect seating in the housing |
Blade material and edge geometry vary more than most packaging explains. Industrial research on materials such as tungsten carbide shows performance depends on composition, grain size, and included edge angle, as outlined in Cadence's overview of tungsten carbide blade material. That doesn't mean your quilting blade is carbide, and you shouldn't assume an industrial method suits it. Check what your blade is made of first, then follow the permitted method for that blade. If you're still learning the tool itself, QuiltKit's guide to rotary cutters covers cutter types and handling in plain language.
Never improvise a holder, and never force a blade into a sharpener that doesn't match its diameter. A purpose built guide, a sound blade, and a replacement blade on hand are the three things that keep this job controlled.
Choose a Sharpener That Fits the Cutter
A rotary cutter that snags on cotton may need sharpening, but a poorly matched sharpener can make its edge less consistent. Check the blade's condition and compatibility first. A suitable sharpener must match your blade diameter, hold the blade without wobble, and work with its material. If the product page does not specify compatible sizes, do not guess.
Checks to Make Before You Buy
- Blade diameter and fit: Confirm that the sharpener accepts your blade size. The blade should sit flat and turn without tilting or binding.
- Material compatibility: Check that the abrasive suits the blade material, and follow the maker's directions on wet or dry use.
- Coarse and fine stages: A two-stage system can address dullness and then refine the edge. A single fine surface is better suited to light maintenance.
- Guide stability: A track or holder can help keep the blade aligned. Consistent alignment matters more than added pressure.
Guided systems can make angle control easier for beginners because the guide holds the blade in position. Manual abrasive sharpening gives experienced quilters more control, but small angle changes can create uneven contact around the circular edge. Choose replacement instead when the blade is damaged, rather than dull.
Treat claims that a sharpener makes a blade like new with caution. There is no reliable independent dataset establishing a fixed level of restored performance for these tools. Judge the result by what you can observe: whether the sharpener contacts the blade evenly, whether the cutter turns smoothly afterward, and whether the edge looks consistent under light.
For experienced users, abrasive aggressiveness is a practical trade-off. A coarse surface removes steel faster, which may help with a very dull edge, but lingering can leave an uneven bevel or burr. Heavy pressure can also create heat. A blade may feel sharp to the touch yet cut inconsistently through layered cotton. Fine stages can refine a rough edge, but they cannot repair deep damage.
Choose a sharpener that fits the blade, its material, and your experience. A more aggressive tool is not a better match by default.
QuiltKit's rotary cutter guidance lists the Omnigrid dual rotary blade sharpener as an option for compatible blades. Confirm your blade diameter on the product page before ordering. Stable measuring tools also matter: a sharp blade still needs a true edge to follow. Review quilting templates and rulers for accurate cutting as you check your setup, then verify the sharpener's fit and instructions for your specific blade.
Sharpen the Blade in a Controlled Workflow
Alignment matters more than force at every point in this process. Work on a clear, stable surface with good light, and keep scrap fabric within reach for testing. Even a blade that feels dull can cut skin, so handle it only through its center opening or blunt areas, never by pinching the perimeter.
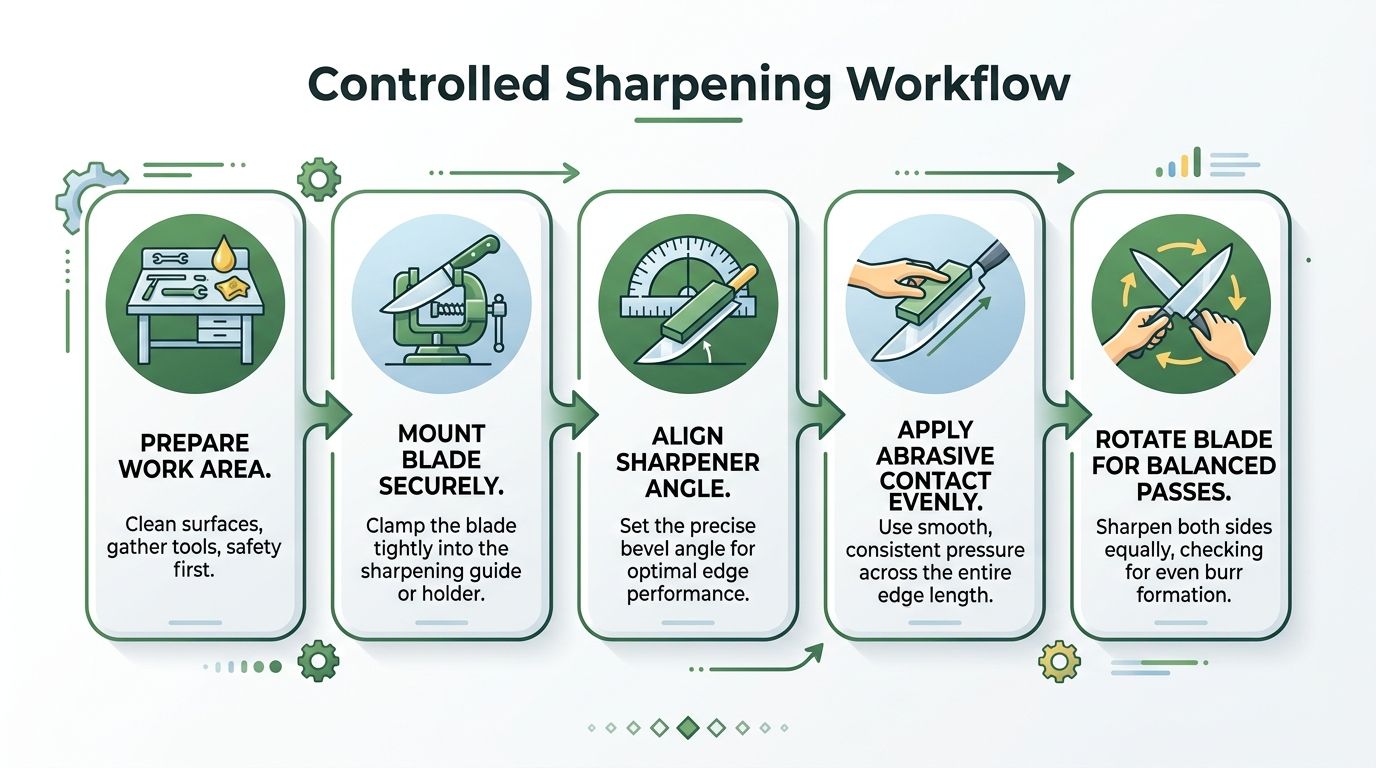
The Sharpening Sequence
- Lock and clear: Lock or retract the cutter, remove lint and residue from around the blade, and inspect the edge under strong light before you start.
- Mount securely: Seat the blade in the purpose built sharpener so it sits flat and turns freely without wobble.
- Align vertically: Keep the blade at approximately 90° throughout the stroke, as described in Linda's guidance on sharpening rotary cutter blades, and approach a guided track at roughly 45° where the maker specifies that angle.
- Start at one end: Begin at the end of the track rather than the center, and roll so the blade visibly rotates through the pass.
- Make balanced passes: Use approximately 20 back and forth passes initially with light, even pressure.
- Turn and repeat: Turn the sharpener 180° and work the opposite side, then reduce later passes by about half so you don't remove excess steel.
- Clean and test: Wipe away all abrasive residue, reassemble carefully, and test on scrap fabric before touching project yardage.
Larger 60 mm blades may need a smaller approach angle so the lower edge contacts the abrasive correctly. Follow your sharpener's own angle guidance rather than treating any single number as universal. If the blade isn't visibly rotating during a pass, you're grinding one spot instead of honing the full circle.
Pressure, Burrs, and Manual Abrasives
Forcing the blade can damage the abrasive, create an uneven bevel, or raise a wire edge that folds over on first contact with fabric. Light pressure feels slow, but it's what keeps material removal even around the full perimeter. If you need to push hard to feel contact, the fit or angle is wrong.
Manual methods demand the same discipline. One informal home method specifies 400 to 600 grit abrasive at about a 20° blade angle, with roughly 15 heel to tip passes per side, as set out in Mrs. Quilty's home sharpening instructions. Count strokes symmetrically, because unequal treatment shifts the edge and makes the cutter pull sideways. Where your device offers coarse and fine surfaces, use the coarse stage only long enough to address dullness or minor nicks, then refine on the fine stage to remove the rough burr.
When I finish a sharpening session, I hold the blade under strong light before reassembly. Shiny flat spots, chips, or an edge that still feels rough after balanced passes tell me to stop and replace it. If your basic cutting technique needs a refresher first, review how to use a rotary cutter safely and accurately before you test the refreshed edge.
Test the Edge Before Returning to Fabric
A sharpened blade earns its place back in the cutter on scrap fabric, not on your project. Use offcuts that match what you'll cut, including the same number of layers. One clean pass through a single layer proves very little if your next job is four layers of quilting cotton.
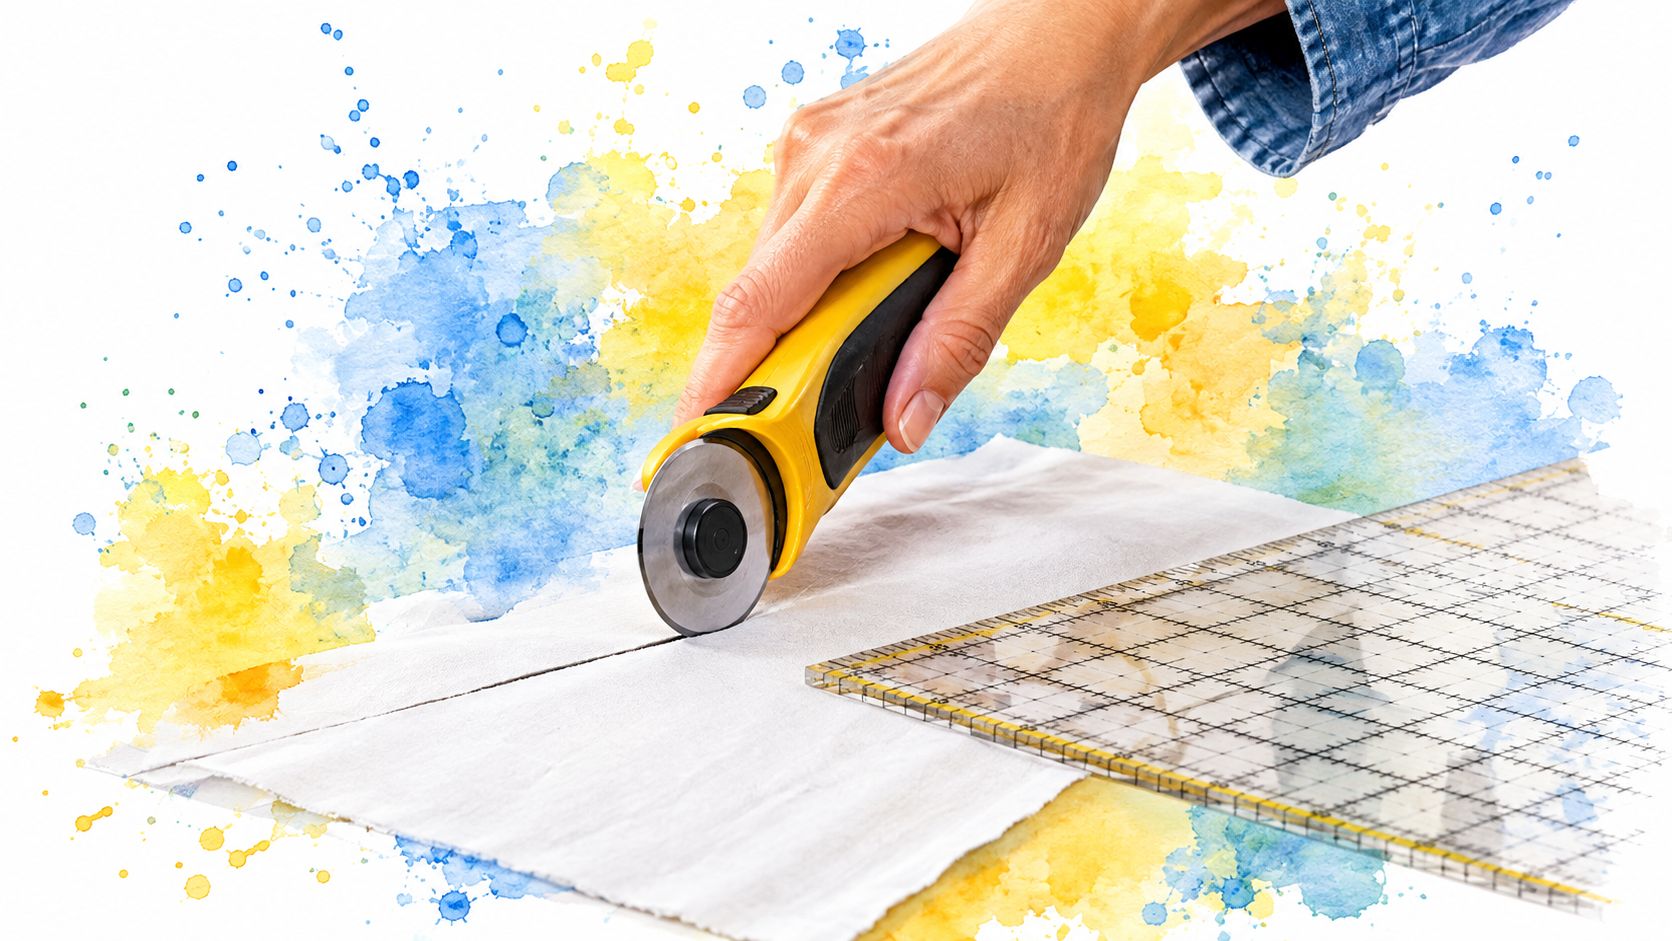
Check four things on that test cut. The cutter should start without dragging, track a straight line against the ruler, sever every layer cleanly, and leave an edge free of skipped fibers. Smooth cutting without dragging is your practical pass or fail line. When I test a freshly sharpened blade, I check both the first pass and the straightness of the second, because a burr often hides until the blade rolls through a full rotation.
When the Test Points Somewhere Else
Consider a beginner trimming layered precuts who sharpens twice and still gets ragged edges. The blade tests cleanly on a fresh area of mat but stumbles in the same old groove. That pattern indicts a compressed mat channel, not the edge, and more sharpening would only thin a sound blade. Blade seating causes a similar false alarm when the disc sits slightly off center and wobbles.
The short demonstration below shows what smooth, controlled cutting contact looks like in practice.
Inspect the edge itself under direct light as part of the same test. Shiny flat spots signal areas the abrasive didn't restore. Cracks, deep chips, corrosion, and an uneven perimeter signal structural damage that no amount of honing fixes. Retire those blades rather than grinding them thinner.
Decide Between Sharpening and Replacement
Dull is a symptom, not a diagnosis. Increased cutting pressure, jagged cuts, visible nicks, cracks, rust, or a distorted edge should trigger inspection rather than automatic sharpening, a distinction drawn clearly in this condition based look at rotary cutter blade sharpeners. Work through the decision in order and stop at the first clear answer.
A Condition Based Decision Path
- Clean first: Remove lint and adhesive residue, then retest. Residue alone can mimic dullness.
- Inspect under light: Look for nicks, cracks, rust, flat spots, and distortion around the full perimeter.
- Test on scrap: Cut your usual layer count on a fresh mat area to rule out mat channels and seating problems.
- Sharpen only uniform dullness: Proceed when the blade is structurally sound, seats correctly, and rotates smoothly.
- Replace structural damage: Retire any blade with cracks, deep chips, corrosion, or poor fit in the housing.
There's a real trade off hiding in repeated sharpening. Each session removes a small amount of steel, and that reduction can eventually affect how far the blade extends through the guard or cause it to drag against the housing. The lowest cost per use choice isn't always the safest or most economical one once fit and alignment suffer.
Keeping spares on hand removes the temptation to nurse a damaged blade through one more project. If your inspection ends in replacement, stock up on 45mm replacement rotary blades so the next swap takes minutes. A fresh blade also gives you a clean benchmark for judging whether your sharpening worked.
Maintain Cutting Tools Between Projects
A cutter that works cleanly at the end of one project can drag on the next if lint, adhesive, or a loose blade goes unchecked. Clear lint from around the blade after each session, store the cutter with the blade retracted or guarded, and check that it fits securely before starting again. These habits help distinguish routine upkeep from a dull edge that may need sharpening or replacement.
Keep the mat in good condition, too. Shift your cutting lines to spread wear, remove adhesive buildup, and check for compressed channels that can pull the blade off course. If your cutting surface may not suit your usual projects, compare cutting mat sizes for your workspace before treating wandering cuts as a blade problem.
Match the Interval to Your Work
There is no universal replacement schedule. Blade wear depends on fabric weave and sizing, cutting volume, mat condition, and how often you sew. A quilter cutting dense, heavily sized cotton yardage every week may need to check the edge more often than someone who trims an occasional precut. The fabric's properties and workload matter more than its brand.
Before cutting strips for a batch of table runners, test the blade on scrap using the same layer count planned for the project. That quick check reveals whether the edge cuts consistently and whether your pressure is steady, while the good fabric is still folded. Test again before trimming a finished top over batting from Hobbs, Pellon, or The Warm Company. At that stage, an uneven cut is harder to correct.
Sharpening tools have a longer history than quilting cutters. Albert J. Dremel founded his company in 1932 after inventing an electric razor blade sharpener. The company has reported more than 17 million rotary tools in use, according to Woodworker's Journal history of Dremel rotary tools. That history supports routine tool maintenance, but it does not guarantee that a fabric blade can be restored. Rotary cutter blades differ from razor blades in geometry and hardness, so check compatibility and condition before sharpening.
Safety still matters at the cutting table. The LSU AgCenter on rotary cutter hazards discusses much larger machines, but the basic caution applies: a damaged or uneven edge can encourage extra pressure and repeated passes. Those habits increase the chance of a slip and strain on your hand.
Your Recap and Next Session
Keep the maintenance decision simple: clean, inspect, test, sharpen only a sound and uniformly dull blade, verify on scrap, and replace anything structurally damaged or poorly fitting. Use light pressure, keep the blade aligned, and lock it during handling.
For your next project, QuiltKit carries quilting tools, irons, sewing notions, and project supplies. You can also join the Email Sign-up Savings list for savings on a future precut bundle, table runner kit, or replacement blade order.
Before cutting, test the edge on scrap. If it still needs extra pressure or leaves an uneven cut after cleaning and checking the mat, decide whether the blade is fit to sharpen or due for replacement.