


Fusible Batting Tape: What It Is and How to Use It
You've finished a quilt top, opened the batting cupboard, and found that the piece you saved is just short of the length you need. The scrap bag is full of useful-looking offcuts, but overlapping them would leave a ridge, and throwing them away feels wasteful. Fusible batting tape gives those pieces another practical use by joining batting scraps into a larger, workable section.
The important part is choosing the tape and method as carefully as you choose batting loft, fiber content, and backing fabric. A low-profile cotton join behaves differently from a lofty polyester seam, and a small mug rug has different needs from a large quilt prepared for a longarm.
What Fusible Batting Tape Actually Does
Fusible batting tape is a purpose-built quilting notion for joining separate pieces of batting. It's a narrow, heat-activated strip placed over a seam, where an iron activates the adhesive and bonds the batting together. Product descriptions commonly list a 1.5-inch-wide tape on a 15-yard roll, with a smooth finish designed not to shift, bunch, stretch, or separate after activation (batting adhesive and fusible tape options).
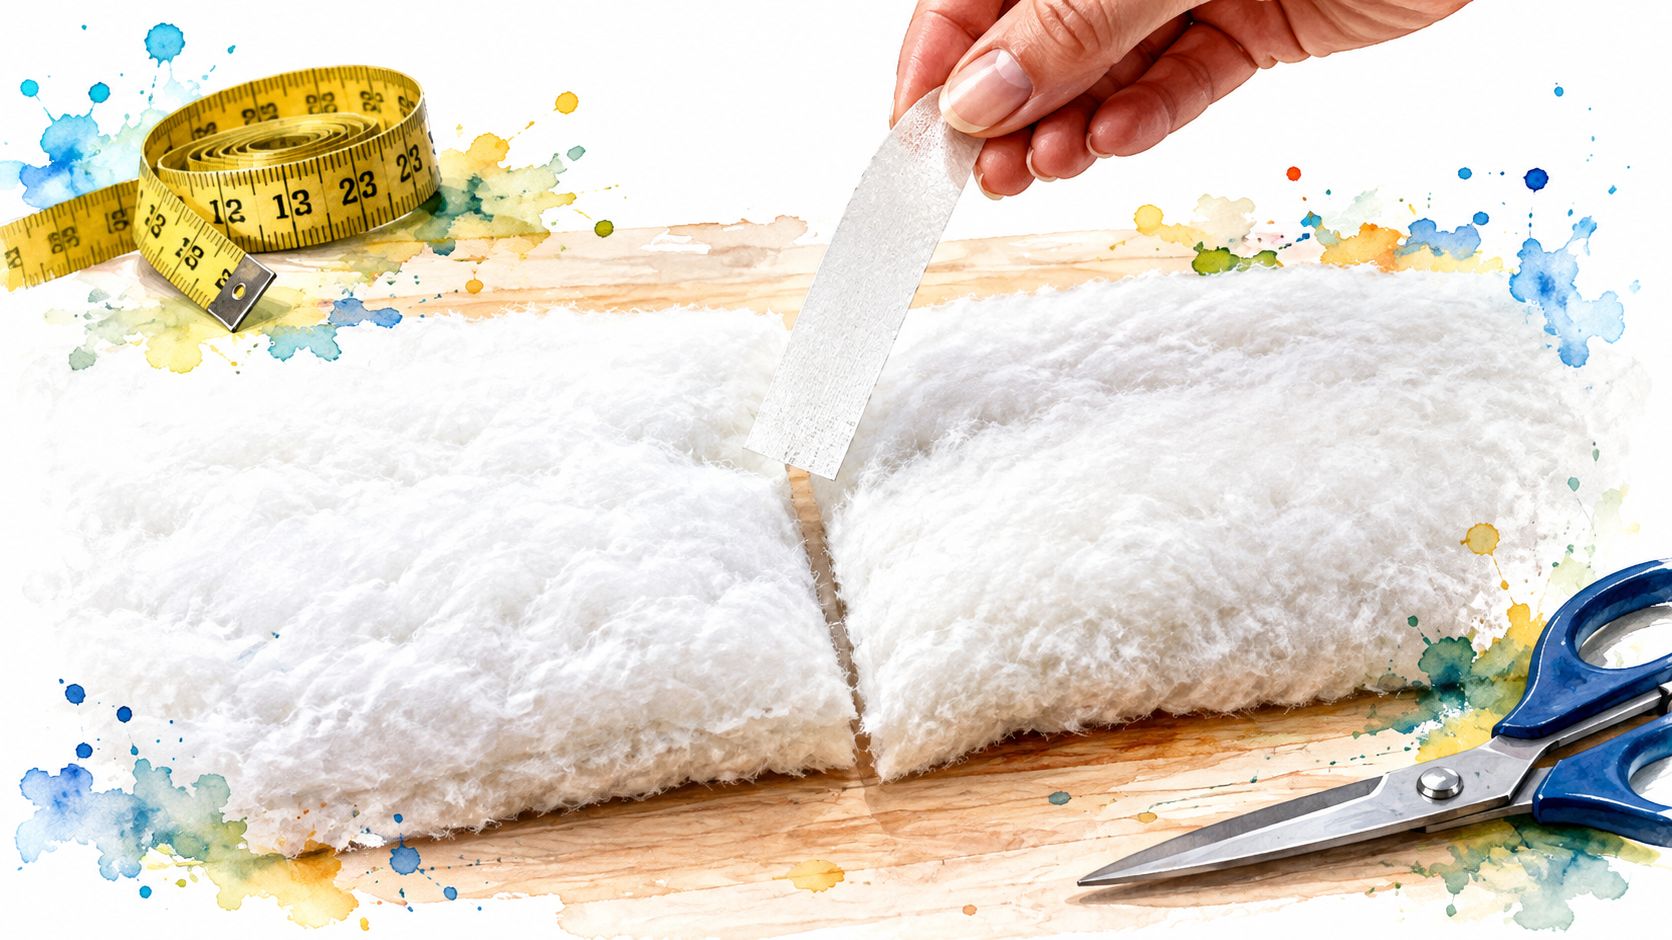
The usual method is a butted seam. You trim two batting edges cleanly, place them edge to edge without a bulky overlap, position the tape across the join, and apply heat. The tape bonds the batting fibers, not the quilt fabric, so it belongs in the batting layer before the quilt sandwich is quilted.
Why the edge matters
I've learned to spend more time trimming than pressing. Ragged edges leave gaps beneath the tape, while overlapping edges create the lump quilters are trying to avoid. Guidance on fusible batting tape recommends bringing the cut edges together and adding stitching over a heavily handled join when extra stability is needed (guidance on joining batting scraps).
That makes this tape a workflow choice, not a magic replacement for every basting method. It can help combine leftovers into a larger sheet for a bed-size or longarm quilt, secure a small repair, or hold an edge flat before quilting. It doesn't replace pins, spray basting, or a machine zigzag when the batting's surface, loft, or scrim won't accept the adhesive.
For a beginner, think of it as a quiet bridge between pieces. For an experienced quilter, think about how the seam will behave under the needle, in the hoop, and during washing. The same decision matters whether you're using cotton batting from Hobbs, a polyester blend, or a fusible product from Pellon.
For a broader look at handling batting before quilting, see these fusible batting instructions.
How to Apply Fusible Batting Tape Step by Step
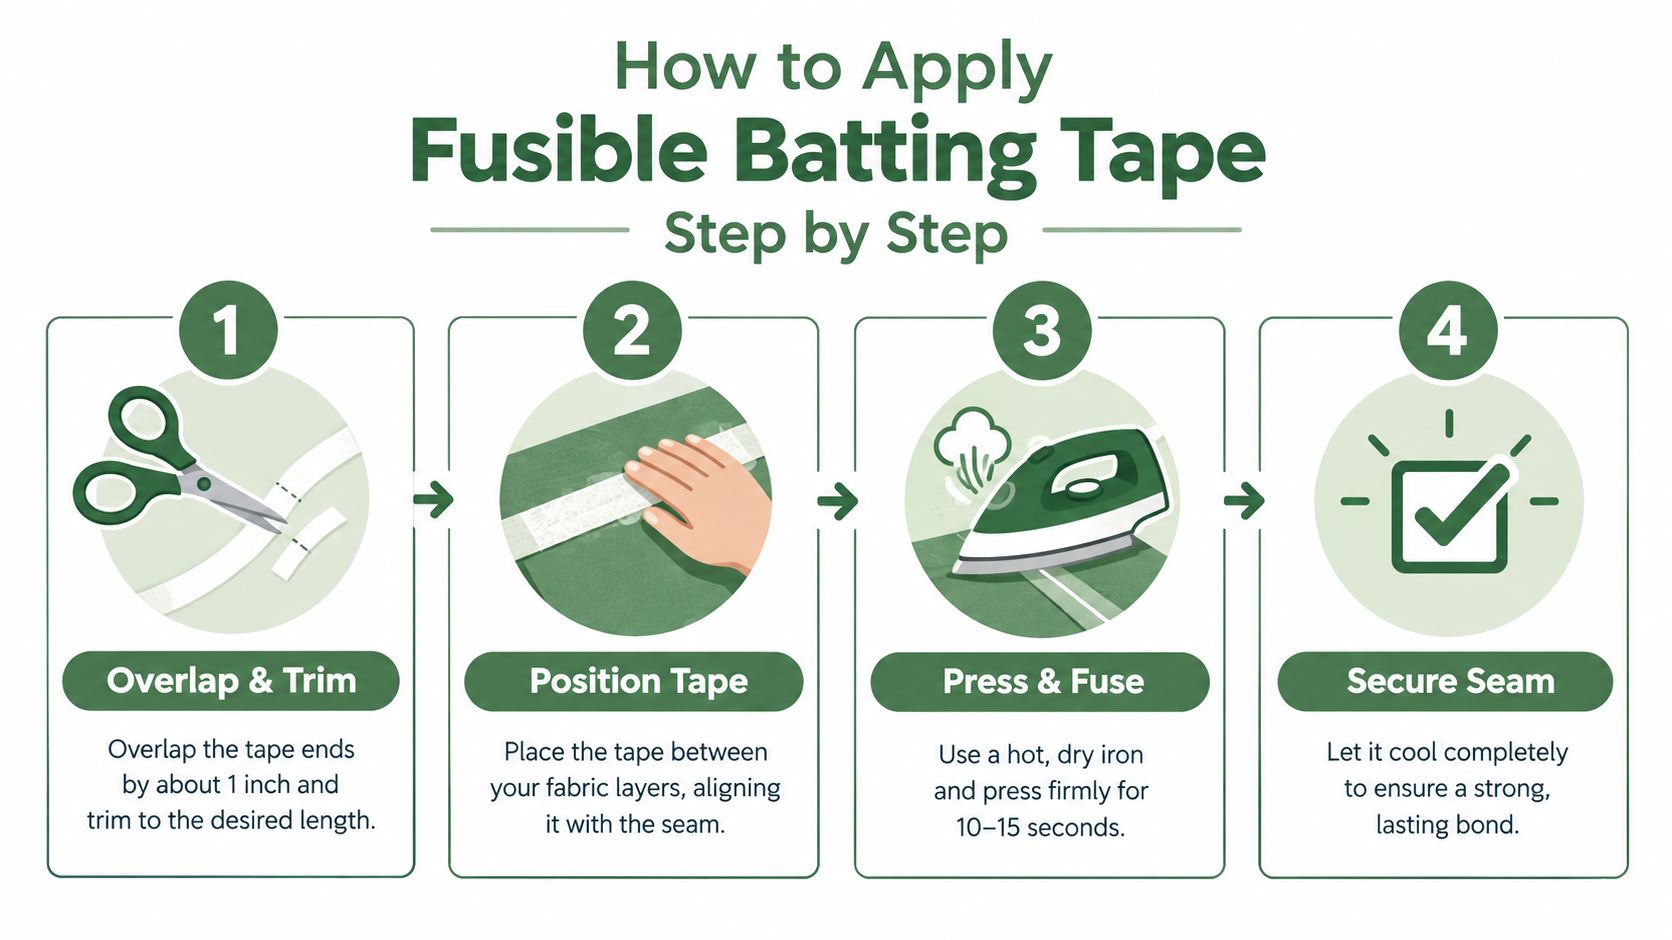
The most reliable application is calm and deliberate. Product directions commonly call for a low-to-wool iron setting, no steam, medium pressure, and about 10 to 15 seconds of heat per section (fusible tape application directions). Because batting fibers vary, test the tape on an offcut before pressing the actual quilt.
Prepare the seam
- Overlap, then trim. Lay the batting pieces over one another by about half an inch. Trim through both layers with sharp scissors or a rotary cutter, then separate them so the newly cut edges meet cleanly. This creates a straighter join than trying to match two worn scrap edges.
- Position the tape. Place the batting pieces edge to edge. Center the tape over the seam, following the product's guidance for which side carries the adhesive. Keep the strip flat. A wrinkle in the tape can translate into an uneven bond.
- Use a dry iron. Set the iron to the manufacturer's recommended range. Directions for this type of tape often specify a low-to-wool setting rather than a universal cotton/high setting, so don't assume every batting can tolerate the same heat. Synthetic or blended batting may require lower heat or a modified technique.
- Press in sections. Hold the iron still for roughly 10 to 15 seconds per section, using medium pressure. Lift the iron instead of sliding it, because gliding can shift loose fibers before the adhesive has set.
- Cool and flex. Let the seam cool before gently flexing it. The fused join should remain soft and flexible, not stiff. If an edge lifts, return to the iron after checking the setting, tape placement, and batting compatibility.
Practical rule: Dry heat gives you control. Steam can interfere with the adhesive while you're trying to make a stable join.
A pressing cloth adds protection for delicate fibers such as wool. It can also reduce the chance of shine or heat marking when you're working near fabric, although the tape belongs on the batting rather than directly on the quilt top.
The adhesive is intended to keep the seam pliable, which is why it can pass under a hand or machine needle after activation. Some products are marketed as soft, thin, and needle-easy, with use suggested for hand quilting, machine quilting, and quilt-as-you-go construction (needle-friendly fusible tape details).
If you're choosing an iron for repeated pressing, compare features in this guide to a quilting iron. Always make the scrap test part of the process, especially when the batting contains synthetic fibers or has a noticeable loft.
Matching Tape Formats to Your Batting and Project
Tape width should follow the behavior of the batting and the scale of the join. A narrow strip keeps a miniature project flexible, while a wider strip gives more surface contact across a lofty seam. Roll length is a workflow decision too. You'll use less for an occasional repair than for repeated longarm preparation or guild work.
A practical match-up looks like this:
| Batting / Project | Recommended Width | Roll Length |
|---|---|---|
| Mini quilts, table runners, appliqué joins | 1 inch | Short roll |
| Cotton or poly-blend batting for throws and twin quilts | 1.5 inches | 20 yards |
| Lofty polyester or wool batting | 2 inches | 20 to 30 yards |
| Repeated longarm or guild projects | 1.5 to 2 inches | 30 yards |
The 1.5-inch format is a sensible starting point for relatively flat cotton or poly-blend batting. A 2-inch strip offers extra coverage when the fibers are puffier or more likely to shift, but it can add more material to a small project than you need.
Roll length matters most when the tape becomes part of a regular production routine. A 20-yard roll suits someone joining one or two seams per project, while a 30-yard roll is more useful for longarm quilters or guild members preparing several quilts. These formats should be treated as planning options, not proof that every tape works equally well with every fiber.
For cotton batting, look for a light, flexible join that settles into the quilted structure. Polyester can feel springier and may need a wider strip or stitched reinforcement if the surface resists bonding. Wool demands a cautious heat test because its loft and heat sensitivity can change the result.
Before choosing a roll, compare loft, fiber, and project size with this guide to the best batting for quilts. Quilters working with modern solids from Kona Cotton or colorful Ruby Star Society fabrics may also want the seam to disappear beneath a clean, high-contrast quilt top, which makes a flat join especially important.
Basting Edges, Repairs, and Small-Space Uses
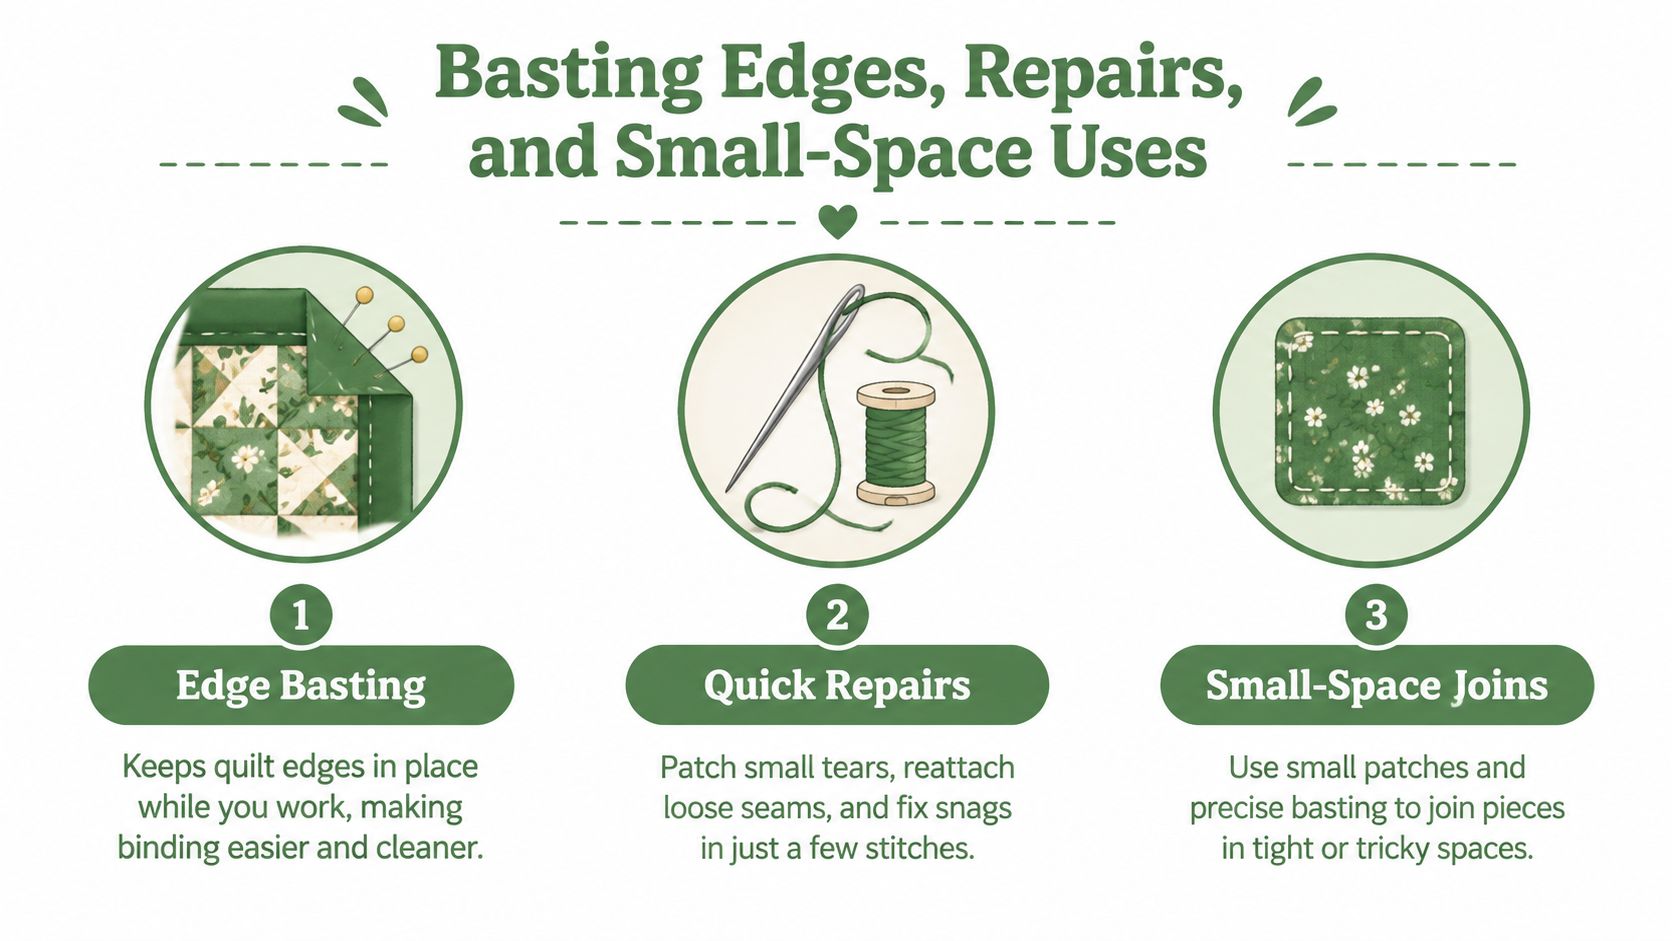
Fusible batting tape is useful beyond joining two large rectangles. It can hold an edge flat, repair a small tear, or stabilize a compact project where pins distort the layers.
Edge basting
For a quilt edge, place the tape along the batting near the backing edge and press it so the batting stays aligned with the quilt top. The goal is a flat perimeter that won't curl into the hopping foot or catch on a hoop. Work in short sections and let each area cool before moving the quilt.
Quick repairs
For a torn batting area, slide tape beneath the opening. Bring the fibers together without stretching them, press from above, and allow the join to cool before checking it. The tape can hold the fibers in place while quilting adds the lasting structure.
Small-space joins
Miniature quilts, pillow tops, appliqué motifs, and mug rugs benefit from a narrow, flexible join. A 1.5-inch strip applied in short 4-inch segments can follow a curve without creating one stiff continuous band. For a full-width batting join, a 2-inch roll provides broader coverage.
A hot iron makes these small repairs quick, but speed shouldn't replace testing. If the batting contains a scrim, has a very high loft, or reacts poorly to heat, use a stitched join instead.
Spray adhesive is another option for temporary positioning, but it serves a different purpose from seam tape. Compare the handling differences in this guide to 505 adhesive spray, then decide whether you need a permanent batting join or temporary layer control.
Pros and Cons You Will Notice in the Hoop
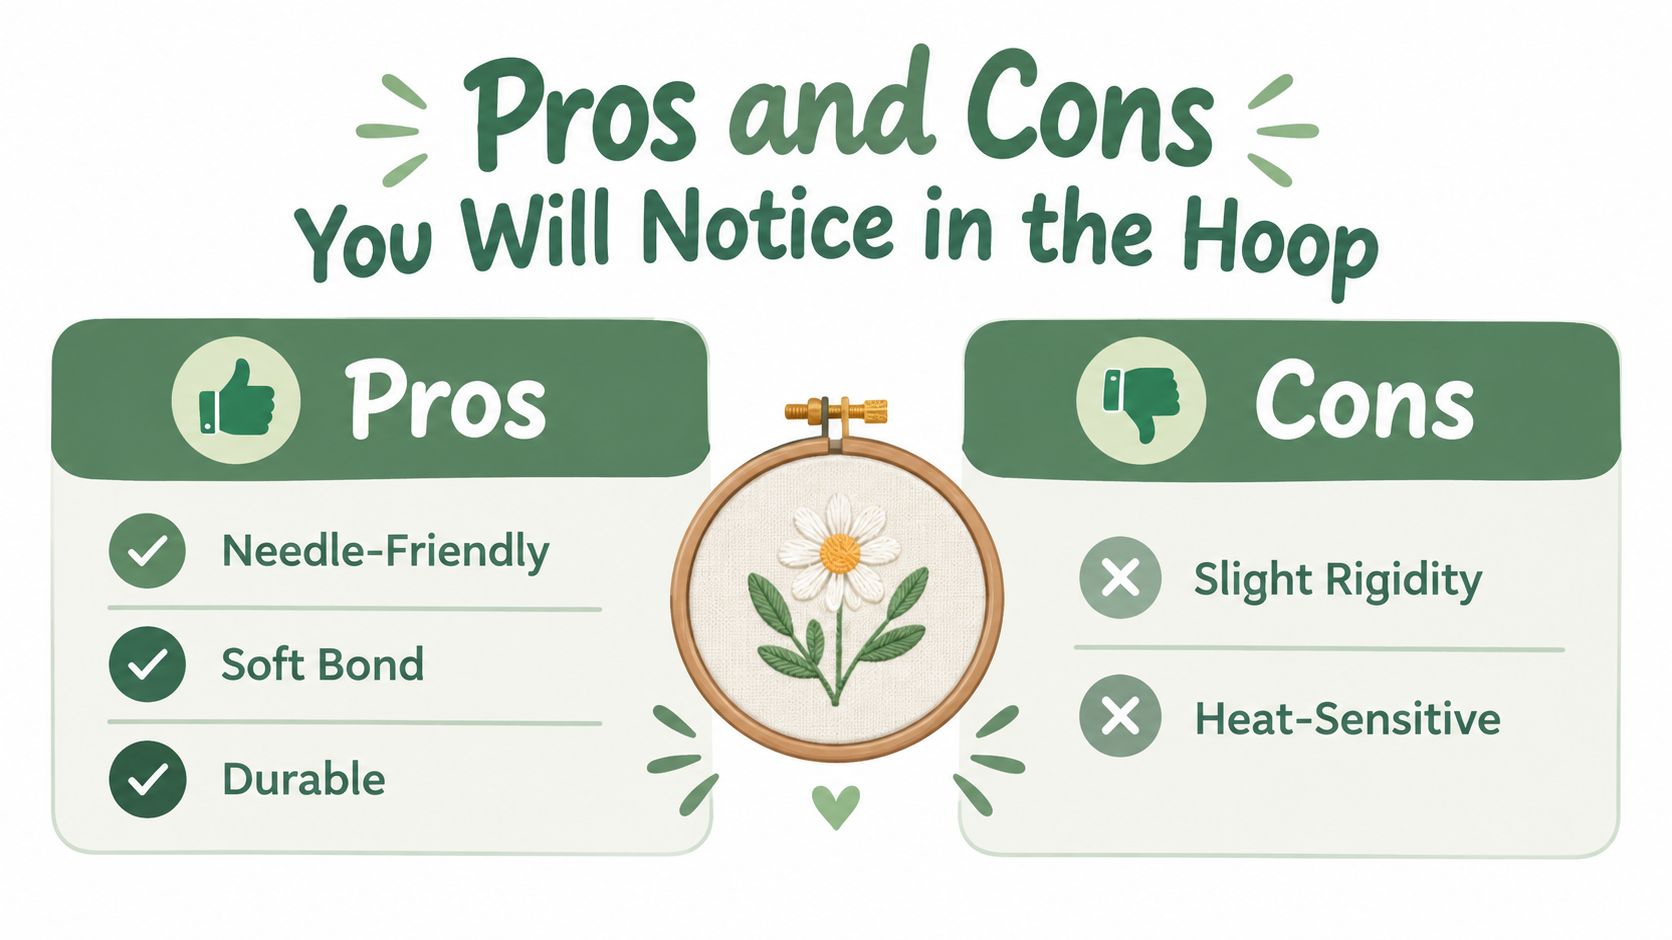
The first advantage appears when the quilt reaches the machine. A properly fused seam can lie flatter than an overlap, leaving the needle to cross a low-profile join instead of climbing a bulky ridge. Some tapes are marketed as soft, thin, and needle-easy, with manufacturers describing them for both hand and machine quilting.
A flat seam is easier to quilt than a thick seam, but a flat seam isn't automatically a permanent seam.
What works well
- Waste reduction: Usable batting scraps can become part of a larger section instead of going straight into the bin.
- Flexible handling: A suitable tape remains soft enough for many hand and machine quilting applications.
- Cleaner edges: Fused perimeter sections can reduce curling while you guide the quilt under a walking foot or longarm.
- Simple repairs: Small tears can be stabilized without adding a bulky patch.
- Quilt-as-you-go support: Section-based construction can benefit from a thin join that doesn't overwhelm the seam area.
The result depends on heat, pressure, fiber content, and surface structure. A smooth cotton batting may accept the adhesive neatly, while a lofty polyester batting can separate as the quilt sandwich flexes.
Where the limitations show
Tape can stiffen the seam slightly. That may be unnoticeable in a utility quilt but important in an heirloom hand-quilted piece where soft drape and stitch definition are central to the finish.
High-loft batting and batting with a scrim can also challenge the bond. The tape may adhere to the surface while the underlying fibers shift, creating an edge that peels under tension. Heat-sensitive materials can scorch or flatten if pressed at an unsuitable setting, so wool and silk deserve particular caution.
I also wouldn't treat tape as the only security on a heavily used quilt. If the fused seam will receive substantial handling, stitching over it adds stability, as noted in the machine quilting guidance. The tape positions the layers. Quilting stitches can provide the long-term reinforcement.
Troubleshooting Fused Seams and When to Skip the Tape
A lifted seam usually isn't mysterious. Start with the three variables you can control: heat, moisture, and contact. If the iron was too cool, steam was used, or the tape didn't sit fully against the batting, the adhesive may not have activated evenly.
Try this order:
- Recheck the product directions. Use the recommended heat rather than automatically choosing the hottest setting.
- Remove steam from the equation. Press with a dry iron and lift instead of sliding.
- Hold the iron still. Give each section enough contact time for the adhesive to activate.
- Inspect the fibers. A scrim or very lofty polyester surface may prevent the tape from gripping the batting structure.
- Stitch the join if needed. A wide zigzag can cross both edges and provide mechanical stability.
The common assumption is that fusible tape replaces pinning or spray basting. It doesn't. Tape joins batting pieces, while pins and spray baste help control the quilt top, batting, and backing as a complete sandwich. A walking foot can also distribute the layers more evenly when the quilt moves through a domestic machine.
Skip the tape when the project demands the softest possible drape, when the batting is too heat-sensitive for a safe test, or when the finished quilt will face unusually demanding laundering. Wall hangings, hand-quilted heirlooms, and commercially laundered quilts may be better served by a stitched join or a conventional basting method.
Keep a small backup kit nearby:
- Curved pins: Useful when you need adjustable layer control.
- Spray baste: Helpful for temporary positioning across a quilt sandwich.
- Neutral thread: Practical for a zigzag seam that may sit beneath light fabric.
- Walking foot: Helpful when feeding multiple layers through a home machine.
Caring for Fused Seams and Storing Batting Scraps
Care starts with the first wash. Use a cold or warm gentle cycle and mild detergent, then choose low tumble heat or air-drying. High dryer temperatures can soften the adhesive and may encourage it to move or show through, especially where the quilt top is light in color.
Inspect the quilt after washing rather than assuming every seam will behave identically. If a fused area blocks unevenly, lay the quilt flat and smooth it back into shape while damp. A small amount of pilling usually relates to the batting or fabric surface, not automatically to the tape, so avoid aggressive brushing that could disturb the join.
Adhesive showing through is uncommon when the tape is centered and the seam is fully covered by quilting, but pale fabrics make any irregularity easier to notice. A pressing cloth, accurate placement, and a scrap test reduce that risk. If the seam remains visible, add quilting across the join rather than applying more tape on top.
Build a useful scrap system
Batting scraps become easier to use when they're sorted before the next project begins. Trim awkward leftovers into 2.5- to 5-inch strips, then store them flat or rolled in labeled bins by fiber type and loft. Keeping cotton separate from polyester, wool, and blended batting helps you build joins with more consistent behavior.
Use the sorted pieces for projects where a pieced batting panel makes sense:
- Wall hangings: Small dimensions make efficient use of narrow offcuts.
- Mug rugs and table runners: Short joins stay manageable under a domestic machine.
- Miniature quilts: Narrow tape can stabilize small sections without overwhelming the design.
- Practice quilts: Scrap batting lets you test quilting patterns before cutting into a fresh piece.
I keep the thinnest scraps near my cutting table and the loftier pieces in separate rolls. That small habit makes it easier to match the batting to the project instead of forcing mismatched scraps together at the last minute.
For quilters comparing batting, widebacks, and finishing notions, quiltkit.com offers options including Pellon fusible tape listings, fusible fleece products, batting from brands such as Hobbs and The Warm Company, and wideback cottons up to 108 inches. Visit the shop to pair the right tape and batting with your next quilt, and join the Email Sign-up Savings list if you're building a practical stash gradually.