


Jelly Roll Quilt Kits: How to Choose, Sew, and Finish
You're standing in front of fabric bolts, or scrolling through a shop page, trying to choose prints that will work together. A coordinated roll is tempting: the colors are already assembled, and much of the repetitive cutting is done. The catch is that a precut bundle and a complete kit aren't always the same thing.
Jelly roll quilt kits can make planning and piecing more approachable, but a roll's strip count alone doesn't tell you whether it'll finish the quilt you have in mind. The useful questions are what's in the package, how the pattern uses those strips, and how much fabric will remain after seams, trimming, and finishing.
What a Jelly Roll Quilt Kit Is
A jelly roll is a coordinated bundle of fabric strips, typically 2.5 inches wide and approximately 42–44 inches long, cut across the usable width of quilting fabric. A common roll contains about 40 strips, though pack counts vary by maker. The fixed format lets a pattern designer plan strip sets, rail-fence blocks, log-cabin units, and other constructions without asking you to cut every repeated strip from yardage.
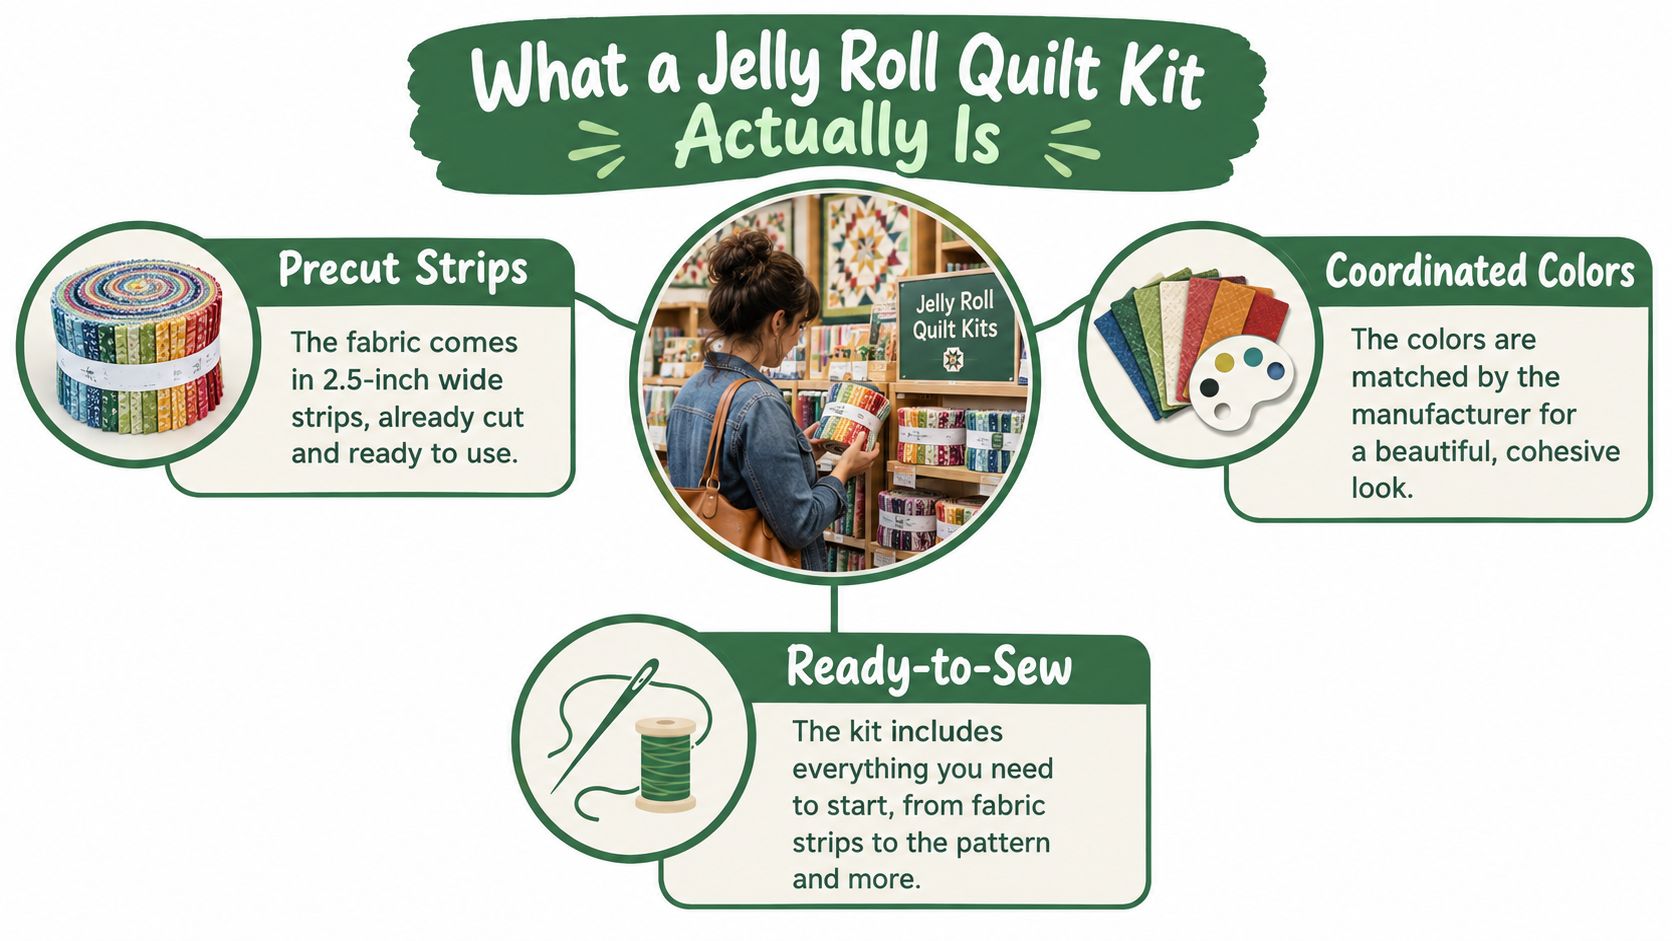
Those strips run selvedge to selvedge, so their length follows the fabric's usable width. A roll saves time at the cutting table, and the colors arrive pre-matched. What the roll can't promise is finished size. A strip count that comfortably covers a crib quilt can come up short on a throw once seam allowances, squaring-up, and trimming take their share, so the format is only half the story.
The commercial format became recognizable in the mid-2000s. Moda Fabrics introduced its jelly roll bundle in 2006, using coordinated strips, and the name was reportedly trademarked in 2009. Other manufacturers developed comparable precuts under names such as Roll-Ups, Design Rolls, Honey Buns, and Rolie Polies. National Sew a Jelly Roll Day was established in 2017 as an annual observance on the third Saturday of September, according to this jelly roll history and observance overview.
At checkout, the question is whether you're buying strips alone or a ready-to-sew kit. A standalone roll gives you coordinated fabric and nothing else. A complete kit should name everything included: the pattern, plus any background, binding, backing, or batting.
I've watched buyers assume a single roll covers a throw, then run short once seams and squaring-up claimed their share. The word "kit" doesn't settle that math. The strip count and the pattern's layout do.
Inside the Package and How Kits Differ from Bundles
A coordinated bundle and a ready-to-sew quilt kit solve different problems. The bundle handles color selection and strip preparation; a complete kit may also supply the pattern and the additional materials the quilt top needs. Read the listing as an inventory, not just a product name.
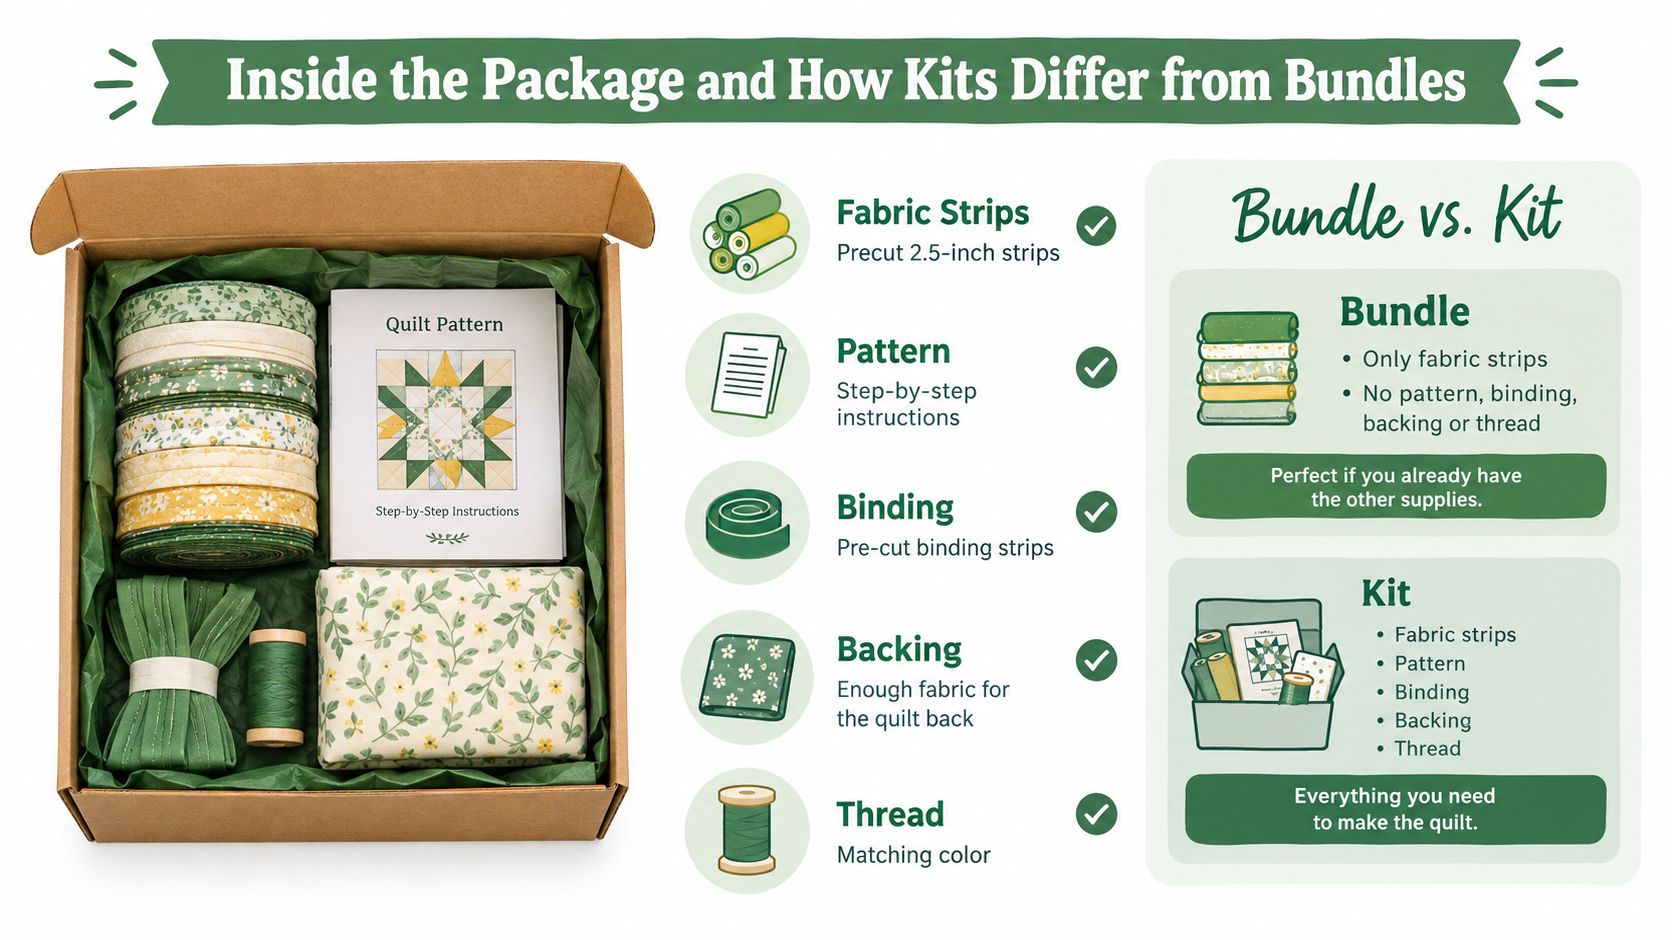
Before ordering, look for a clear description of the roll's strip count and dimensions, then check the pattern and finishing materials. A true ready-to-sew kit may include:
- Fabric strips: A coordinated precut roll, commonly around 40 strips, with dimensions stated in the listing.
- Pattern instructions: Construction steps, seam allowance guidance, and the intended finished dimensions.
- Background or sashing fabric: Extra yardage used to separate strips or build the design.
- Binding fabric: Material for finishing the quilt's outer edge, either included or specified separately.
- Backing and batting: Check carefully. These finishing layers aren't automatically included just because the item is called a kit.
- Notions: The pattern may call for thread or other supplies that aren't in the package.
A plain bundle can still be the right choice if you already have a pattern, background fabric, and finishing plan. It leaves you to source the other components and confirm that your chosen materials meet the pattern's requirements. For a wider comparison of what coordinated bundles provide, see this guide to fabric bundles for quilting.
For batting, compare the pattern's intended feel and use with options from Hobbs, Pellon, and The Warm Company. A kit listing should make clear whether batting is included, sold separately, or not specified. That small check prevents a familiar frustration: finishing the top and discovering that the backing or batting still needs to be sourced.
Comparing Common Brands and Fabric Types
The brand and collection shape the look of a jelly roll, but a label alone can't tell you exactly how a particular fabric will behave under your needle. Check the actual collection, fiber content, and pattern requirements. For a broader overview of makers and fabric lines, consult this guide to quilting fabric brands.
Ruby Star Society collections often appeal to makers looking for graphic prints and contemporary color combinations. Kona Cotton solids can provide a clean visual pause beside busy prints, especially when a design uses background fabric to separate strip sets. By contrast, Marcus Fabrics collections may suit makers drawn to reproduction-inspired patterns, while P&B Textiles and Blank Quilting offer other coordinated options to evaluate by print and palette.
The tactile details are worth checking when you can handle the fabric. A tightly woven cotton can hold its shape more consistently during precision piecing; loose handling, fraying edges, or stretching can make a narrow seam allowance harder to maintain. I check whether cut edges shed threads easily and whether the strip stays flat as it feeds under the presser foot. Those observations are more useful than a broad claim that a fabric is “high quality,” and they shouldn't be assumed to apply to every collection from a brand.
A scant quarter-inch seam is a common precision choice when the pattern calls for a full two-inch finished strip. Since seams consume fabric, test the seam and measure a sample unit before chain-piecing the entire roll. When you're comparing designs and fabric styles, this quilting process video offers another look at strip-piecing in action.
Choose by the project's demands: bold prints need enough space to show, busy rolls can benefit from a quiet solid, and small-scale designs can make a compact table runner feel detailed without adding complicated construction. If you're making a gift or a collegiate-themed quilt, prioritize a palette and print scale that will remain legible across the finished top.
Matching Projects to Skill Level
The best project for a jelly roll is the one whose pattern requirements match the strips you have, not the one that sounds quickest. Use the pattern's materials list as the final authority: strip counts and finished dimensions vary with layout, seam allowances, borders, and added fabric.
| Project | Strips Needed | Finished Size | Skill Level |
|---|---|---|---|
| Table runner | 20–25 | Pattern-specific | Beginner |
| Baby quilt | 30–40 | Pattern-specific | Beginner to confident beginner |
| Lap quilt | Pattern-specific | Pattern-specific | Confident beginner to intermediate |
| Bed quilt | Often more than one roll, or a roll plus coordinating yardage | Pattern-specific | Intermediate, depending on design |
The runner is a friendly first project because a simple strip layout lets you practice straight seams, pressing, and squaring without committing to a large top. A rail-fence design is another useful starting point: repeated strip sets create blocks with a clear rhythm, and chain-piecing can keep the work organized.
For a baby quilt, check whether the pattern uses the roll by itself or adds a background, sashing, or borders. A braided layout can look intricate while relying on repeated units, but accurate seam allowances still matter. The number of strips named in a pattern isn't interchangeable with a different design's requirements.
Before you cut: Confirm the pattern's stated strip count, usable strip length, and added fabric requirements. A roll that fits one layout may not fit another, even if both patterns are marketed as beginner-friendly.
Lap quilts introduce more opportunities for sashing and borders, so expect more measuring and decisions about how the prints meet at the edges. Log-cabin and half-square-triangle patterns can be satisfying next steps, but they may call for sub-cutting, careful alignment, or additional fabric beyond the roll. Bargello and pixel designs can reward experienced piecers who enjoy managing a deliberate color sequence and checking that units stay in order.
A bed quilt commonly calls for more fabric than a single roll can provide, especially once the pattern adds borders or a separate background. For a broader set of approachable designs, browse these quick and easy quilt patterns. Then compare the specific materials list with what's included in the kit before deciding that one roll is enough.
Yield, Shrinkage, and Honest Waste Expectations
A roll that looks generous on the shelf can come up three strips short at the cutting table. The stated contents describe raw material before seam allowances, end trimming, squaring, and layout take their share. As noted earlier, a common roll holds about 40 strips; worked out on paper, that represents roughly 2.78 yards of fabric, around 4,400 linear inches of strip, before any of it is sewn.
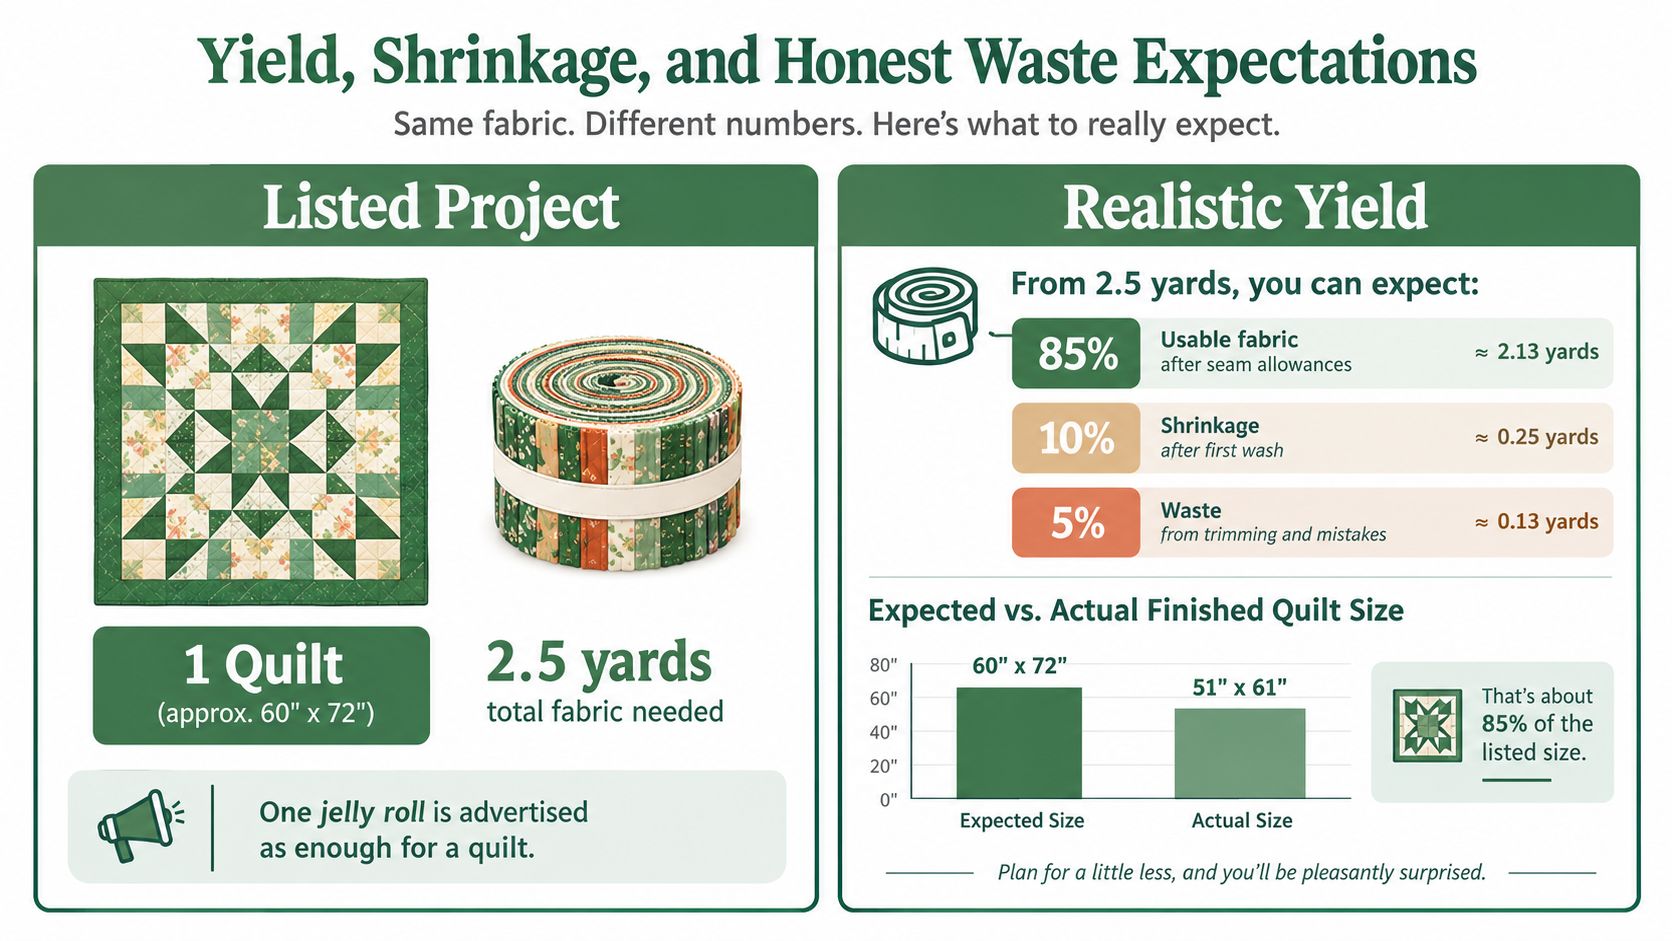
In practice, usable yield runs lower. A separate estimate puts real-world precut yield 5–7% below theoretical yield because of trimming and alignment losses, as described in this precut yield and waste discussion. Treat it as a planning figure, since individual rolls and patterns vary. Selvages, uneven ends, the occasional short strip, and miscuts leave scraps that suit mug rugs or small blocks but won't carry a project's next planned unit. I've learned to treat the label as a ceiling and buy to the pattern.
That gap is why a pattern's materials list matters more than any "one roll makes a quilt" claim. Check whether the design uses the full strip length, adds a background, or needs extra yardage for borders and binding. If the project lands close to the roll's capacity, a coordinating solid is often the practical addition. If the pattern calls for a second roll, leftover scraps will not cover the difference.
Washing changes the finished dimensions too. Technical quilting guidance puts quality cotton shrinkage at roughly 3–5% after a warm wash and low-temperature tumble dry; as a worked example, a 60-inch border losing 3% finishes near 58.2 inches, though results depend on the fabric and care routine. Either prewash every layer that will be laundered after quilting, or keep the top unwashed and commit to one care plan.
Precuts can reduce cutting time without guaranteeing the least possible waste. Treat convenience and fabric efficiency as separate questions.
Match the roll's contents against the pattern's full materials list, backing included, before you buy. Pack counts and strip lengths differ between makers, so compare what's inside using this guide to how many strips are in a jelly roll. If a layout leaves no margin for a mis-cut strip, extra yardage bought up front beats hunting for a matching print once the dye lot is gone.
A Practical Workflow from Strips to Finished Top
Good strip piecing starts with a small test, not a full chain of seams. A consistent seam allowance keeps multi-strip units close to their intended dimensions; a narrow error repeated across a block can change its final size. Use the pattern's seam specification, sew a test seam, and measure the sewn unit before committing the roll.
Prepare and piece in a steady sequence
- Flatten the strips. Press out folds before piecing or sub-cutting. Avoid stretching the fabric as you move the iron.
- Test the seam. Use a calibrated quarter-inch foot if available, then measure the sample against the pattern's unit dimensions.
- Chain-piece strip sets. Feed one pair after another without cutting the thread between each unit. This reduces repeated thread starts, but it won't fix an inaccurate seam.
- Press with the pattern in mind. Press strip sets flat, then follow the instructions for pressing direction. Nesting seams can help adjoining units line up, but only when the seam directions allow it.
- Square and assemble. Trim dog-ears where they interfere with alignment, square blocks to the pattern's common measurement, and keep row seams consistent so the top doesn't drift into a wedge.
I've found that pressing folded strips flat before sewing makes it easier to spot a twisted edge before it becomes part of a long seam. Keep the work surface clear enough to support the fabric, and let the machine feed it rather than pulling from behind the presser foot.
Once the top is assembled, check that it lies flat before layering. Add batting and backing with enough room for the quilting method, baste securely, and quilt with tension suited to the fabric and batting loft. Finish by squaring the quilt and applying binding evenly; accurate piecing can't compensate for a backing that shifts or an edge that wasn't trimmed square.
Choosing Batting and Wideback for Finishing
The pieced top sets the design, but batting and backing determine much of the quilt's warmth, drape, and quilting definition. Choose them for the way the quilt will be used and quilted, rather than treating them as interchangeable supplies.
100% cotton batting can suit a traditional, softer drape. An 80/20 cotton-poly blend may offer a different balance of loft and stitch definition, while fusible batting can simplify basting when its instructions fit your project. Black batting is worth considering beneath a dark or high-contrast top when a lighter batting might show through.
The Warm Company, Hobbs, and Pellon each have batting options to compare by fiber, loft, and product directions. Don't assume that the same needle, quilting density, or basting approach works for every batting. For additional selection criteria, consult this guide to choosing batting for quilts.
Backing is a separate decision. A 108-inch wideback cotton can cover a quilt without a center seam when the quilt's dimensions and quilting plan allow it. A pieced backing can work well too, especially when you want to use yardage or create a deliberate back design; just plan the seam placement so it doesn't interfere with the quilting.
Before layering, check the backing size against the finished top and the requirements of your quilting setup. Consider how the batting's loft will affect tension and stitch appearance, and make sure all layers follow a consistent washing plan. A carefully chosen wideback and batting help the quilt finish cleanly, but they won't correct a top that's stretched or out of square.
Finishing Answers and Where to Shop Next
How many jelly rolls equal a yard? There isn't a dependable one-to-one conversion for every project: roll count, usable width, trimming, and pattern requirements affect the result. Use the pattern's exact strip and yardage list rather than substituting by label.
Can a layer cake or charm pack replace a jelly roll? Not directly. Those precuts have different shapes, so the pattern must be written for them or adapted with new cutting and yield calculations. For binding, follow the pattern's specified fabric requirements and check whether binding is included in the kit. To finish the raw quilt edge cleanly, square the quilt, prepare binding to the pattern's directions, and sew it evenly around the perimeter.
Ready-to-sew kits, coordinated precuts, backing, batting, and quilting notions make it easier to plan the whole project instead of stopping after the top. If you're not ready to choose a kit, check for Email Sign-up Savings before your next fabric purchase.
Explore quiltkit.com for ready-to-sew quilt kits, coordinated fabric, wideback cottons, batting, and finishing supplies. Choose a project that matches your pattern requirements and skill level, then get the materials together so you can spend less time sourcing and more time sewing.